
Preparing a Peach Pit
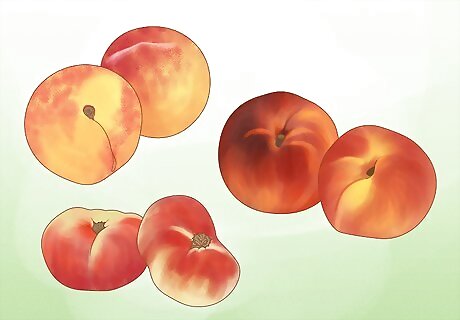
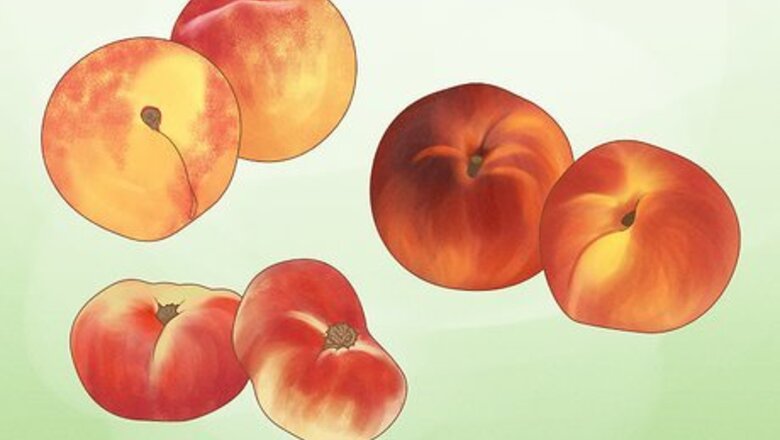
Select a variety. The first thing to do when selecting a good peach to grow is to look at what varieties have the characteristics you want. This can include the taste of the peach, as well as characteristics like type of skin and fruit size. Just keep in mind that each variety has its strengths and weaknesses while growing. The most common variety is the 'Redhaven.' Try to use a locally grown variety so you know the tree will be able to survive in your climate. When you're choosing a variety, keep in mind that a seed taken from a peach won't produce fruit with identical characteristics to the original peach.

Account for growing region. Another factor in making a wise selection is where you will be growing your peaches. In the United States growing regions are broken up by the USDA into zones (this differs in other countries). Peaches typically grow in zones 5, 6, 7, and 8. You can also grow some varieties in zones 4, 9, and 10. Each zone has a variety the does particularly well: Zone 4 - Hale Zone 5 - Madison Zone 6 - Saturn Zone 7 - Contender Zone 8 - Frost Zone 9 - Topaz Zone 10 - Florida Beauty
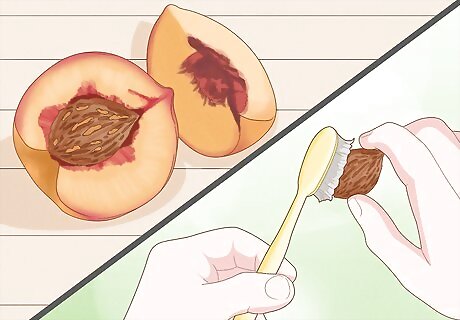
Remove all flesh from the pit. Once you select a type of peach, you need to separate the pit from the rest of the peach. You are off to a good start if you eat away the peach around the pit. Next, take a brush or rag and scrub off any remaining fruit. This will give you a nice, clean pit to start with.

Wash the pit. Use warm water and soap to wash away any residual traces of fruit. This will ensure that your pit does not attract pests. It also helps protect the pit from microbial growth.
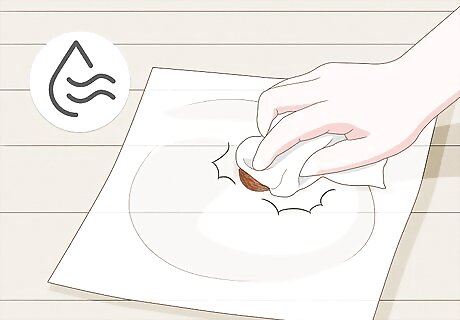
Dry the pit. Pat the pit dry with a cloth or paper towel. Leave it sit overnight to finish drying. Inspect the pit to make sure that it is dry before proceeding. Too much water can cause the pit to rot.
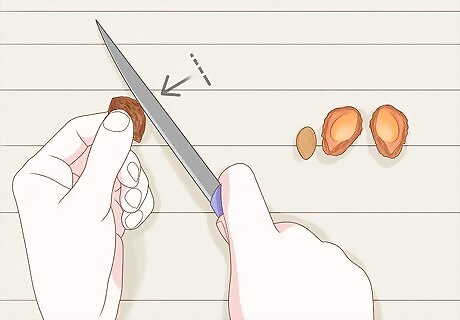
Peel away the outer layer, if possible. You can save yourself time and make the growing process easier if you remove the entire pit. The pit is the hard outer layer that protects the seed within it. Sometimes the pit will be split and you can separate it without damaging the seed. If the pit isn't separated or you think you'll damage the seed trying to remove it, just leave the pit in place. You can use a knife or other slim object to pry the pit apart where it has begun separating. Handle the seeds with caution. They contain cyanide, which is toxic to humans and animals when ingested. Wear gloves and wash your hands when handling the seeds, and keep them away from children and pets.
Germinating the Seed
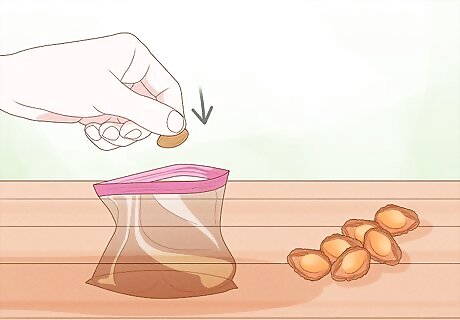
Place each pit into a plastic bag. It is wise to plant more than one pit at a time. Many of them may not survive past their first year, or even grow at all. Each pit that you have selected should be placed in its own plastic bag.
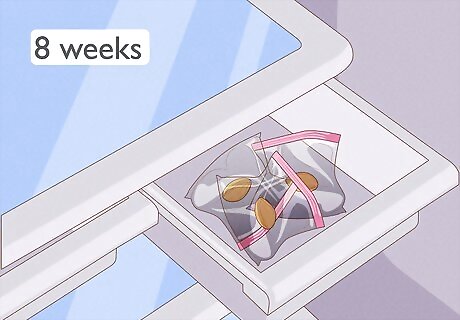
Keep the pits cold. Stratification is the process of chilling the pit so that it will begin germinating. This process mimics the winter months and signals to the seed when to grow. To stratify the pits, wrap them in a damp paper towel and place them in the cold for 8 weeks. You can do this outside if you live in a cold climate, or you can store them in your refrigerator for 8 weeks.
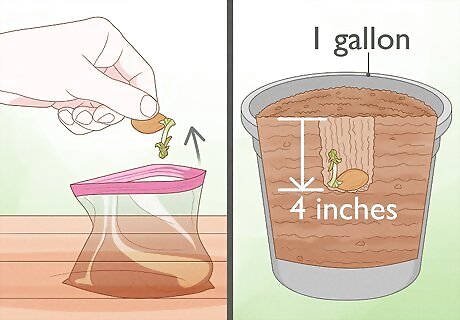
Pot the sprouts. Once the pits begin to sprout, remove them from the bags. Place each pit four inches below the surface of a one gallon pot of soil. Make sure to use a high nutrient blend such as soil based potting mix.
Transplanting Your Peach Tree
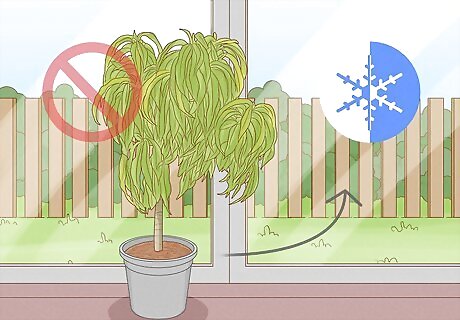
Protect young trees from frost. Do not place any peach trees outside when there is a risk of frost. These trees typically do not survive a frost in the first year. Once the risk of frost is over, you can begin preparing the potted trees for transplant.

Harden the trees. To harden the trees, let them spend time outside each day. Gradually increase the time that they spend outside to allow them to develop a resistance to the effects of weather and pests. Start by placing them outside for one hour per day, and increase each day until they are staying outside all day. It may take a few weeks to appropriately harden your peach trees. Don't leave the trees outside overnight during the hardening process.
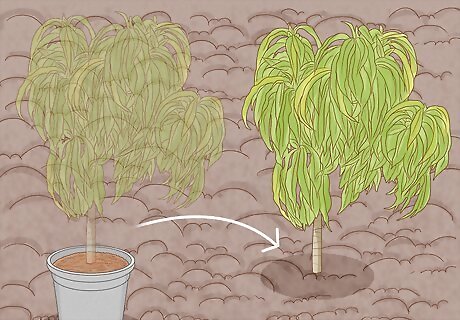
Plant the trees in your garden. After your trees have been hardened, it is time to plant your peach tree. Choose a suitable place in your garden and plant the two strongest trees. If you have space, you can plant more. If your space is limited, you can give any extra trees away.


Comments
0 comment