
Installing a Light Switch Sensor for an Existing Light
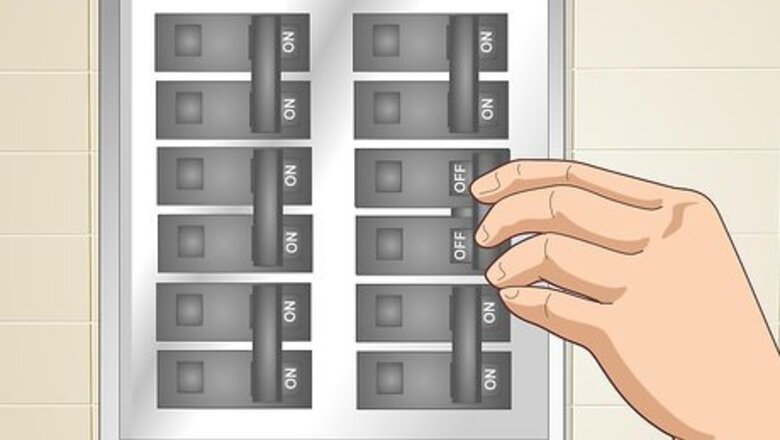
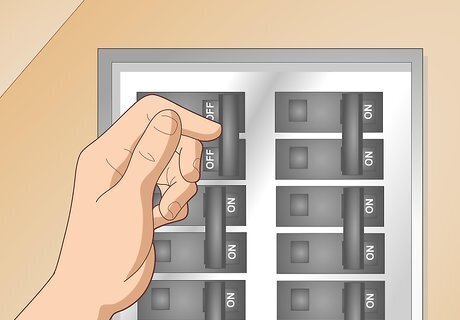
Turn off power to the room at the main fuse box. Flip the breaker that supplies electricity to the room where you plan to install the light switch sensor. Test the lights in the room to make sure they are really cut off from power. Never start installing a light sensor or performing other electrical work without shutting off the power first. Use this method when you want to install a light sensor in a finished room that already has a light connected to a switch, such as a bedroom, living room, bathroom, or hallway, for example.
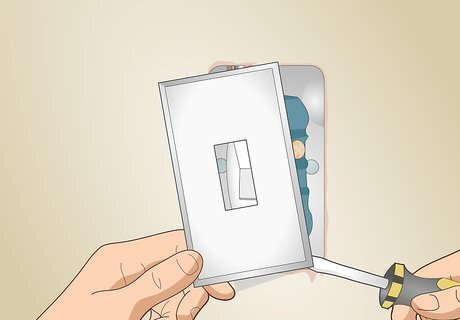
Remove the light switch’s faceplate by unscrewing or prying it off. Use a screwdriver to take out the screws if it has any, then pull it off the wall and set it aside. Pop it off the light switch by sliding something flat and skinny under an edge and prying it off the wall if it doesn’t have any screws.
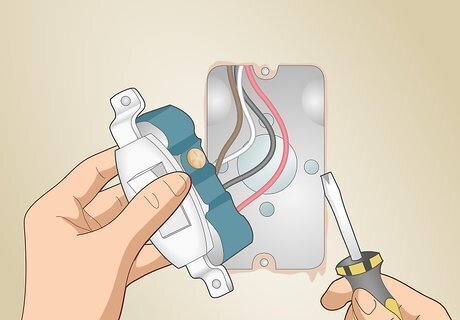
Unscrew the existing light switch from the wall and pull it out. Use a screwdriver to remove the 2 screws that attach the light switch to the electrical box in the wall. Disconnect the wires by twisting off any plastic wire nuts or unwrapping any electrical tape and untwisting the wires if they are twisted together. Pull the light switch out of the wall and set it aside. Some light switches might have screws on the backside that hold the wires from the walls in place. If this is the case, use a screwdriver to loosen them until you can detach the wires. Plastic wire nuts are cone-shaped plastic caps that screw onto a set of wires to keep them connected. Your light sensor might come with them or you can buy them separately at a hardware store or online.
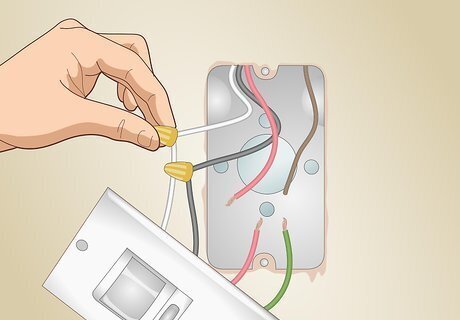
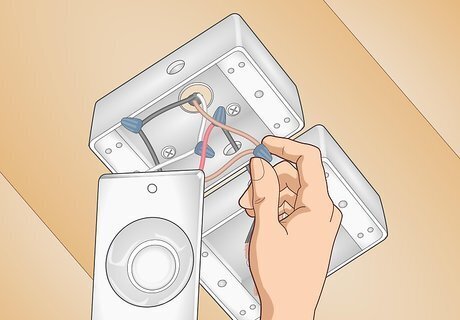
Connect the black, white, and red wires from the light sensor to the wall wires. Twist the hot black wires together and screw a plastic wire nut onto the ends. Repeat this for the neutral white wires and red load wires.Warning: If you aren’t sure which wires are which in your wall, do not attempt to complete the wiring yourself. Call a licensed electrician so they can come test the wires for you. The live and neutral wires are always black and white, respectively. The load wire is the wire that connects to the light fixture. It might be a different color than red in your wall, such as black. It usually comes out of the top of the electrical box in the wall, since it is coming down from the ceiling. However, you can only be sure which wire it is if you test all the wires with a multimeter.
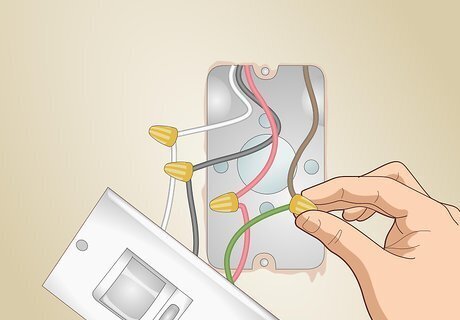
Wire the green wire from the light sensor to the copper wire in the wall. Twist them together and cover them with a plastic wire nut. These are the ground wires. The ground wire in your wall will always be bare copper.
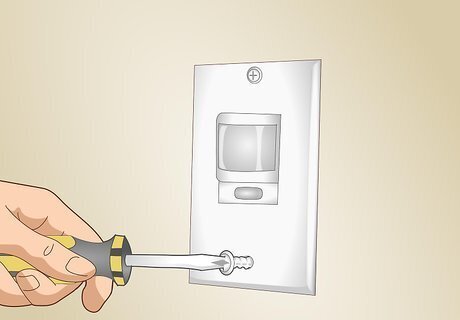
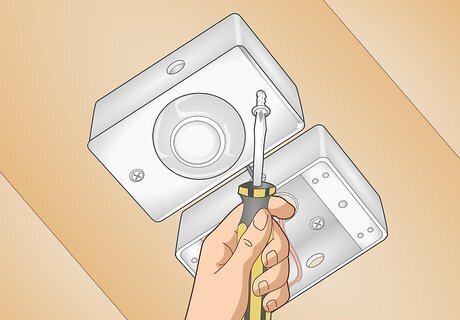
Mount the light switch sensor on the wall with the provided hardware. Tuck all the wires into the electrical box in the wall. Screw the light sensor onto the wall using the provided screws and a screwdriver or electric drill. Snap the wall faceplate into place. You can leave the faceplate off until after you test the light if you want.
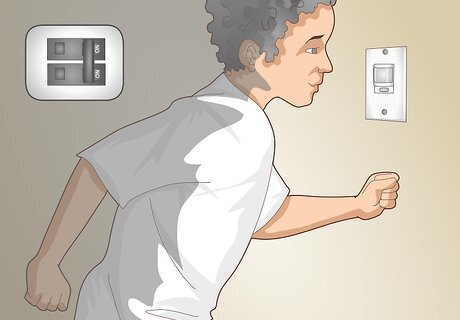
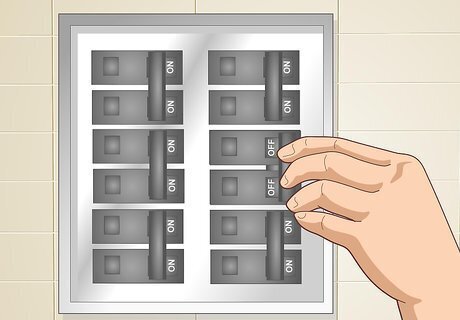
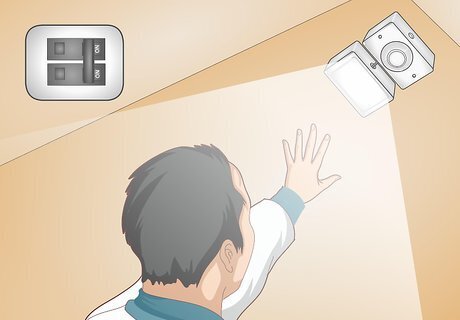
Turn the power back on and test the light switch sensor. Flip the breaker that supplies electricity to the room back on at the main fuse box. Flip the power switch on the light switch sensor to the ON position to check if it turns the light on, then set it to the AUTO position. Go out of the room until the light turns off, then walk back in to see if the light turns on automatically. Read the light switch sensor’s owner’s manual for any instructions about how to adjust the timing and sensitivity for your specific light sensor. Some models allow you to make the sensor more or less sensitive, adjust how long it keeps the light on, or even change the dimness of the light.
Connecting a Sensor to an LED Light
Turn off power at the main fuse box. Flip off the main power breaker so that there is no electricity being supplied while you work. Test a light switch or outlet where you plan to install the motion sensor to ensure that there is no electricity flowing to the area. Always do this first before you perform any kind of electrical work. This method is a good option if you want to install a motion sensor light in an unfinished room like a basement or garage. It doesn’t make sense to do it in a finished room where you could more easily install a light switch sensor.
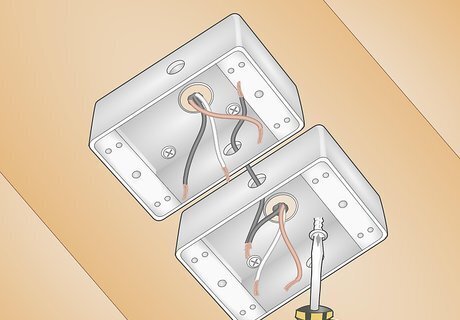
Install 2 junction boxes with wire connections on a ceiling or wall. Screw 2 junction boxes onto a wall or ceiling and connect them to the power supply. Run a wire for connecting the light sensor to the LED light between the 2 boxes.Warning: If you don’t have any experience with electrical work, hire a licensed electrician to install junction boxes and connect them to the power supply. It is not safe to try and do this yourself unless you know exactly what you’re doing. An electrician can also easily install the motion sensor and LED light for you at the same time. If you have an existing light that you want to connect a light sensor to, like an outdoor light or a light bulb with no switch, you can just swap the whole light for a fixture with a built-in motion sensor. You could install more than 2 junction boxes and wire them all to the box for the motion sensor if you want to connect more than 1 light to the sensor.
Connect the black live wires and white neutral wires using wire nuts. Twist the exposed metal ends of the black wires from the motion sensor and the junction box together and screw a plastic wire nut onto them to hold them together. Repeat this for the white wires. Your motion sensor might have different colored wires, such as a brown wire instead of a black wire. If so, refer to the manufacturer’s instructions to be sure which wire is the live wire. Some motion sensors have an easy-to-read wiring diagram on the back that shows you which wires to connect. The neutral wire on the motion sensor can also be blue or green instead of white.
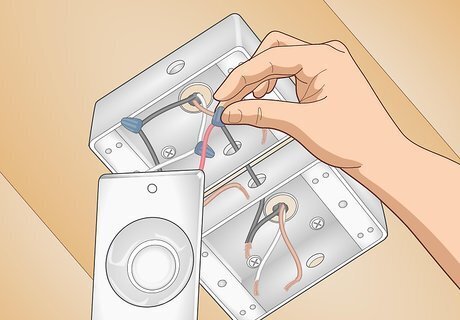
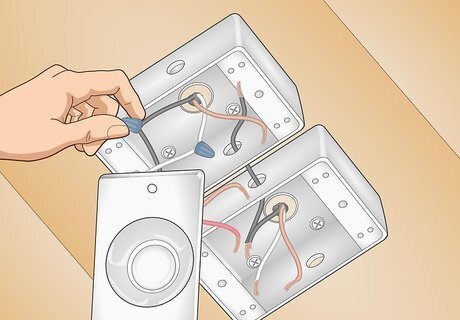
Connect the red wire from the motion sensor to the other junction box’s live wire. Hold the exposed metal end of the motion sensor’s red wire together with the end of the black live wire that goes to the other junction box for your LED light. Put a plastic wire nut on top of the ends to hold them together. This will make your motion sensor function as the light switch for your LED light.
Secure the 2 copper ground wires together using a wire nut. Twist the end of the motion sensor’s copper ground wire together with the end of the junction box’s copper ground wire. Twist a wire nut over the ends to secure them together.
Mount the motion sensor on the junction box using the provided hardware. Tuck all the wires up into the junction box. Screw the motion sensor in place using the provided screws and a screwdriver or power drill. Depending on the specific model of motion sensor, there might be a mounting bracket that you have to install first or it might just screw directly onto the junction box.

Repeat the process to wire and mount the LED light. Connect the colored wires from the junction box to the matching colors of wires on the back of the LED light fixture using plastic wire nuts. Screw the LED light fixture into place on the junction box using the provided hardware and a screwdriver or power drill. You can use any kind of LED light fixture for this. For example, if you are installing a motion sensor light somewhere like a basement with low clearance, you could use a low-profile, flush-mount LED light.
Turn on the power and test the light. Switch the power breaker back on at the main fuse box. Walk by the motion sensor to check that it turns on the light. If you used an adjustable light fixture of some type, you can now adjust it so the light hits exactly where you want it to.


Comments
0 comment