
Open the Word document you want to edit. Find and double-click the document you want to open in your files, or open Microsoft Word and select your file here. Alternatively, you can open a new, blank document.

Right-click the shape you want to overlay. Find the shape or document element you want to overlay your image on, and right-click on it to see your options. You can also edit other document elements with picture overlays, including chart backgrounds, and diagrams.
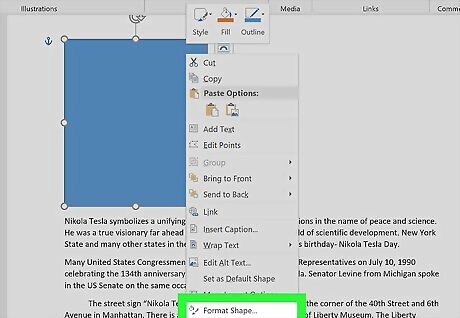
Click Format shape on the right-click menu. This will open the formatting panel on the right-hand side of the page. On some versions, you may need to click Shape Fill on the "Format" toolbar, and select Picture here. The picture fill option is only available on Word's desktop versions.
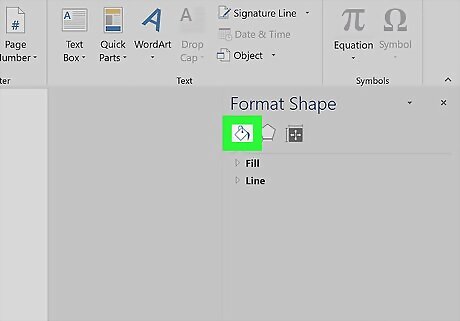
Click the paint bucket icon on the top-left. You can find it in the upper-left corner of the formatting panel.

Extend the Fill options on the menu. Click this option to see all your fill options.
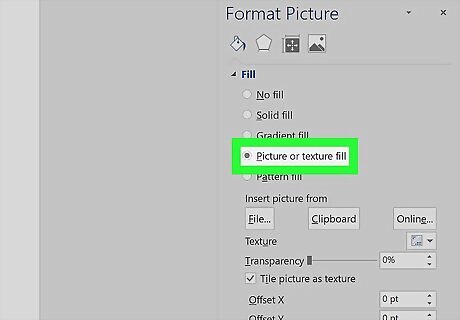
Select Picture or texture fill. This option will allow you to overlay any image from your computer on the selected shape, graph, or element.

Click the File or Browse button. This will open a new window, and allow you to select the image you want to overlay.
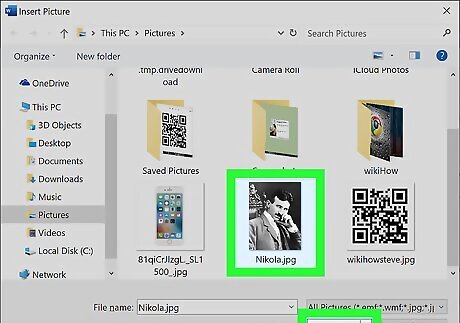
Select the image you want to overlay. Click the image in the pop-up window, and click Insert. This will fill the shape with your image.
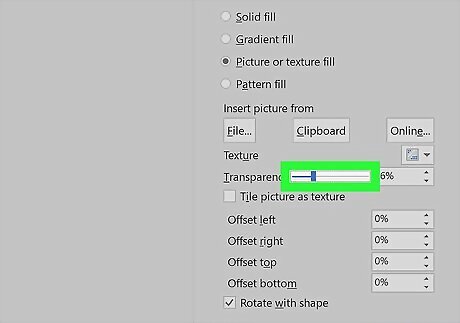
Adjust the Transparency slider in the "Fill" options. You can drag the slider here, and make your overlayed picture opaque or transparent. If you want to remove the shape outline around the overlayed picture, extend the Line options below Fill, and select No outline.
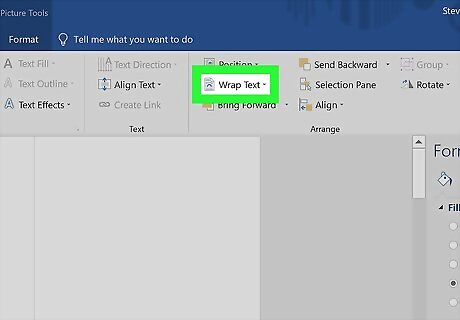
Click the Wrap Text button on the toolbar. Make sure you're in the contextual Shape Format menu at the top, and click this button towards the right of the toolbar panel. This feature is also available in Word's mobile versions. When your image is selected, you can tap Wrap Text on the Picture menu, and select Behind Text here.
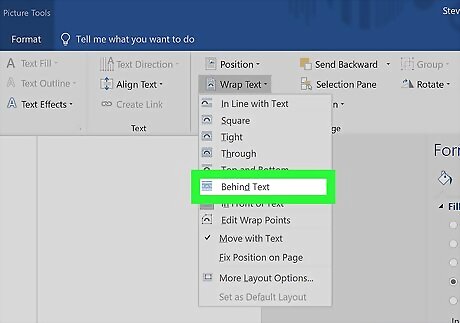
Select Behind Text on the Wrap Text menu. This will position your overlayed image behind all the text, and allow you to position it anywhere on the document.
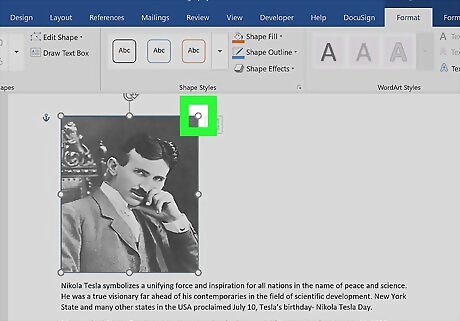
Click and drag the corners of the shape to resize. You can drag the corner dots around the overlayed picture, and change its size or proportions according to your needs.

Hold down and drag the image to move it. You can drag the overlayed image, and position it anywhere on the document.


Comments
0 comment