
Making a No-Sew Pouch
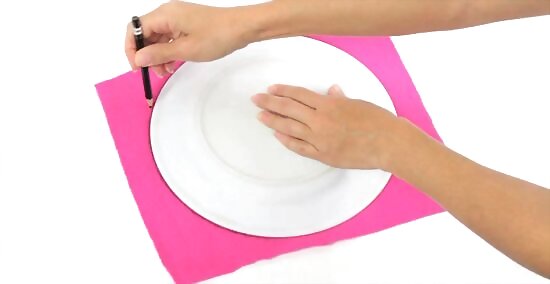
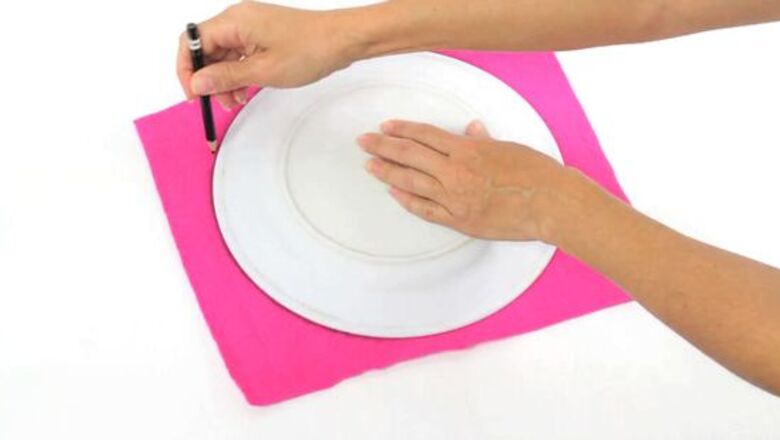
Place a 10 in (25 cm) plate onto a piece of felt or fabric fleece. Lay out your fleece fabric so that it is flat with no lumps or bumps. Then, place a 10 in (25 cm) plate so that it is completely on the fabric. Trace around the outside of the plate with a pencil to create a circle on the fabric. If you cannot see the circle, you may need to go over it with the pencil again or use chalk. Avoid using a pen to trace the circle since this will not come off as easily.

Cut out the circle you traced onto the fabric. Use a sharp pair of scissors to cut along the line you traced onto your fabric. Go slowly and make even cuts to ensure that there are no jagged edges around the top of the pouch. If you have a rotary cutter and cutting mat, you may use that to cut along the line instead. Apply firm, even pressure to the cutter to ensure that you do not have to go over the same spot twice.

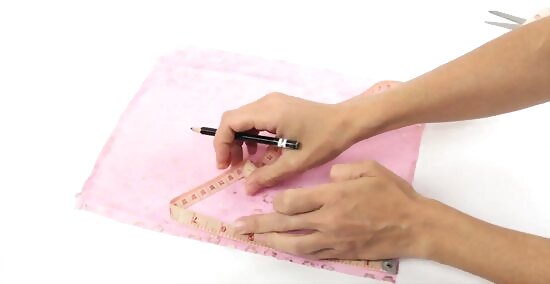
Place an 8 in (20 cm) plate onto the fabric circle. Lay the circle of fabric you just cut out onto your work surface and smooth it out. Then, place an 8 in (20 cm) plate at the center of this circle. Make sure that its edges are equidistant to the edges of the fabric.Tip: If desired, use different sized plates to create your pouch. Just make sure that there is only about 2 in (5.1 cm) difference in size. For example, trace around the outside of a 14 in (36 cm) plate to create your fabric circle, and then use the outside of a 12 in (30 cm) plate to make notches.

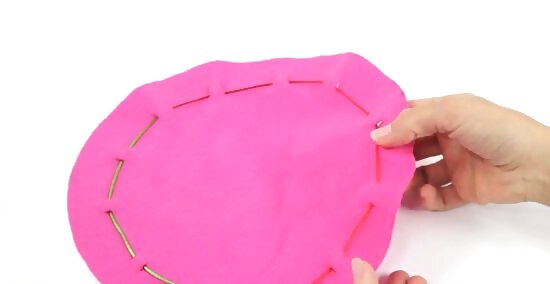
Mark the fabric with 0.5 in (1.3 cm) lines at 12 points around the plate. Imagine the plate is a clock. Then, use a pencil and ruler to create a pair of 0.5 in (1.3 cm) long lines at the 12:00 position on the edge of the plate. Position the marks so they are about 0.5 in (1.3 cm) apart and about 1 in (2.5 cm) from the edge of the fabric. Repeat this for each hour position going all the way around the plate. For example, make 2 marks at 1:00, 2:00, 3:00, 4:00, 5:00, 6:00, and so on going all the way around.

Snip through each of the marks using a small pair of scissors. Use your scissors to cut through each of the lines. Make sure that you only cut the line and do not cut past it in either direction. Cutting through each line will create a notch in the fabric that you can insert the cord through. You may need to use a smaller pair of scissors to cut these notches.
Weave the cord through the notches. Insert 1 end of the cord through 1 of the notches you made, then bring it through the notch right next to it coming through the other side of the fabric. Then, bring the cord through the next notch on the same side as you brought it through the first, and back through that notch's pair on the other side again. Repeat this until you have woven the cord through all of the notches 1 time and you are back at the beginning.
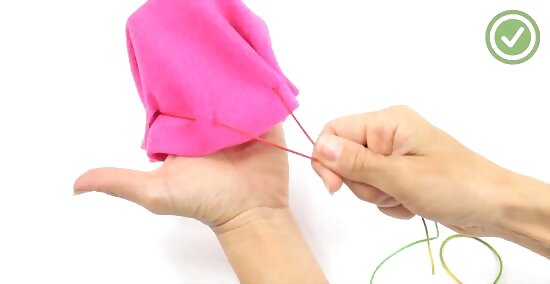
Pull the ends to gather the pouch and tie the ends to secure it. Grasp each of the cord's ends and tug them to gather the fabric. Push down on the inside of the pouch if the fabric bunches up. Fill the pouch with whatever items you like and pull the cords to close the pouch completely. Tie the ends in a bow to keep the pouch closed.
Sewing a Pouch
Cut out a 6 by 6 in (15 by 15 cm) square along a fold. You can make the pouch any size you like. Fold your fabric in half and measure up from the fold to find the location 6 in (15 cm) from the fold. Mark the fabric at this point with a pencil. Then, measure across the fabric at this point to find the location 6 by 6 in (15 by 15 cm) from the raw edge. Cut the fabric using these marks to guide you. Make sure to use a sharp pair of fabric scissors to cut your fabric.

Fold and pin 1 in (2.5 cm) of fabric on the top edges. This will create the casing for the cord. Fold the top edges over so that the raw edges are going inwards towards the wrong (back or inner) side of the fabric. Insert the pins so that they are perpendicular to the folded edges of the fabric. This will make it easier to remove them as you sew.
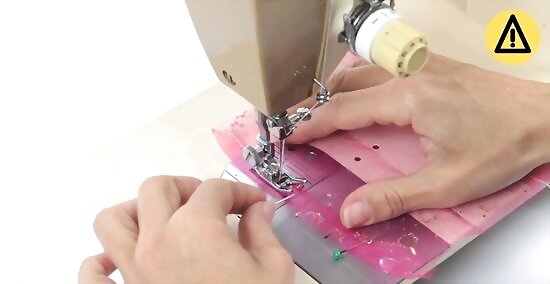
Sew a straight stitch along the bottom edge of the folds. Set your sewing machine to the straight stitch setting. Position the needle about 0.25 in (0.64 cm) from the raw edges of the fabric. Sew in a straight line going from 1 edge to the other. This will create a tube in the fabric through which you can insert a cord. Repeat this for both of the folded and pinned edges. Make sure that you leave the ends of the tube open. Do not sew across them.
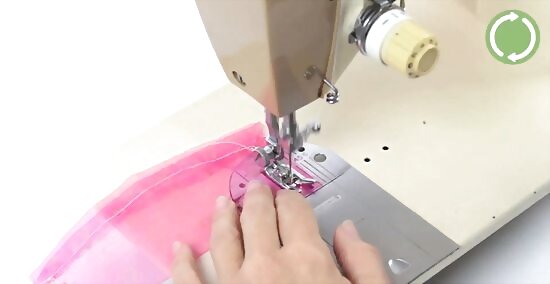
Sew a straight stitch to secure the sides of the bag. Fold the ends of the fabric that you just sewed across so that the raw edges are facing out. Then, sew a straight stitch from the bottom of the tube casing on 1 side to the folded, bottom edge of the fabric. Repeat this for the other side.

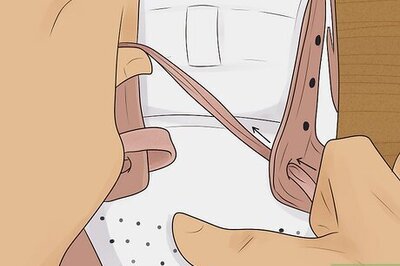
Thread the closed safety pin through the opening on 1 side. Turn the bag right side out so that all of the seams are hidden. Then, loop the end of a 12 in (30 cm) piece of cord around a safety pin a few times. Close the safety pin and then insert it through the opening in the tube casing. Use the safety pin to work the cord all the way through the casing. Tip: If the safety pin comes open while you are working it through the casing, try to closed it again without removing the safety pin from the casing. If you cannot get it closed, tug on the cord to pull it back out the way you inserted it and close the safety pin.

Bring the safety pin back through the other opening so the ends are matching up. Next, insert the safety pin through the tube opening on the opposite side of the pouch. This opening will be right next to where you just brought the safety pin out of the casing. Work the safety pin and cord through this casing in the same way.

Tie the ends in a knot to secure them. Both ends of the cord should be on the same side of the pouch now. There should be 1 end coming out of 1 tube and the other end coming out of the other tube. Tie these ends together in a double knot to keep them from slipping back into the casing.

Repeat to weave a second piece of cord through on the opposite side. Wrap the end of the cord around a safety pin and close it. Then, insert the safety pin into the opening opposite where the 2 cord ends are tied together. Then, work the safety pin and cord back through the other side and remove the safety pin from the cord. Tie the ends together to secure them. Your pouch is now complete! Tug on the knotted ends of the cords to close the bag, and use your fingers to spread apart the fabric to open the bag back up.


Comments
0 comment