
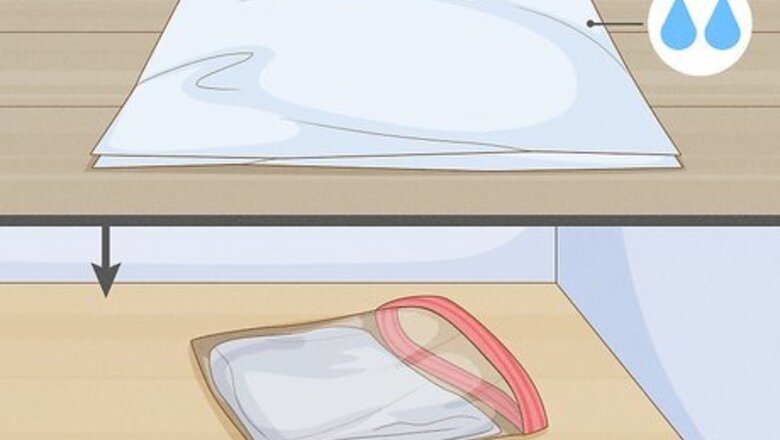
- Place the chilli seeds between 2 damp paper towels, seal them in a plastic bag, and set them in a warm area for 2-5 days.
- Fill a planting tray with seed-starting mix and spread the seeds on top about 2 inches (5 cm) apart. Then, lightly cover them with soil.
- Mist the seeds with water and cover the tray with plastic wrap. Set it back in a warm area and watch as they sprout in about 2 weeks.
Germinating Chilli Seeds

Place seeds between 2 damp paper towels and seal them in a plastic bag. Dampen a paper towel and lay it on your table. Scatter your chilli seeds on the paper towel, then layer a second damp paper towel on top. Then, place the seeds inside a plastic bag or container and seal it shut. Chilli seeds generally germinate easily, so it's likely that most of your seeds will sprout. Place 1 seed between the paper towel for every plant you want to grow, then add a few extras just in case they all don’t sprout. Either buy chilli seeds online, from your local plant nursery, or harvest your own from ripe chilli peppers. If you’re harvesting your own seeds, choose a chilli pepper, put on some gloves, and cut it in half. Scoop out the seeds with your hand and place them in a shallow plastic container. Then, let them dry out in a well-ventilated area, like your kitchen, for about 1 week.

Store the seeds inside in a warm location for 2-5 days. Chilli seeds love heat, so set them in a spot that stays around 70 to 80° F (21-27° C). If you don’t have a consistently warm area, place a heating mat under the seeds. Just make sure that the heat source isn't hot enough to melt the plastic bag or container that your seeds are stored in. After 2 to 5 days, you’ll see the seeds start to swell or sprout. Pre-germinating the chilli seeds before you plant them in soil typically gives them a better chance of sprouting successfully. In warmer climates, leave the seeds outdoors to germinate. Just bring them in if the temperature drops below 60° F (15° C).
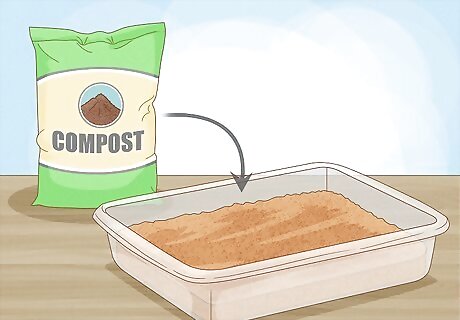
Fill a planting tray or seed tray with compost or a seed-starting mix. Once your seeds are swelling or starting to sprout, move them into soil. Fill either a large planting tray or a multi-cell seed tray to the brim with light compost or seed-starting mix. If there are any clumps of soil, break them up with your fingers. Then, press the soil down and water it thoroughly. After you moisten the soil, you won’t water it much until the seeds are fully germinated, or have fully sprouted.

Sprinkle the seeds across the tray and cover them with a thin layer of soil. Drop individual chilli seeds on top of the soil about 2 inches (5 cm) apart. Then, cover them lightly with more compost or soil. Gently press the soil down on top of the seeds and mist it lightly with a spray bottle full of water.
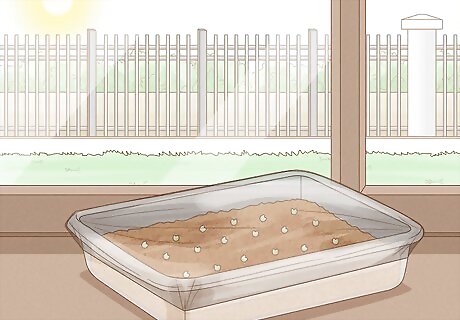
Cover the tray with plastic wrap and place it in a warm location. To get your seeds to germinate and sprout successfully, place a piece of plastic wrap over the planting tray. This helps lock in all the heat and moisture the seeds need. Then, set the tray in the same warm spot you initially put your seeds. As an alternative, purchase an electric propagation tray. These keep your seedlings at a warm, consistent temperature.

Monitor the seedlings and the soil moisture over the next 2 weeks. The best part about growing chillis from seeds is watching them sprout right before your eyes! Over the next 2 weeks, keep an eye on the planting tray to monitor the seeds’ growth. Check the compost or soil moisture every few days, too. Make sure the soil stays moist, but not wet. If it feels dry to the touch, give it a misting of water.
Set the seedlings in a bright, sunny location once they sprout. When the seeds start to break through the soil and grow tiny leaves, move them to a spot that gets warm, direct light. A sunny windowsill in your kitchen or living room gives the seedlings all the light they need, and lets you watch them as they continue to grow!
Transplanting Chilli Seedlings into Pots
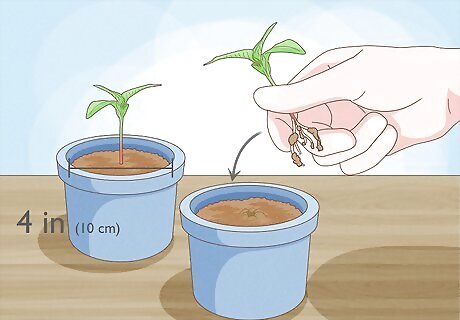
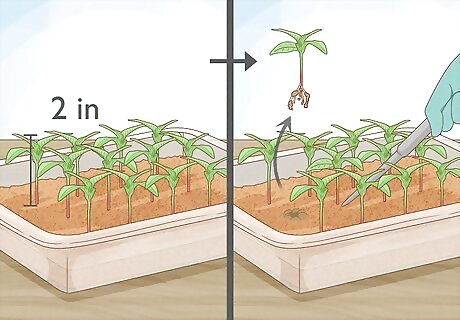
Scoop the seedlings out of the planting tray once they have 5-6 leaves. Wait to transplant your chilli seedlings until they’re about 2 inches (5 cm) tall or have 5-6 leaves. Use a flat, sturdy object, like a butter knife, and cut into the soil around the seedling. Then, push the knife under the seedling’s roots and gently lift it out of the tray. Make sure to keep the roots intact and disturb them as little as possible. Water the seedlings before removing them to prevent the soil from falling apart during the transfer. If you planted the seeds in a multi-cell plant tray, gently pinch the bottom of the container to loosen the soil. Then, press the bottom of the container to push the seedling out. Transferring the plants into pots prevents their roots from getting constricted, which helps them grow.
Plant each seedling into a 4-inch (10 cm) pot full of well-draining soil. Fill a 4-inch (10 cm) pot with drainage holes with a well-draining potting mix. Water the soil lightly and make a well in the center with your finger. Gently place a seedling in the empty space and fill around it with the soil. If you live in a cooler climate, plant chilli plants in pots and keep them indoors. Set them under grow lights in a warm room. Alternatively, plant your chilli plants in your garden outdoors. Just wait to plant them until the last frost of the season is over.

Place your pots in a spot that gets about 6-8 hours of direct sunlight. Chilli plants need lots of warm sunlight to grow and produce chillies. The amount of light the plant receives directly affects the speed and size of its growth! So, choose a spot for your plant that gets lots of sunny, direct light, whether that’s on a windowsill indoors, or on your porch outside. Just make sure to bring it back inside if the temperature drops below 60° F (15° C). If you don’t have a lot of direct light inside but want to grow your chilli plant indoors, place a grow light over it. Or, purchase a mini greenhouse.

Water your chilli plant when the top 1 inch (2 cm) of soil is dry. Check on your chilli plants regularly to make sure their soil stays nice and moist. Just press your finger about 1 to 2 inches (2-5 cm) deep into the soil. If it feels dry, give the plant a nice soaking. Then, wait for the soil to dry out again before watering.

Fertilize the chilli plants regularly with a 1-1-1 water-soluble fertilizer. Wait to fertilize your plants until they’re fully established in their pots, which is usually after 2 weeks of being planted. Then, water your plants with a balanced fertilizer containing a 1-1-1 ratio of nitrogen, phosphorous, and potassium. Check the label on the fertilizer to determine how often to reapply it.
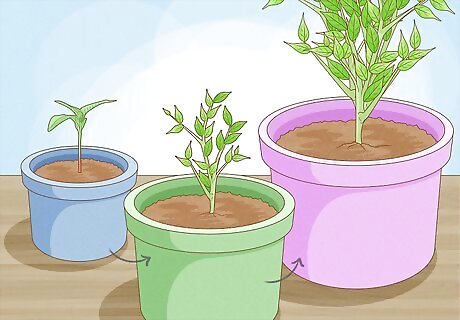
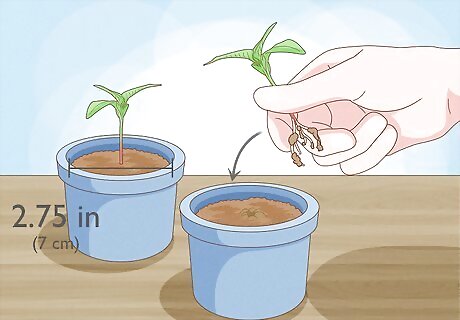
Repot your chilli plant when it starts to outgrow its current container. As your chilli plant grows, it needs more space for its roots to spread out. Choose a new pot that’s about 1 to 2 inches (2-5 cm) larger than your plant’s current one. Then, fill the new pot with well-draining soil and make a well in the center. Turn the plant on its side and gently dig it out of the soil, leaving a large clump of compost around its roots to protect them. Set it inside the well of the new pot, fill around it with soil, and then water it thoroughly. When a plant outgrows a pot, you’ll see its roots coming out of the top or bottom of the container. That’s your plant telling you it’s too cramped in its current container! If you want to keep your chilli plant small, keep it in a small pot to thwart further growth. The standard progression of pot sizes goes from a diameter of 4 inches (10 cm) to 6 inches (15 cm), then finally to 8 inches (20 cm).
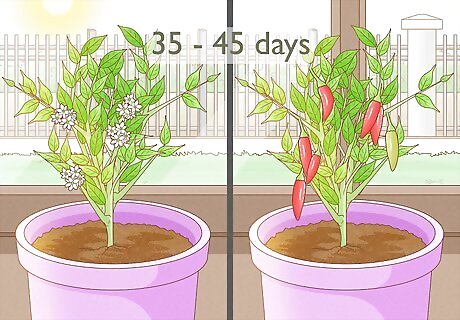
Harvest chillies when they mature, or 35 to 45 days after flowering. As your chilli plant grows, it’ll start to produce flowers. When these flowers fall off, baby chilli fruits take their place. Wait for the chilli to grow to its maximum size and feel firm when you squeeze it. Then, snip off the chilli with a pair of scissors, or remove it by hand. Always wear gloves when touching chillies. They contain capsaicin, which can irritate your skin. This compound is also what makes chillies hot. Either wait for the chillies to fully ripen and change color, or pick them when they’re green. Store extra chillies in your fridge, where they’ll usually stay good for 1 to 2 weeks. Alternatively, cut extra chillies into strips, lay them on a baking sheet, and place them in your freezer. When they’re fully frozen, place them in plastic freezer bags and store them in the freezer for 3 to 6 months. Pickling your chillies and storing them in jars is another great way to use them in recipes.
Transfering Chilli Plants Outdoors

Acclimate the chillies to the outdoors when they’re 4-5 inches (10-13 cm) tall. Let your chilli plants grow indoors for about 6 to 8 weeks before planting them outside. At this point, they’ll be about 4 to 5 inches tall. Instead of immediately planting them outside, gradually harden them to the sun over the course of 10 days. Start by setting them in filtered light for a few hours each day. Then, move them to bright, direct light, extending their time in the sun each day. The heat, direct sunlight, and wind can shock and damage your chilli plants if you immediately plant them outside.

Plant the chilli plant in a spot that gets 6-8 hours of direct sunlight. Find a warm, sunny spot in your garden that gets lots of daylight and has well-draining soil. Then, dig a hole deep enough to cover the roots and base of the plant’s stem. Use a gardening fork to gently dig up some soil at the base of the hole and rake a handful of compost into it. Gently insert the plant inside the hole. Then, fill the space around it with an even mixture of soil and compost. Plant chilli plants at least 18 inches (45 cm) apart from any other plants to ensure that they have adequate room to grow.
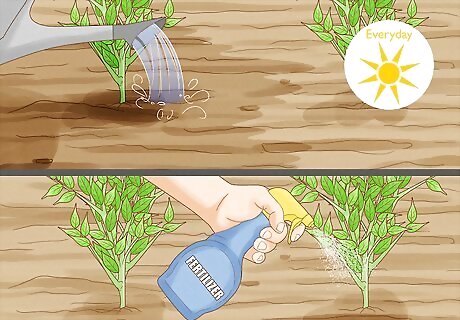
Keep the soil moist and feed your plants fertilizer regularly. In general, give your plants about 1 to 2 inches (2-5 cm) of water each week. If you live in a hot, sunny climate, water your chilli plant every day. Just avoid over-watering it by making sure that the soil is moist, but not swampy. Then, feed your plants with a general-purpose, 1-1-1 water-soluble fertilizer according to the fertilizer’s label. Monitor your chilli plants for pests like aphids and spider mites. Aphids are pear-shaped and typically white or brown, while spider mites look like tiny moving dots. Typically, spraying your plant’s leaves with a hose removes either pest. If you see ladybugs around your plants, they’ll take care of the aphids for you.
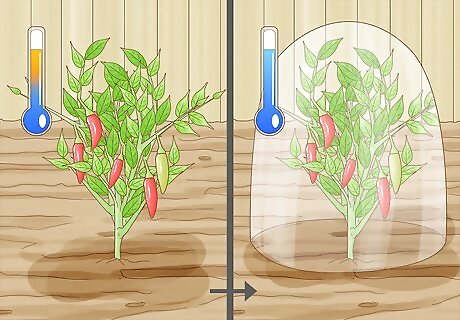
Make sure your plants stay warm, around 70 to 80° F (21-27° C). Only transplant your chilli plants outdoors if you live in a warm climate or have a long summer growing season. For chilli plants to grow well, their soil needs to stay around 70 to 80° F (21-27° C). In the latter case, it is best to transfer them outdoors in June. Purchase a garden fleece or a cloche (i.e. a protective dome cover that goes over the plant and is burrowed into the soil around it) to cover plants in case of unseasonally cold weather.
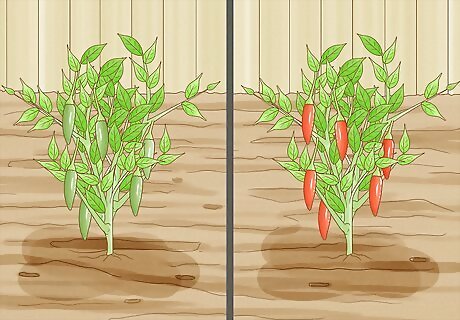
Pick the chillies when they’re green, or wait for them to change color. The great thing about chillies is that you can eat them before they’re fully ripened and when they’re ripe. Regardless of its color, just make sure the chilli is fully grown and firm when you squeeze it. Then simply pluck it off the stem while wearing gloves, or cut it off with scissors. Most chillies fully mature 35 to 45 days after the plant flowers. Either store extra chillies in your fridge for 1 to 2 weeks, or freeze them in strips in your freezer. Frozen chillies typically stay well for 3 to 6 months.


Comments
0 comment