views
Realistic Cat
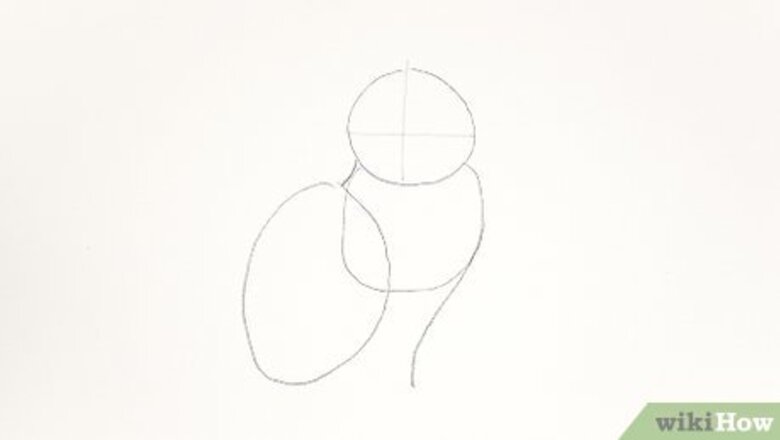
Draw 3 overlapping circles to create an outline of the cat’s body. Sketch a small circle for the head and a larger circle slightly below it for the chest. Extend a line down at the right side of the second circle to create the cat’s front legs. Then, draw an even larger circle below and to the left of the second to make the cat’s body. Add two crossed lines in the center of the head to serve as grid lines. Finally, sketch a small curved line to connect the left side of the head to the body. If you want to make your drawing larger, use the grid method. Print out an image of the cat and use a ruler and marker to create a grid on the paper. Then, take a larger, blank piece of paper and draw the same grid on it. Draw the lines and shapes that you see inside the squares of the reference image in the corresponding squares on your paper.
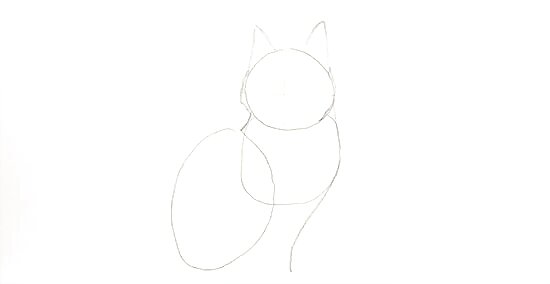
Round out the face and add 2 triangles for the ears. Draw a line from the right side of the cat’s cheek to the second circle to form the cat’s neck. Then, use soft, curved strokes on either side of the cat’s cheeks to plump them out. To draw the cat’s ears, add 2 pointy triangles at the top of its head.
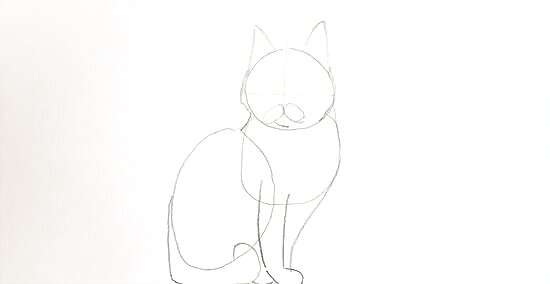
Add ovals and curves to the face and body for the mouth, paws, and tail. Draw 2 ovals at the bottom of the cat’s head that touch at the vertical line to create its mouth. Then, draw a vertical line at the center of the cat’s body and just above the second circle. Make a second, curved line parallel to this line. Add an oval at the end of the lines to connect them and make the cat’s paw. Finally, draw an L-shaped line at the bottom of the body for the tail.
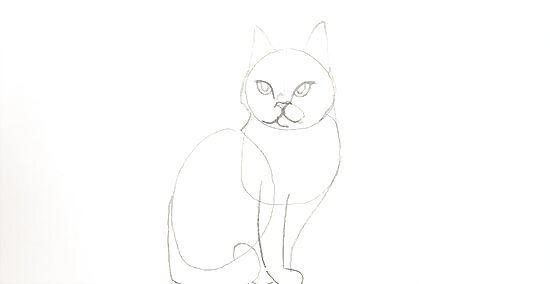
Draw 2 almond-shaped eyes above the horizontal line on the head. Use the grid on the cat’s head to draw its face. For the nose, pencil in a triangle on the vertical line that rests on top of the 2 ovals you made for the mouth. Draw a curved line on each side of the nose and bring it over the horizontal line. Then, draw a half-circle below the curved line to make the eyes. Add circles inside for the pupils.
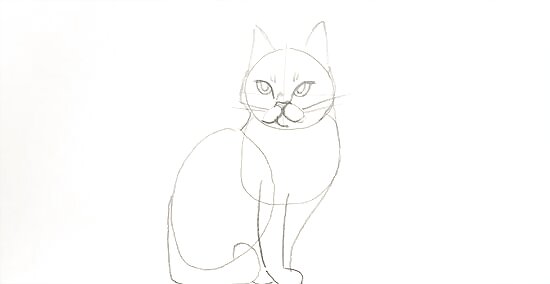
Add 4 quick strokes to the head to make the cat’s whiskers and brows. Make 2 short lines slightly above the cat’s eyes to draw its brows. Then, place your pencil at the edge of the mouth. Draw 2 long lines extending past the cat’s face for the whiskers.
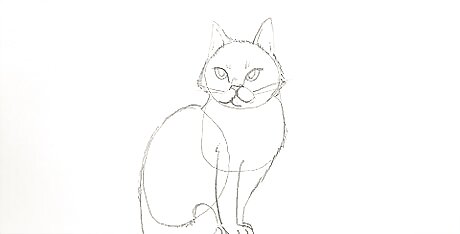
Use soft, feathery strokes to create a furry outline around the cat. Starting at the cat’s left cheek, make small, jagged, zig-zag-like marks right on top of the outline you drew. Move along the cat’s back and over its tail, keeping your strokes at a downward angle. Then, move to the right cheek and make similar strokes down the outline of the cat’s body. Finally, draw feathery marks along the top of the cat’s head and ears.
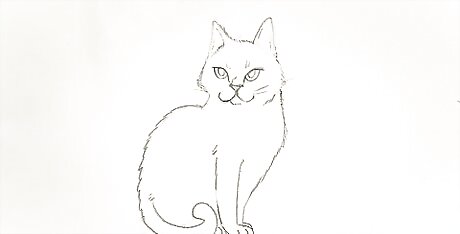
Erase the original circles and guidelines. Use an eraser to carefully remove the head, neck, and body circles, as well as the face grid line. When you’re finished, only the furry outline of the cat remains.
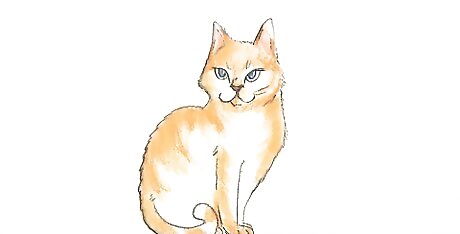
Color the cat. Get creative and use colored pencils, markers, or crayons to bring your cat to life. Make any type of cat you like, such as an orange or calico cat, by using different colors to create stripes and patterns on its body and face. If you want to stick with pencils, use cross-hatch marks to give the cat dimension. Or, angle a soft 4B or 6B pencil on its side to smoothly blend out shaded areas.
Cute Cartoon Cat
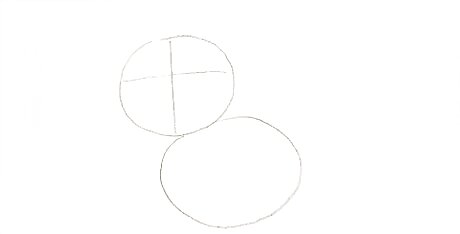
Make 2 large circles for the cat’s head and body. Make a large circle for the head. Then, draw a vertical and horizontal line through the center of the head. To make the body, add a larger circle under and slightly to the right of the head.
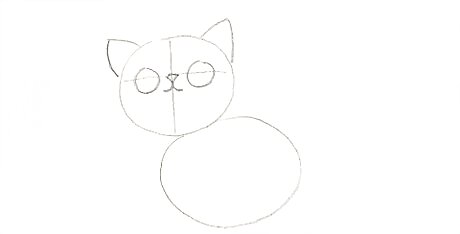
Draw 2 circles for the eyes and 2 triangles for the ears. Place your pencil in the middle of the criss-cross grid lines and move it slightly left. Draw a circle so the horizontal line passes through its center. Then, do the same on the right side. Your cat now has eyes! Go back to the middle of the grid lines and draw a small triangle for the nose. Extend 2 curved lines under the nose to make the cat’s mouth. Finally, draw 2 pointed triangles on either side of the cat’s head for the ears.
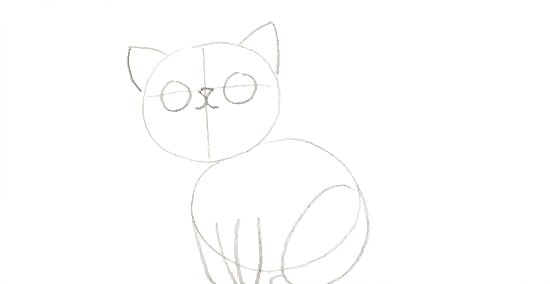
Sketch an outline of the cat’s front and back legs. Move your pencil on the outline of the cat’s body, resting it on the middle, left-hand side. Draw a curved line down, stopping slightly below the circle. Make a line parallel to this line and connect them at the bottom with a curve; this is your cat’s left front leg. Do the same steps slightly to the right to make the right front leg. To draw the back leg, sketch a long oval that overlaps the bottom of the body. Add a small circle that touches the left side of the leg for the paw.
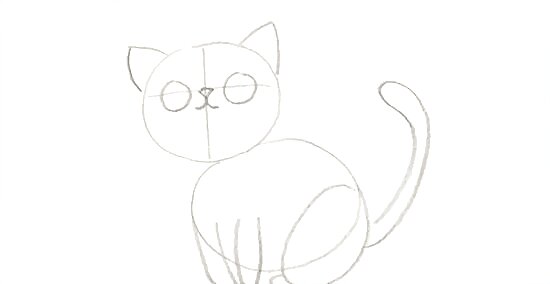
Draw a long, curved tail coming out of the back of the hind leg. Make a curved line extending upwards from the cat’s back leg. Hook the line at the top, then draw a parallel line back to the hind leg.
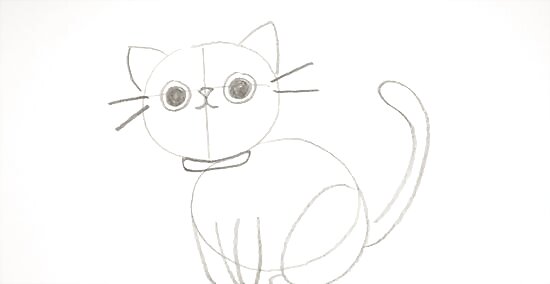
Add pupils to the cat’s eyes and draw on its whiskers. Draw a large circle in the middle of each eye and shade them in. On either side of the horizontal grid line, draw 2 long lines for the whiskers. Then, draw a curved rectangle below the cat’s head to give it a collar.
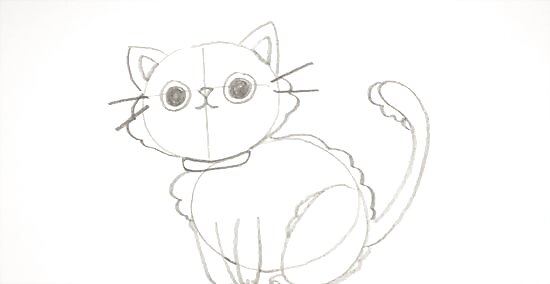
Sketch a fluffy outline around the body to give your cat fur. Make cloud-like strokes around the outline of the cat. Add a smaller triangle inside the cat’s ears to give it more detail. Then, add short lines at the bottom of the cat’s paws to draw its claws.
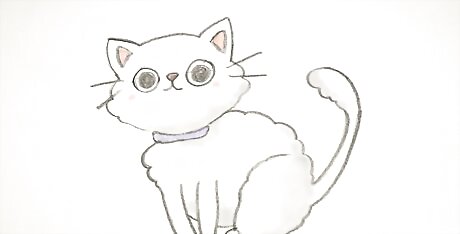
Erase the outlines and color in your kitty. Remove your drawing guidelines, only leaving the furry outline around the cat. Then, let your imagination run wild and illustrate your cartoon cat. Make it sweet and soft with a subtle gradation around the fur, or make it even more cartoony with bold, vivid colors.
Cat Standing Sideways
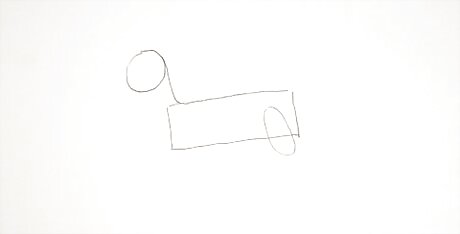
Sketch a circle for the head and rectangle for the body. Draw a circle for the cat’s head. Then, make a long, horizontal rectangle below the circle and off to its right. Use a curved line to connect the back of the head to the body and draw the neck. Then, sketch a squished oval at the back end of the rectangle for the cat’s thigh.
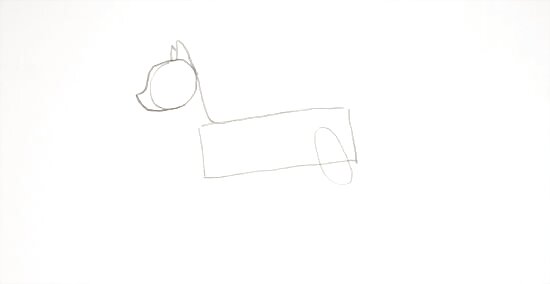
Draw 2 triangles for the ears and a square outline for the face. Make a curved triangle towards the back of the head for the ear. Add a smaller triangle right next to it for the other. To draw the cat’s muzzle, draw a straight line on the top of the head. Curve the line down, make a hook, and draw a short, straight line down.
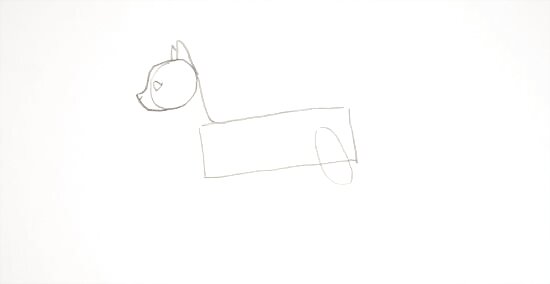
Add a curved triangle for the eye and line for the nose. Place your pencil to the left of the center of the cat’s head. This cat is facing sideways, so to make the eye, draw a sideways V. Then, connect the points with a curved line. Sketch a tiny line at the top of the muzzle to draw the nose.
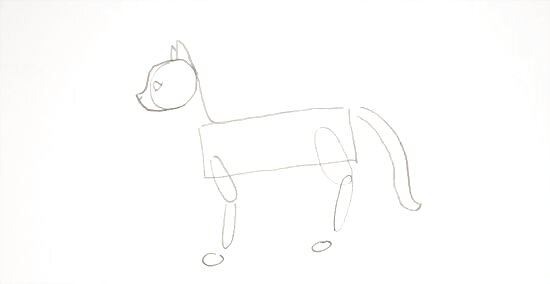
Draw long ovals at the front and back of the rectangle to make the legs. Sketch an oval below the one at the back of the rectangle. Draw a small circle below it for the cat’s back paw. Then, draw 2 long ovals at the front of the rectangle like you did at the back. Add another small circle below it for the front paw. Finally, draw a curved tail coming from the top, right corner of the rectangle.
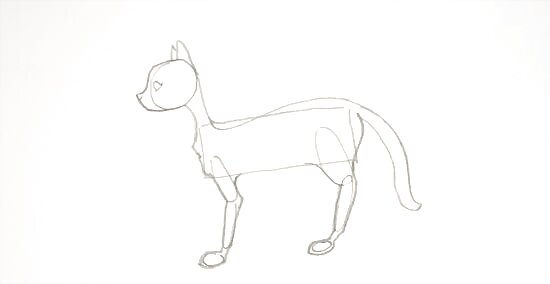
Connect all the shapes together to make the outline of the cat. Use long, curved strokes to connect the cat’s head to its neck and chest. Make similar lines to outline the cat’s front and hind leg. Finally, draw a curved hump from the cat’s neck to its tail to make its back.
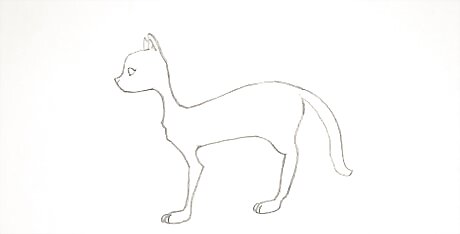
Erase the draft lines and add details to the eyes, ears, and paws. Use an eraser to get rid of the outlines of the circles, ovals, and rectangle. Draw a smaller triangle inside the front ear and mark a slit for the cat’s pupil in its eye. To draw the claws, make 3 small, curved lines on its paws.
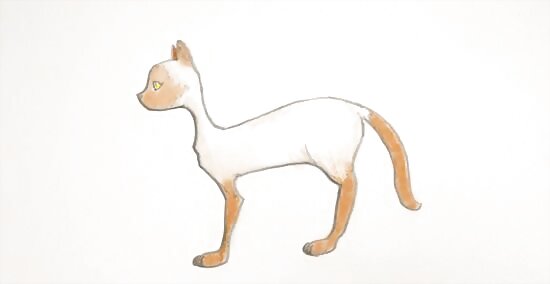
Color in the finished cat. Get out your crayons, markers, or watercolors. Give your cat stripes, spots, or make it one solid color. If you’re using colored pencils, use darker colors to shade your drawing and make it look more realistic.
Sleeping Cat
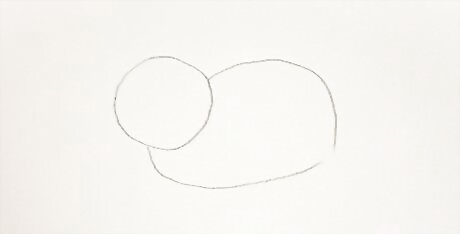
Draw a long oval for the body and a smaller circle on top for the head. Start with the cat’s body, sketching out a large, oblong oval. Then, draw a smaller circle that overlaps the oval on the top left for the head. Erase the overlapping line inside the head.
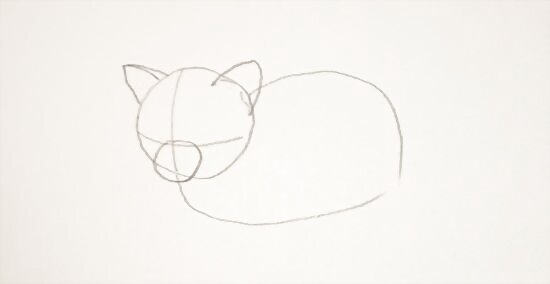
Add grid lines to the head, triangles for ears, and a circle for the muzzle. Make the facial grid lines by drawing a curved vertical and horizontal line through the center of the head. It helps to think of the head as a sphere, not a circle. Then, draw a circle through the bottom half of the vertical line for the muzzle. For the ears, add 2 triangles to the top of the head.
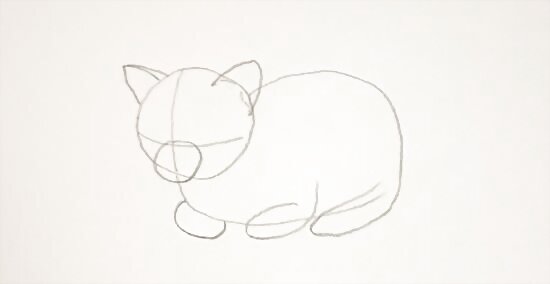
Sketch ovals along the body for the front and back legs. Draw a small oval at the bottom, left-hand side of the body. Move your pencil slightly to the right and draw a second small oval. These are the cat’s front legs. Draw a third, longer oval at the bottom right of the body for the cat’s back leg.
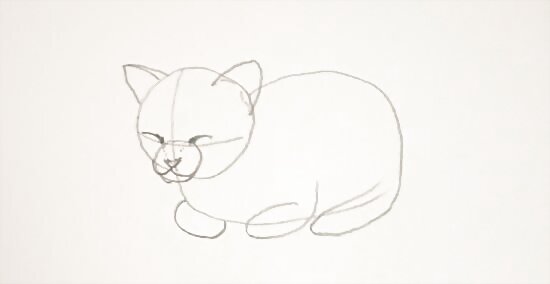
Draw in a triangle nose and curved lines for the eyes. In the middle of the circle for the mouth, make a triangle for the nose. Draw 2 curved lines under it for the mouth. To draw the eyes, sketch a faint line from each corner of the nose to slightly above the horizontal line. There, draw a downwards curved line for the cat’s closed eyes.
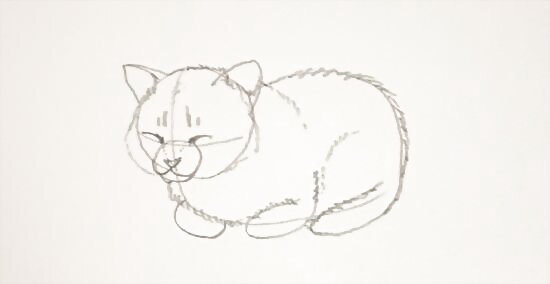
Make jagged, feathery lines along the cat’s body to draw the fur. Use short, irregular strokes along the outline of the cat to give it a soft, furry look. For extra detail, make lines of fur inside the cat’s ears and across its body.
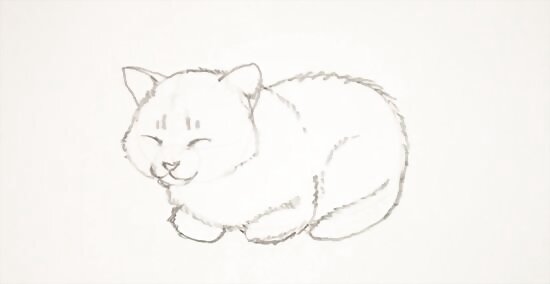
Erase the draft lines and add details like whiskers. Carefully remove the lines of the circles, ovals, and grid lines on the face. If you want to make your cat more detailed, draw lines extending from its cheeks for whiskers.
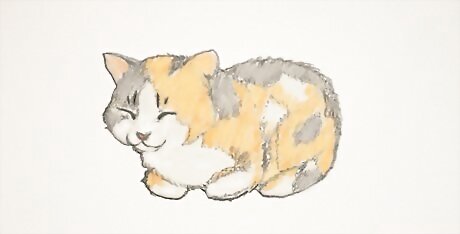
Color your cat drawing. Make your sweet, slumbering kitten come to life with markers, crayons, or paint. Give it orange, black, and white spots to look like a calico cat. Or, make up your own designs to create a truly unique cat.





Comments
0 comment