
Ensuring Smooth Fondant Rolling
Work on a clean, flat surface. In many cases this will be your counter top. A marble or wooden chopping board works well if your counter is irregular in shape or has trenches in it from grouting. Irregularities in your counter can make your fondant irregular when rolling. Depending on the amount of fondant you're working with, you might only need a small area to work in. Generally, you'll need at least enough space to accommodate a rolling pin.
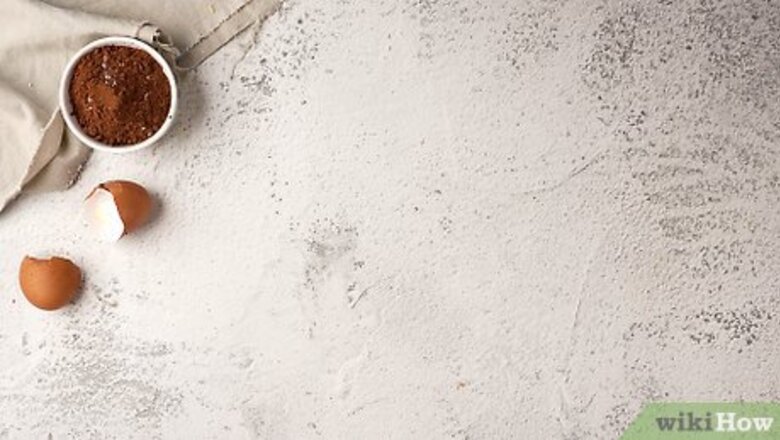
Allow ingredients to reach room temperature. Take your fondant ball out of your refrigerator if you have stored it there and allow it to sit on your work area until it has reached room temperature. If you've wrapped your fondant in plastic wrap, remove this now. To prevent your fondant from prematurely sticking to your work area, you may want to leave the bottom covered by plastic wrap. Depending on your climate, the time it takes for your fondant to reach room temperature can vary. In most cases, 15 minutes to a half hour should be sufficient. You may want to remove your fondant from the refrigerator before you begin preparing your work area. This way, you can prep while waiting for the fondant to reach room temperature.
Sprinkle your work surface with icing/confectioners sugar. Powder the area you'll be rolling your fondant on with a thin layer of confectioners sugar. This will stop the fondant from sticking to the surface on which you are trying to roll it out. You should also dust your fondant working tools, like your rolling pin, in the sugar. In most cases, you should only need enough sugar to create a thin coating on your tools and work area. Fondant is very sticky. Especially in warm or moist climates, you may find you need to use a considerable amount of sugar on your work area and fondant working tools. If you don't have confectioners sugar available to you, you can use corn starch as a substitute.
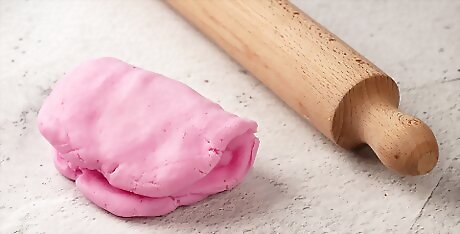
Knead your fondant. The kneading action and heat of your hands helps the fondant become smooth in consistency and pliable. Before you knead, you'll want to coat your hands with confectioners sugar or corn starch to prevent the fondant from sticking to yourself. If you are working with white colored fondant and need to add food coloring to it, you should do so during the kneading process. You may want to use plastic gloves to prevent your hands from being stained. If using several different colors, portion out your fondant in the quantity you believe necessary and knead the coloring into each portion separately. The motion for kneading fondant is very similar to that of kneading dough. However, the fondant will in most cases be heavier and thicker. Generally, you can expect to knead your fondant for about five to eight minutes before it reaches the correct consistency.
Place the fondant on your prepared work area. Your fondant should be now at room temperature and your work area coated with either sugar or corn starch to prevent sticking. Put your fondant atop your prepared work area.
Rolling the Fondant
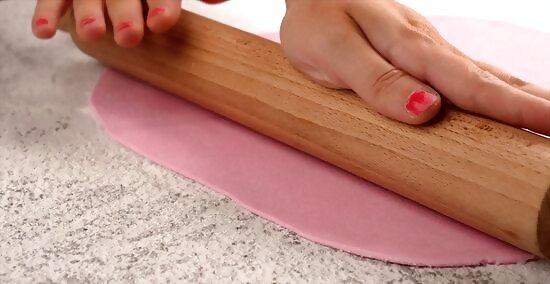
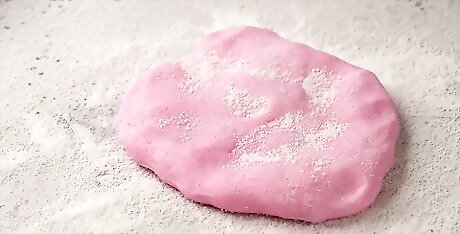
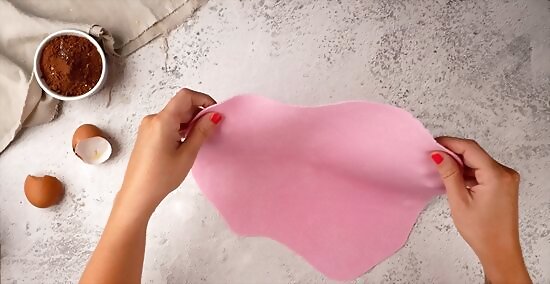
Roll your fondant into a thick, even disk. Take your rolling pin and place it on your fondant ball. Remember, you want your pin to be sugared or corn starched beforehand to prevent sticking. Roll back and forth continuously to flatten the fondant. Use gentle but firm pressure, and take your time to ensure evenness in the rolled fondant. When you are finished rolling your fondant, if you're still waiting for your cake to finish, you can prevent your fondant from drying out by covering it in a thin layer of shortening. If you're trying to roll your fondant into a large circular shape to cover a large cake, try turning the circle every few rolls. Rotate about 90 degrees each time, the roll the fondant outwards, away from yourself.
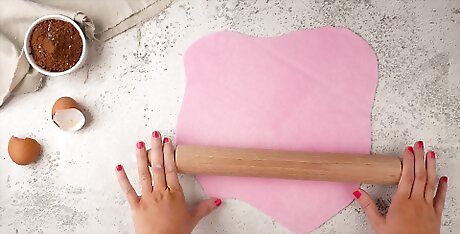
Stop rolling when you reach your desired thickness. How thick you want your fondant is going to depend on what you are using it for. An even fondant covering for a simple cake can be rolled fairly thin, which will make it easier to drape over the cake. If you plan on molding the fondant into flowers, characters, shapes, or designs, thicker fondant might be best. Fondant that is ½" (1¼ cm) thick can be useful for molding characters, flowers, and three dimensional designs. When layering the outside of a cake with fondant, a thick coating of fondant can be overpoweringly sweet. In this case, you may want to roll your fondant until it is the thickness of cardboard or thick card stock. Rolling your fondant too thin can to make it tear easily. This will make it difficult to transfer to your cake. It may take some trial and error before you find the perfect thickness for your fondant design.
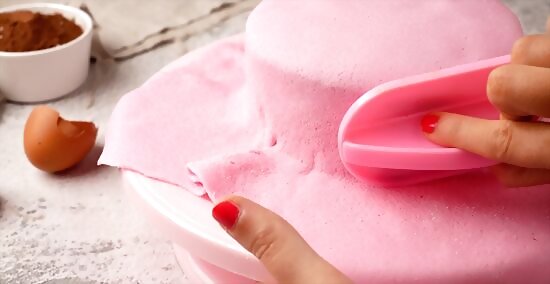
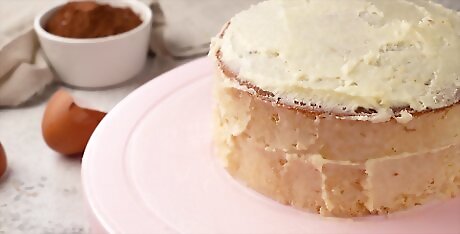
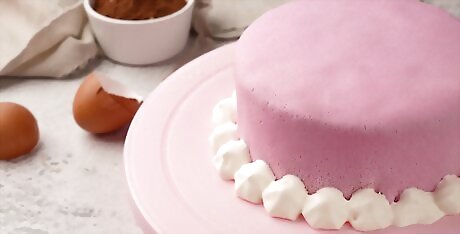
Transfer your fondant to your cake. If you are draping a sheet of fondant to entirely cover a cake, it can be transferred easily by placing the rolling pin on the fondant and winding the fondant around the pin. Then take the pin and fondant to your cake and gently unroll it atop the cake. You may notice that your fondant is slightly irregular in places. This is fairly common. Even a steady, well-practiced hand at fondant isn't perfect. You can use a palette knife or butter knife to smooth your fondant, if needed. Alternatively, you can pick up the rolled fondant gently with your hands and drape it on top of your cake. You may want to coat your hands first in confectioners sugar/corn start to prevent sticking, or wear plastic gloves.
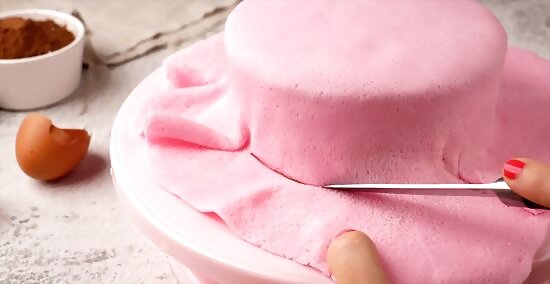
Trim your fondant. Now that your fondant is rolled and applied to your cake, you'll need to trim off extra bits so it is uniform and neat. For precision trimming, you may want to use a clean utility knife for this purpose, or a very sharp paring knife.
Improving Your Fondant Finish
Apply a crumb coat to your cake for a smooth finish. A crumb coat is a thin layer of frosting on the surface of your cake that prevents crumb build up. Crumbs beneath the surface of your fondant can give it a lumpy or irregular appearance. Use a spatula or offset spatula to spread a thin, uniform layer of icing on your cake. White icing works well as a crumb coat for most kinds of fondant. Dark colored icing can sometimes show through lighter colored fondant.
Flip fondant to hide cracks. The sugar in your fondant can sometimes crack, causing your cake to look less polished. When this happens, flip your fondant and inspect the other side. In many cases, the cracks will only appear on one side of the fondant. If there are cracks on both sides, gently rub solid vegetable shortening in a circular motion over the afflicted area. This should fuse the fondant back together. Avoid using water to revitalize or repair fondant. Water will cause the sugar to break down.
Soften dry fondant when smoothing. Getting your fondant to look just right can take time. When you are smoothing your fondant, you may notice that some parts harden and become brittle. Use a smoother to gently rub solid vegetable shortening on the dry fondant in a circular motion to revitalize the fondant. Attempting to shape or smooth dry fondant can result in it breaking. When smoothing, you may want to use a special tool called a fondant smoother. This will help smooth the fondant with less risk of it tearing.


Comments
0 comment