views
Ensure that the wire/wires you're going to be dealing with are not powered. Switch off all suspect breakers and use a suitable meter or tester to ensure that power is off - reducing the chance of shock or burns.
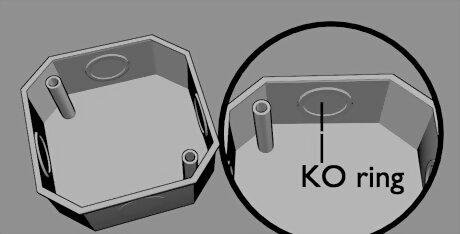
Locate the knock out stamping (KO) sized to fit the desired connector (or fitting). There will likely be several KOs of different sizes on more than one surface from which to choose. Pick the one that will be easiest to connect the cable or pipe.
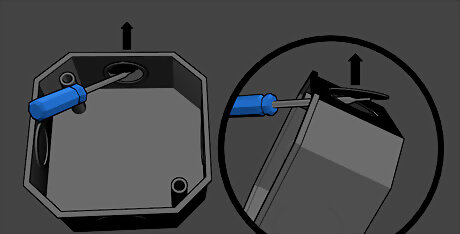
Find the point of attachment for this KO. The single size KOs and smallest of multiple KOs are generally secured in a single location. Press the edge of a screwdriver against the inner-most KO's stamped edge, away from this point of attachment, and press (or rap sharply if needed) to push the KO away from the wall of the box.
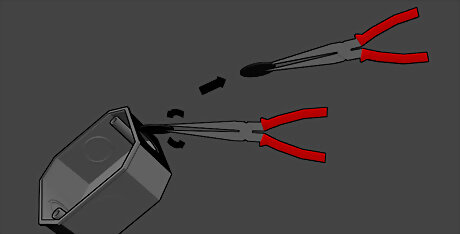
Twist the KO back and forth with fingers or pliers to fully remove. The smallest KO is usually a 3/8" or 1/2" trade size opening. Most modern connectors require a minimum 1/2" trade size opening. If this is the size of the KO removed and the connector to be installed, skip head to step 10; otherwise continue to increase to the next step KO size.
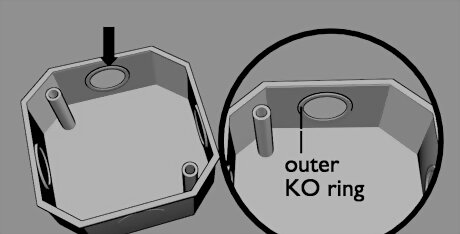
Locate the next KO ring point of attachment. The second ring of KO is much smaller and may be attached to yet a third (or more) KO ring. These KO rings are also often secured by two (or more) points of attachment. They will require slightly more effort and patience to remove without damaging any additional KO rings that are larger than needed. An over-sized opening will not support the connector without additional expense.
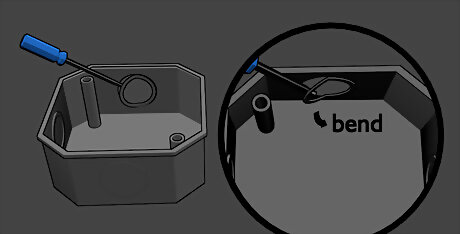
Insert the blade of the screwdriver into the opening as shown so that the tip just extends beyond the opening. The tip should be as far away as possible from the point of attachment. The blade should not extend beyond the the outer edge of the inner ring. Gently pry the screwdriver's tip into the box. Only the inner ring of the KO should bend inward.
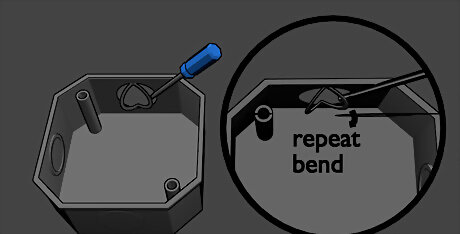
Repeat the previous step in such a way the the tip will press the other portion of the KO ring into the box similar as shown.
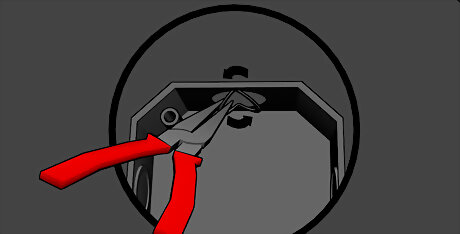
Press the blade against the wall, between it and KO ring to pry it further inward - enough to grab the edge with pliers.
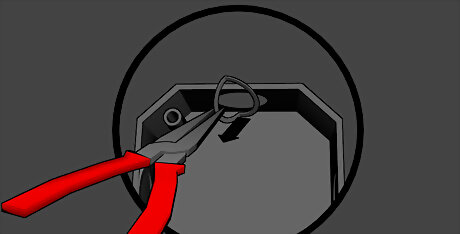
Twist and rock the KO ring back and forth with the pliers only as much as needed to fatigue the point of attachment. Soon, the KO ring will simply break away. Excessive force could damage any additional KO ring - rendering the opening too large to support the connector.
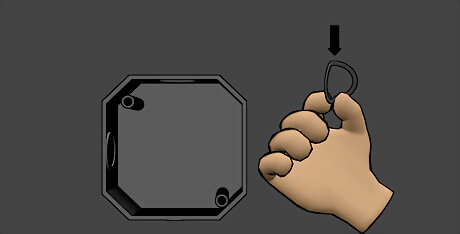
Continue removing KO rings until the correct size opening is achieved.
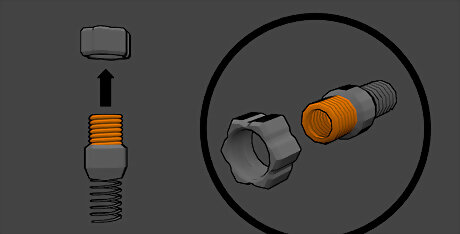
Remove the locknut from the connector.
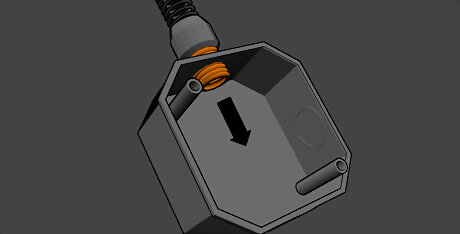
Insert the connector into the opening from the outside of the box.
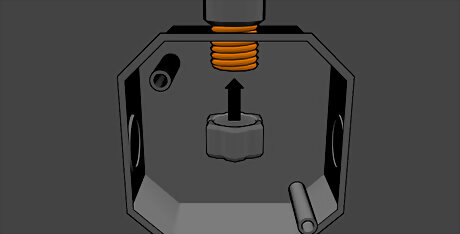
Spin the locknut onto the connector.
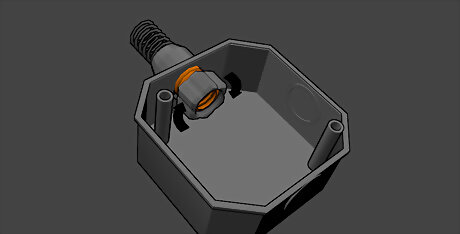
Hold the connector in place to keep screws accessible while hand tightening the locknut.
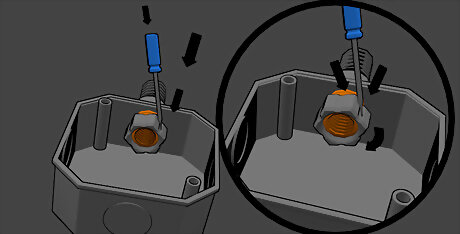
Tighten fully by placing the blade of the screwdriver in a "valley" of the locknut, and rap sharply with pliers or hammer.
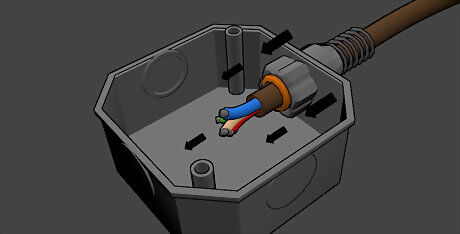
Insert the wire, cable or pipe into the connector and secure with screws supplied on the connector body.




Comments
0 comment