views
Preparing for Your Project
Understand your assignment. If you are building an animal cell for a science fair or as part of a homework project, you will have to know what the rules and expectations are. There is a wide variety of animal cell models you can build, and you want to do the best job you can. Be sure that you are absolutely clear about what is expected of you. Some key questions to ask yourself (or your teacher) include: Are you supposed to come up with your own design for an animal cell, or are you supposed to follow your teacher's instructions? Do the cells have to be edible or non-edible? Which components of an animal cell must be included? How large must the cell model be? When must the cell model be completed? Must the cell model be 3D?
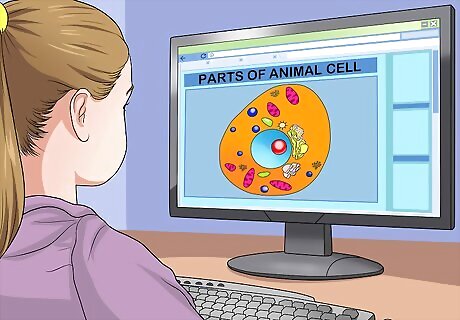
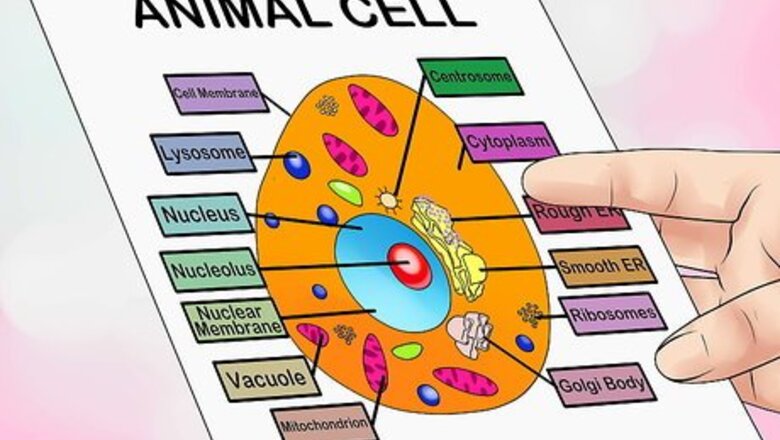
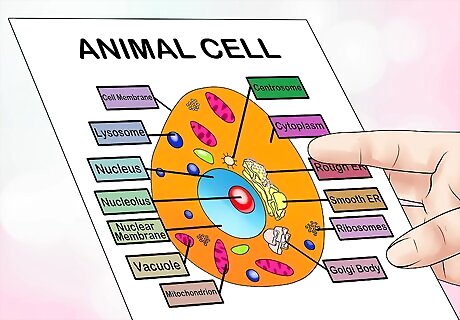
Know the parts of an animal cell. One of the most important parts of an animal cell model is correctly representing each of the parts of a cell. Remember that animal cells and plant cells look very different from one another: they have different parts, and animal cells are not as symmetrical as plant cells are. Be sure that you are familiar with the individual components of a cell, including their function, where in the cell they are located, and what they look like. All of this will help make your model more accurate. The parts of an animal cell you might represent include: Nucleus. The nucleus is in the center of the cell. DNA is contained here, and the nucleus also governs protein synthesis. Nucleolus. This is an organelle where RNA is produced. It is contained within the cell's nucleus. It is usually a slightly darker color than the nucleus. Nuclear membrane. This is a thin membrane surrounding the nucleus. Centrosomes. These help create microtubules and are located just outside the nucleus. Cell membrane. The cell membrane is the thin outside barrier of the cell, made out of protein and fat. It allows certain materials though while keeping other organic materials safely within the cell. Cytoplasm. This substance is contained by the cell outside of the nucleus and within the cell membrane. It contains the other organelles of the cell that govern cell function, and it has a jellylike consistency. Lysosomes. These organelles digest nutrients, and they are round in shape. Ribosomes. Ribosomes are very small and grain like in appearance. They aid protein synthesis. Golgi bodies. These look like a stack of flat circles, and they help construct membranes for other organelles. Vacuoles. These are asymmetrical sacs filled with fluid and surrounded by a membrane. They are used to store waste material. Endoplasmic reticulum. This is a set of connected, folded tubes within the cell, used to transport material from one part of the cell to another. An endoplasmic reticulum that is covered with ribosomes is referred to as a rough endoplasmic reticulum and one that is not covered with ribosomes is a smooth endoplasmic reticulum. Smooth endoplasmic reticulum branches off from the rough endoplasmic reticulum. Mitochondria. Mitochondria convert glucose into energy for the cell. They can be round or rod-shaped.
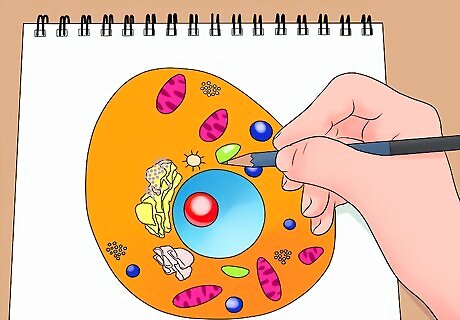
Draw a map of an animal cell. If you don't have a worksheet labeling the parts of a cell and their appearance, you should draw one yourself. You will need a thorough and complete map of an animal cell to help you plan, design, and execute your model. Be sure that the map is large enough for you to label each cell component clearly and accurately. Keep this diagram with you at all times so that you can be sure that your cell model is correct.
Start early. Depending on the type of model you build, you might require a lot of time to create and assemble your model. For example, clay has to harden, gelatin must be given time to set, and you might have to go shopping for extra materials. Give yourself plenty of time to plan out and construct the best possible cell model you can.
Building an Edible Animal Cell Model with Gelatin

Purchase supplies at a grocery store. Edible animal cell models can be made easily with common and inexpensive ingredients at local supermarkets and grocery stores. You have some flexibility in the specific ingredients you use to represent cell components. However, in general, what you require is a gelatin base that is light in color to represent cytoplasm, a plastic bag to represent a cell membrane, and various candies, fruits, and nuts to represent organelles and other cell components. In general, some good ingredients to purchase could include: A light-colored gelatin mix, such as a lemon-flavored jello. You can also purchase a clear or light-colored fruit juice (like lemonade or limeade) along with unflavored gelatin packets. This will eventually be your cytoplasm. It is important that you pick a light color so that the other cell components will stand out. A large, pitted fruit to represent a nucleus (the fruit) and the nucleolus (the pit). Depending on how large your model is, you might use a plum, peach, apricot, or cherry. Small, round candies or fruits. These will represent your lysosomes. For example, M&Ms, Skittles, gumballs, or grapes might serve as effective lysosomes. Oval- or rod-shaped candies or fruits. These will represent your mitochondria. Raisins, craisins, Mike & Ike's, or dried apricots would all work, depending on the size of your model. Slightly larger, irregular candies or fruits. These will represent your vacuoles. Small banana slices, jawbreakers, or gummy rings are good options. Very small, grain-shaped candies. These will represent your ribosomes, so they must be considerably smaller than your other cell components. Some good possibilities could include: Tic-Tacs, Nerds, or extra-small jelly beans. A round, dense piece of candy. This will represent your centrosome. Gumdrops or Gushers could make an effective centrosome. Long, stringy pieces of candy. These will represent the endoplasmic reticulum. If you want to be very precise, you can buy one type that is coated in sugar (to represent the rough endoplasmic reticulum) and one type that is smooth (to represent the smooth endoplasmic reticulum). Some excellent options include gummy worms, sour worms, and various kinds of licorice rope. Long, flat candy or fruit roll-up. When you fold up a long, flat piece of candy or fruit snack, you will have an excellent representation of Golgi bodies. Try bubblegum tape, fruit roll-ups, or other kinds of fruit leather to create this organelle.
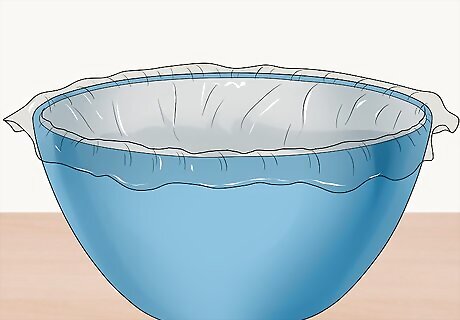
Line a bowl or large cup with a clear plastic bag. In many projects, the clear plastic bag represents the cell membrane. It is important that it be clear so that your cell model is perfectly visible. Find a medium-size bowl or large cup--such as a vessel that can hold about a gallon of liquid--and line it with a clear plastic bag. This will serve as the mold for your gelatin as well as the outside of your cell model.
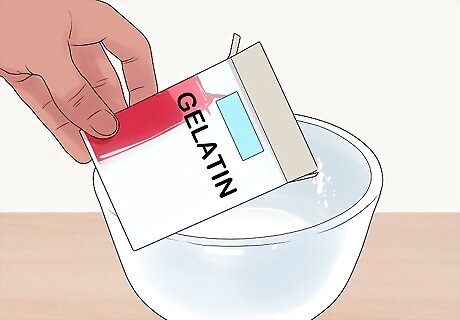
Prepare your gelatin. Most jello and gelatin packets will have clear instructions on the best way to prepare your gelatin mold. It is a good idea to follow these instructions closely, with one exception: put in slightly less liquid than the recipe calls for. This will help your gelatin model remain tougher and more solid, which will help your cell model remain intact. In general, the instructions on how to prepare a gelatin are: Dissolve the gelatin in boiling water in a heat-proof bowl, stirring carefully. Add cold water equal to the amount of boiling water. Let the gelatin cool slightly. Carefully pour the mixture into the lined bowl you prepared. Seal the bag and place it in the refrigerator until it is not-quite-set (45 minutes to an hour). Remove the bag from the refrigerator when the gelatin is stiff enough to suspend your cell components but soft enough to insert fruits and candies deep within the mold.
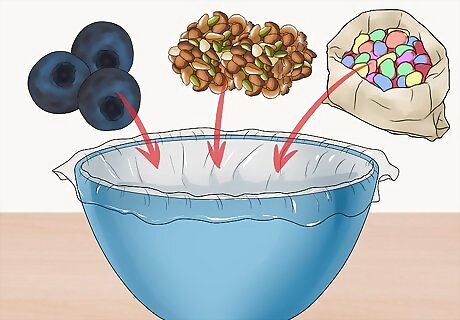
Add the cell components according to your diagram. Once your gelatin mold is slightly set, you can insert the fruits, nuts, and candies you chose for your cell components and organelles. The gelatin should be flexible enough that you can use a spoon, straw, or your fingers to push these components into their proper places within the gelatin cytoplasm. Always refer to your original diagram to make sure you are placing everything correctly.
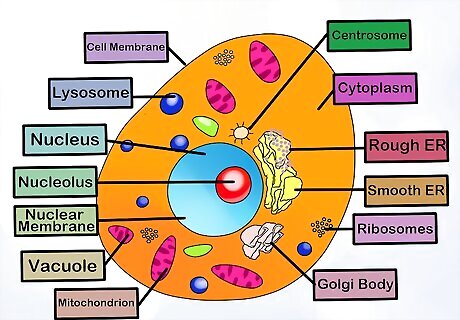
Create a key to your gelatin cell. If you are bringing this model to school or a science fair, you will want to attach a key to your project to allow onlookers to differentiate between the different components of your cell. Be sure to tell them which candies represent which cell parts. If you have to transport the model for long distances, it is a good idea to use a cooler to make sure that your model doesn't melt in the heat.
Building an Edible Animal Cell Model with Cake
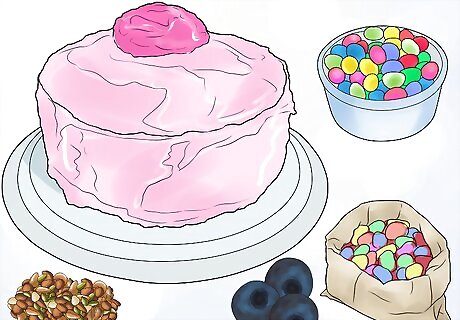
Purchase your materials. In order to make a 3D cell model out of cake, you will need to have the right materials to make the structure of the cell (the cake itself), material for cytoplasm (a light-colored frosting or jelly), and 3D components for the cell parts (nuts, fruits, candies, or molded fondant). You have a lot of flexibility with the design of your cake and the specific ingredients you use to represent the parts of a cell. However, in general, you will want to have the following ingredients on hand: Enough cake batter to make a two-layer round cake. You can choose to bake any flavor of cake you wish, in a light or a dark color. You could even choose to bake one layer of each. This is the base of your cell. A cupcake top, a large piece of fruit, or a round cookie cutter to create the shape of your nucleus in the center of your cake. At least two different colors of frosting. You could choose to use two different flavors (such as lemon and raspberry) or you could add food coloring to a light-colored frosting to create a second color. You should use the lighter-colored frosting as your cytoplasm on top of the cake, and the darker color as the cell membrane to the sides of your cake. Fondant and food coloring. If you wish to sculpt your own cell components out of fondant, you can purchase fondant in a store along with various kinds of food coloring to differentiate your organelles from one another. It is also possible to make your own fondant. If you do not wish to sculpt your cell components, you can choose appropriately shaped fruit, candy, and nuts to represent them instead. Small, round candies or fruits. These will represent your lysosomes. For example, M&Ms, Skittles, gumballs, or grapes might serve as effective lysosomes. Oval- or rod-shaped candies, nuts, or fruits. These will represent your mitochondria. Raisins, craisins, Mike & Ike's, almonds, or dried apricots would all work, depending on the size of your model. Slightly larger, irregular candies, nuts, or fruits. These will represent your vacuoles. Small banana slices, jawbreakers, brazil nuts, or gummy rings are good options. Very small, grain-shaped candies or sprinkles. These will represent your ribosomes, so they must be considerably smaller than your other cell components. Some good possibilities could include: Tic-Tacs, Nerds, and various kinds of sprinkles or funfetti. A round, dense piece of candy. This will represent your centrosome. Gumdrops or Gushers could make an effective centrosome. Long, stringy pieces of candy. These will represent the endoplasmic reticulum. If you want to be very precise, you can buy one type that is coated in sugar (to represent the rough endoplasmic reticulum) and one type that is smooth (to represent the smooth endoplasmic reticulum). Some excellent options include gummy worms, sour worms, and various kinds of licorice rope. Long, flat candy or fruit roll-up. When you fold up a long, flat piece of candy or fruit snack, you will have an excellent representation of Golgi bodies. Try bubblegum tape, fruit roll-ups, or other kinds of fruit leather to create this organelle.
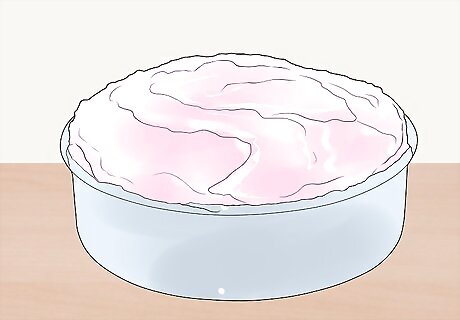
Bake your cakes. Using round cake tins, bake your cake mix according to package instructions. You are also free to use your own from-scratch cake recipe if you like: just be sure to make enough cake batter for two round cake layers.
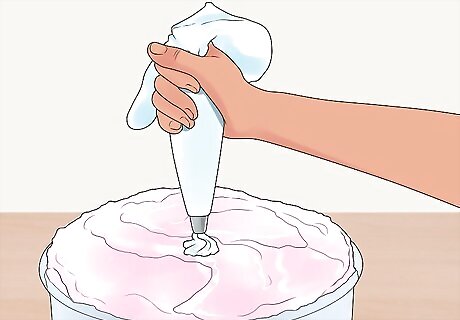
Frost your cakes once they are cool. After your cakes are fully cooked and cooled, you can begin to ice them. Add a thin layer of icing (of any color) on top of the bottom cake layer. Then place the top layer of cake on top of the bottom layer, taking care to make sure the sides are even. Then ice the top of the cake with the light color of icing. This will represent your cytoplasm. Ice the sides of the cake with the darker icing. This will represent your cell membrane.
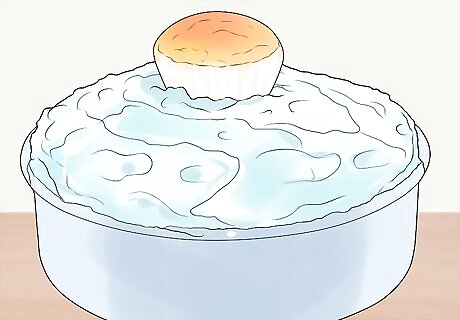
Decide how you would like to represent a nucleus. There are several ways you could place a nucleus on your cell cake. You could cut the top off of a cupcake and place it in the center of your cake. You could use a piece of round fruit--such as an apricot or plum--that has been cut in half. You could also cut out a round, cookie-sized piece from the top layer of your cake, exposing the bottom cake layer. Any of these methods would serve as an excellent nucleus. Just make sure that the nucleus is round and centered on top of your cake.
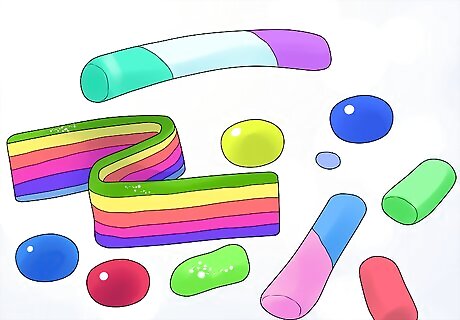
Color and sculpt your fondant. Fondant is an edible, sculptable substance that many cake decorators use to shape smooth, complicated components. If you would like to sculpt your own cell parts, divide up your fondant into at least seven portions. Color each portion of fondant a different shade using your food coloring. Use your hands to shape each individual cell component, including: Small, round lysosomes Tiny, granular ribosomes Long, thin endoplasmic reticulum Round, dense centrosomes A flat, circular stack of Golgi bodies Rod-shaped mitochondria Asymmetrical, hollow vacuoles
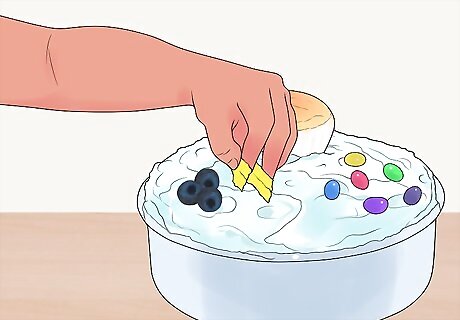
Place your organelles and cell parts on top of the cake. At this point, you will have all of your cell components on hand, whether they are sculpted out of fondant or store-bought candy and nuts. Arrange them on top of your cake in a way that matches your drawn diagram. Pat yourself on the back for a job well done!
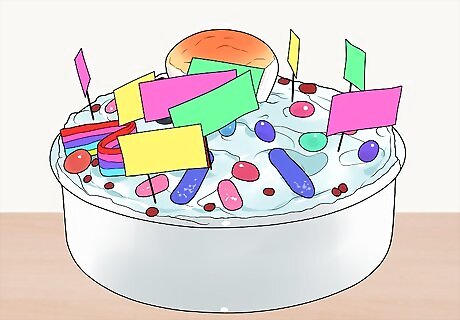
Label cell parts if necessary. If you are required to label your cell components, attach a small paper flag with the cell part's name to a toothpick and insert it into the appropriate spot on the cake. That way everybody will know which types of candy (or fondant shape) is associated with which cell part.
Building a Non-Edible Animal Cell Model Out of Common Household Materials
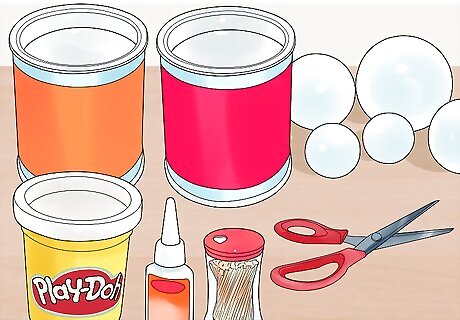
Purchase your supplies. There are many different ways for you to build an animal cell model out of common, inexpensive materials. Take some time to consider what supplies you already have around the house that might work. In general, some supplies you will require include: Modeling clay or play-doh in many different colors Styrofoam balls of varying sizes Several colors of paint Glue Toothpicks Scissors and/or a sharp knife Pipe cleaners Construction paper Small, round objects such as buttons, dry noodles, beads, pieces of cardboard or foamboard, glitter/confetti, or small pieces of plastic
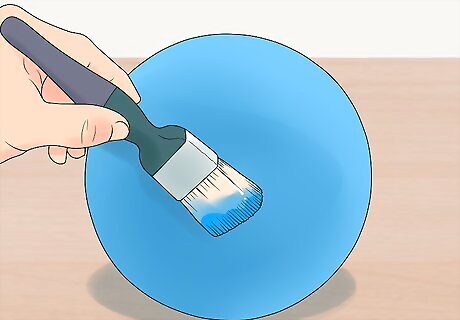
Use a solid, spherical object as the base of the cell. A large Styrofoam ball is probably the best option for you to use as your cell base. However, any other spherical object that is not hollow and that can be cut with a knife or scissors could work, such as a large ball of soft clay. If the ball is not yet colored, paint the outside of the ball any color you wish. You could also use your favorite color of play-doh or modeling clay to coat the outside of the ball in a solid color.
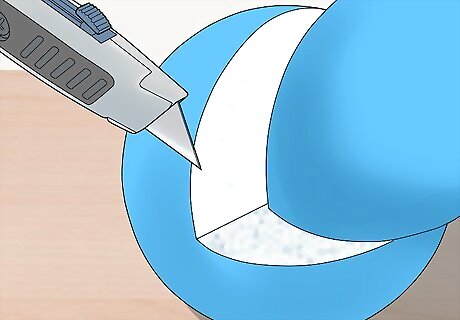
Cut away 1/4 of the ball. Using a sharp knife, cut away one-quarter of the ball. Do this by marking the top of the ball with a pencil. Then cut through that top point until your knife has reached the very center of the ball. Remove the knife. Then turn the ball exactly 90 degrees and make another cut into the center of the ball. This should allow you to remove a perfect 90-degree chunk from the ball. This will allow you to represent the internal workings of the cell in the form of a cross-section.
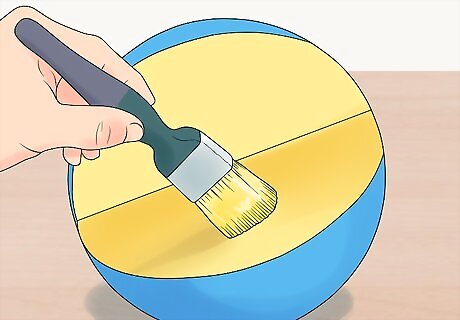
Paint the newly-exposed cross-section of the ball a different color. The internal parts of the ball should be painted a different color. This will represent your cytoplasm. You can paint the cytoplasm any color you wish, though a lighter color will allow your cell parts to show up more clearly.
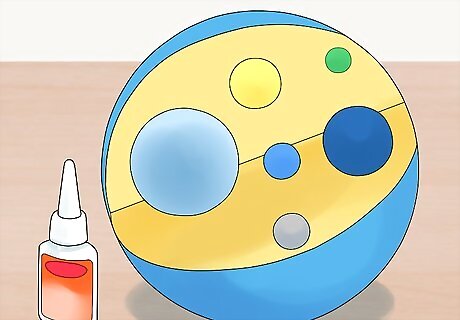
Attach your cell components with glue or toothpicks according to your diagram. Be creative about what common household objects can represent different cell components. If you have trouble finding an object that resembles an organelle, you can create your own using play-doh or modeling clay. Attach these cell components to the cross-section of your cell using glue or toothpicks, depending on the texture of the material. Soft materials such as styrofoam or clay should be attached with toothpicks; hard, slick material such as plastic should be attached with glue. Always refer to your original diagram to make sure you are placing everything correctly. A few suggestions for objects you can use in your model include the following: For your nucleus: a small ball of play-doh or clay, a smaller styrofoam ball (cut in half), a ping-pong ball (cut in half), the plastic top of a large milk jug, or a plastic egg For your endoplasmic reticulum: string, twine, pipe cleaners, rubber cords, or bungee cord For your Golgi bodies: a small stack of cardboard circles glued together, a folded piece of ribbon Ribosomes: confetti, glitter, dry rice Lysosomes: buttons, small plastic circles, small paper or cardboard circles, small clay balls Mitochondria: dry macaroni noodles, oval-shaped buttons or toggles, almond-shaped beads, dry beans Vacuoles: glass marbles, hollow rubber balls cut in half, bottle caps, small cut-up pieces of a plastic bag
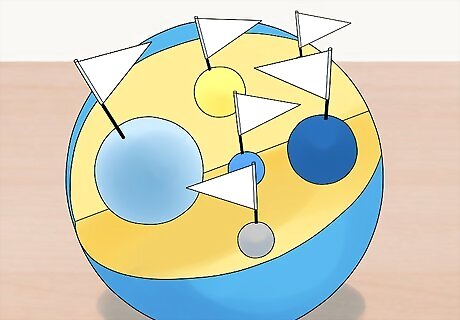
Label your cell components with toothpick flags. For each cell component (nucleus, lysosome, mitochondria, etc.), create a toothpick flag by gluing a small, triangular piece of construction paper to a toothpick. Label each cell component clearly and correctly. Then insert these toothpick flags into the open cross-section of your cell model. Now your teachers and classmates will be able to distinguish the parts of your cell model!








Comments
0 comment