
Installing a Light Fixture in the Ceiling
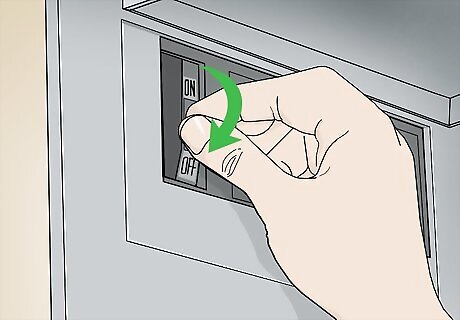
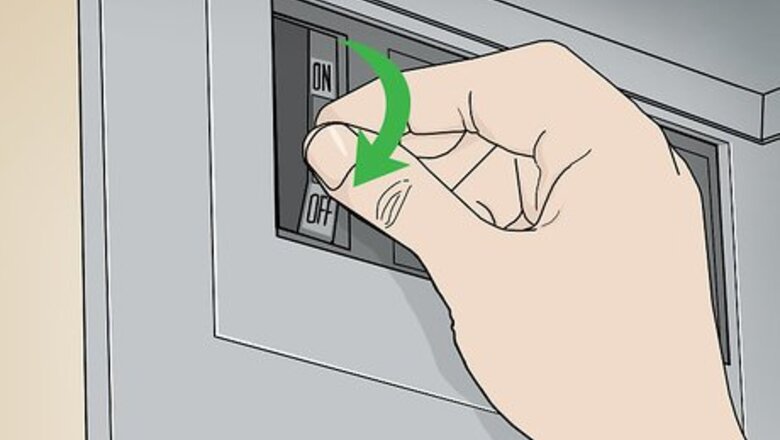
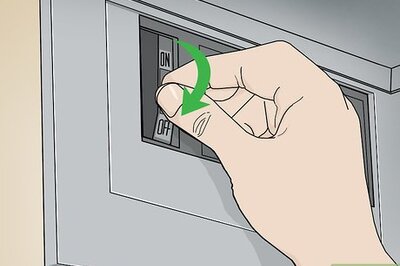
Turn off the circuit breaker that powers the light. Before you do anything else, you need to turn off the circuit breaker. If you aren’t sure which breaker turns off the light, turn off the main breaker and use natural light or a headlamp to complete this project.
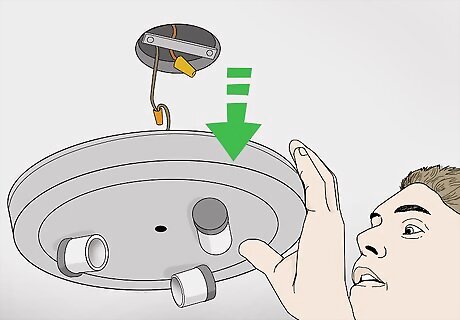
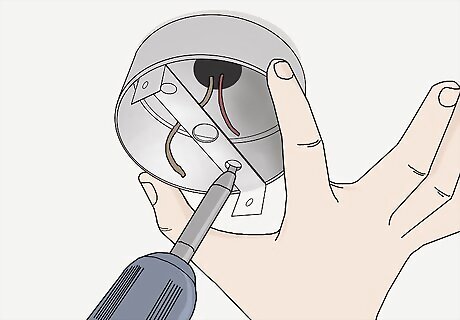
Remove the old fixture, if applicable. Use a screwdriver to remove the screws, or an impact driver with a hex-shaft to remove the nuts, that secure the canopy (the dome-shaped cover) to the ceiling. Then, use a screwdriver to remove the screws that secure the crossbar to the electrical box. Disconnect the wires on the fixture from the wires in the ceiling by removing the wire connectors and untwisting the wires. Carefully lower the old fixture to the floor. EXPERT TIP Jeff Huynh Jeff Huynh Professional Handyman Jeff Huynh is the owner of Moseybolt, a full service solution in home services, renovations, and repair in the Greater Seattle area. He has over five years of handyman experience. He has a BS in Business Administration from the San Francisco State University and his Certificate in Industrial Electronics Technology from North Seattle College. Jeff Huynh Jeff Huynh Professional Handyman Make sure your light will be secure. According to Jeff Huynh, the general manager of Handyman Rescue Team: "If you remove your light fixture and you find a metal or plastic box, wiggle the box to test the screws. If it's not secure, you'll need to replace it. If it seems sturdy and sound, you can install a light fixture that weighs up to about 15 lbs (6.8 kg). However, if you're hanging a heavier fixture like a chandelier, you'll need to install a beam into the rafters above the ceiling and hang the box and the light from that."
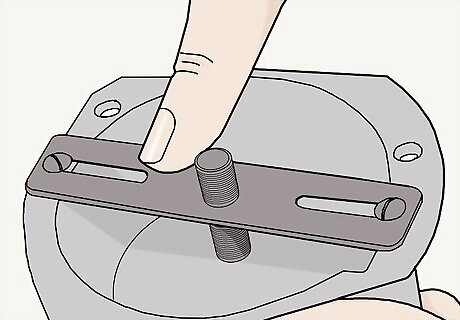
Assemble the mounting strap for the new fixture. Follow the instructions that came with the new fixture. Generally, you’ll need to line up the crossbar with the back of the canopy and thread the pipe or screws through the canopy. Only ⁄4 to ⁄2 inch (0.64 to 1.27 cm) of the pipe should extend past the canopy, so adjust the screws or pipe until that much is showing. Tighten the nuts to hold the screws or pipe in place.
Attach the crossbar to the electrical box. Ask someone to hold the fixture while you do this. First, make sure all the wires are on 1 side of the crossbar. Then, use a screwdriver to screw the crossbar to the electrical box on the ceiling. It should go across the center of the hole and be screwed in on either side.
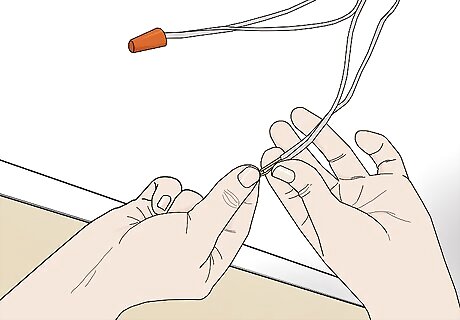
Connect the like wires to each other. You should connect the “hot” wire in the fixture to the “hot” wire in the ceiling, and the neutral wire in the fixture to the neutral wire in the ceiling. Generally, the hot wire is black or red and the neutral wire is white. Use wire connectors to connect the like wires to each other. Simply twist the exposed parts of the wires together, then screw the connector onto the wires.
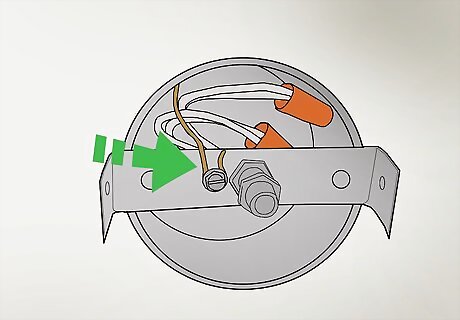
Wrap the ground wire clockwise around the ground screw. There is a ground screw on the crossbar that you installed, and it can usually be found just to 1 side of the center of the crossbar. Find the ground wire, which is usually green or copper. Wrap the ground wire clockwise around the ground screw to tighten it.
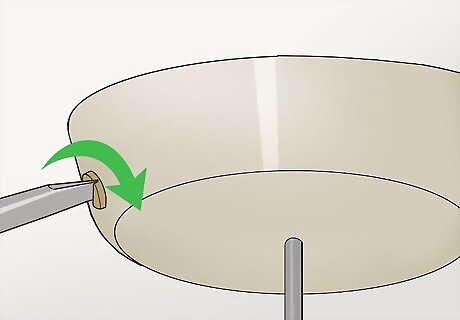
Install the canopy. Tuck all of the wires and wire connectors into the electrical box. Then, use a screwdriver or impact driver to secure the canopy to the ceiling. You can adjust the threaded rod or screws, if necessary, to make sure the canopy fits securely.
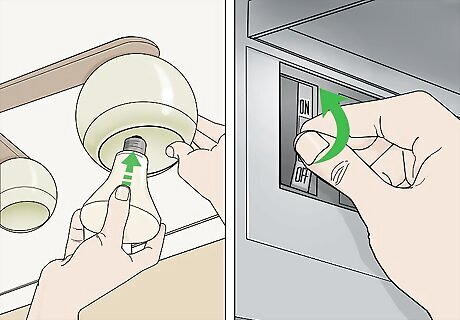
Add the light bulbs and turn the power back on. If necessary, place light bulbs into the sockets of the fixture. Make sure they are rated for the type of fixture you purchased. Then, flip the circuit breaker to turn the power back on.
Hanging a Swag Light from a Ceiling Hook
Purchase a swag light and cord kit. Look for a “swag” light, which is one that is hung from the ceiling and plugged into a wall. This means you don’t have to do any electrical work! The lamp and cord kit should contain the light and shade, the cord with a plug, and anchors or hooks to install the light. You can find swag lamps and cord kits at home improvement and home decorating stores as well as online.
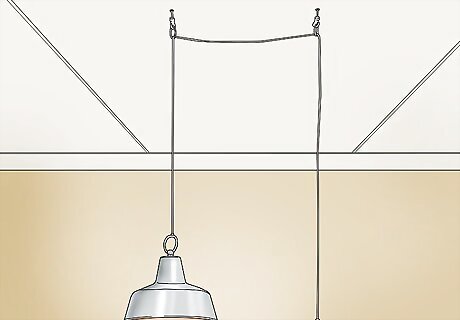
Ensure the cord will reach an outlet. Before you add hooks or anchors, think about where you want the light to go. Determine if the cord is long enough to reach an outlet once you hang the light and run the cord along the ceiling, then down a corner where 2 of your walls meet. If it’s not, consider hanging the light somewhere else or adding an extension cord. Running the cord down a corner, rather than the middle of a wall, makes for a more attractive project.
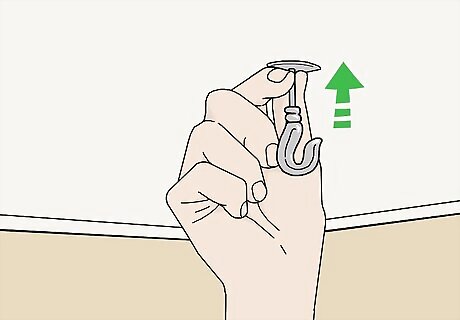
Install 2 ceiling hooks or a ceiling hook and an anchor. If the light you plan to hang is heavy, such as more than 5 pounds (2.3 kg), use an anchor rather than a hook to secure it to the ceiling. Situate this anchor or hook where you want the light to hang from and screw it into the ceiling. The other hook should go in the corner of the room in which you plan to run the cord down to the outlet.
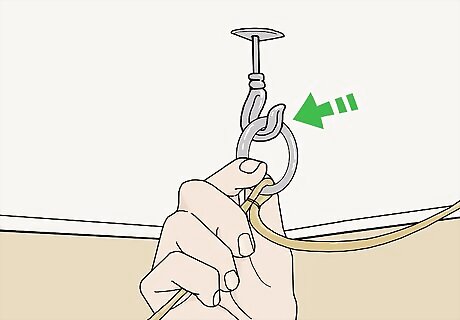
Hang the light from the hook or anchor. Remove all the packaging and screw the bulb into the socket, if necessary. Secure the lamp shade over the bulb and connect the cord, if applicable. Then, hang the cord from the hook or anchor you installed so the lamp sits at the desired height.

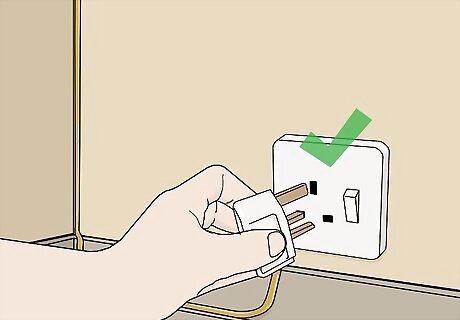
Plug the light in, then hide the cords with cord covers if desired. Once you’ve gotten your light hung up, all that’s left to do is plug it in! If you want a cleaner look, consider covering the cord with cord covers. These are plastic tubes that conceal the cords and help them stay in place. Simply slip the cord into the tube through the slit in the back. Then, peel off the adhesive backing and stick the cover to the wall or ceiling.


Comments
0 comment