views
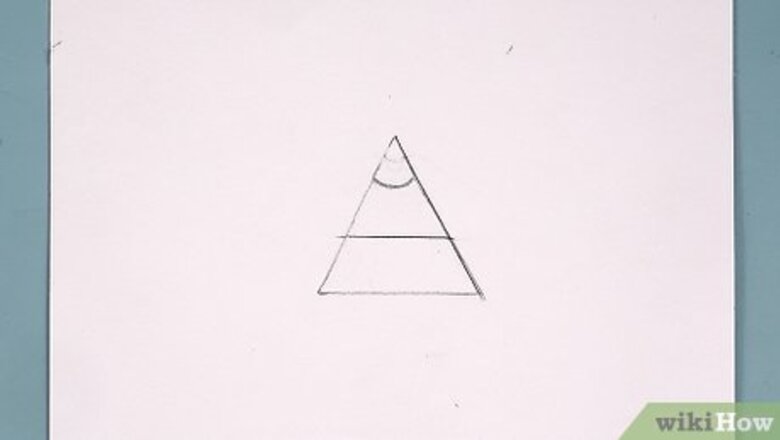
- Draw a long isosceles triangle. Use the bottom line of the triangle as the guide for the bottom lip and a U-shape inside the top point for the cupid’s bow.
- Draw three circles in a triangle formation. Draw the line between the top lip and the bottom lip between the three triangles and draw the lips around the circles.
- Go over the drawing with a shading pencil at an angle to get a smooth, even coat of graphite across the lips and help them stand out from the page.
Drawing Lips Using a Triangle
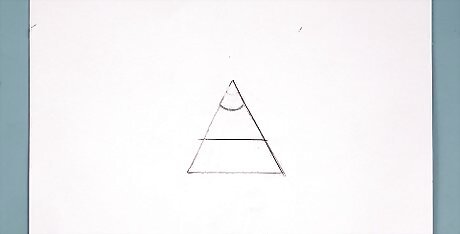
Draw a long isosceles triangle, a u-shape, and a straight horizontal line. Start by drawing a triangle with two lines of the same length. Draw a soft U-shape part way down, inside the top point of the triangle. Draw a straight line horizontally between the U-shape and the bottom of the triangle. The length of the horizontal line is up to you—the longer the line is, the wider the lips will be. The shorter the line is, the more plump and circular your lips will look. You can also start from a horizontal line without the triangle—just mark out the corners of the mouth and draw the U-shape where you’d like the top lip to be.
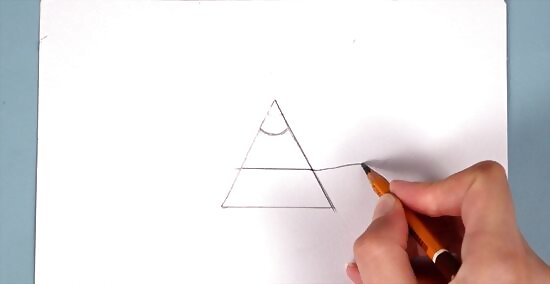
Connect the ends of the horizontal line with the U-shape to create a bow. To make the top lip, curve the lines slowly upward from the ends of the horizontal line. Connect the lines with the U-shape inside the triangle to create a shape that looks like a cupid’s bow.
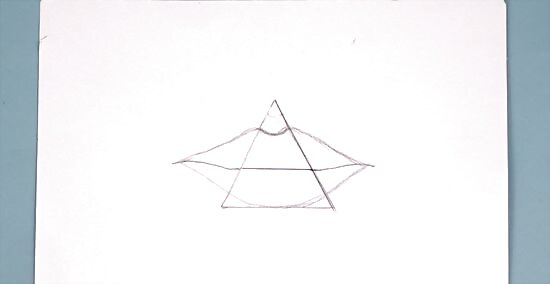
Draw a curved line that meets the base of the triangle to create the bottom lip. Sketch out a curved line that goes no further than the base of the triangle. Feather the bottom lip line so that it doesn’t completely meet the edges of the horizontal line. Erase the triangle construction lines. If you want to make the mouth slightly open and draw in teeth, draw the opening of the mouth by using the horizontal line as a guide for the top of the bottom lip. Then, sketch out the teeth inside. If you want your mouth to have dark lipstick or if you want full, defined lips that curve out, continue drawing the bottom line out to the ends of the horizontal line.
Drawing Lips Using Small Circles
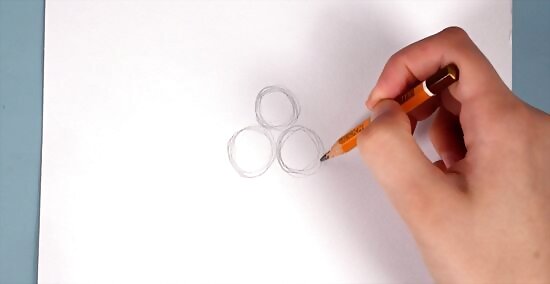
Draw three circles in a triangle formation. Start by drawing a circle—whatever size you choose determines the thickness and fullness of your lip. Draw two other circles equal in size below the first circle to create a triangle shape. For thinner lips, draw two small circles, and two slightly larger circles directly below them at a slight angle. Optionally, draw a triangle around the three circles if you’d like an additional guide.
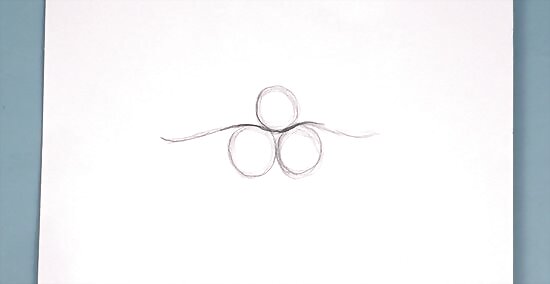
Use the bottom circles as a guide to create the line between the two lips. Draw the middle line that separates the upper and lower lip so that it curves around the tops of the two lower circles and near the bottom of the upper circle. Connect the middle line with the tapered corners of the mouth. Erase the circle guides. Feel free to play around with the shape of the lips by adjusting how sharply the middle line wraps around the guide circles until you get the shape you want.
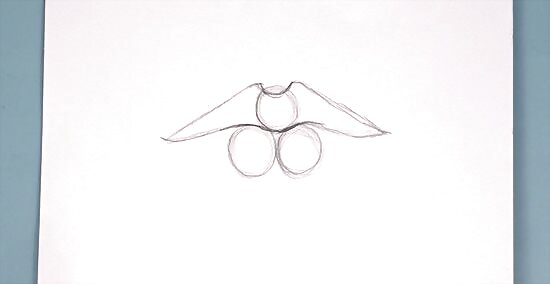
Draw a U-shape above the top circle to and draw out to create the top lip. Draw the U-shape so that it peeks above the upper curved line a little bit to create a natural-looking cupid’s bow. Continue the edges of the U-shape to create curved, long lines on either side. This line will be the top lip. How far out the curved lines go out is up to you—the longer you draw the lines, the longer your lips will be. The shorter they are, the more plump and round they will be.
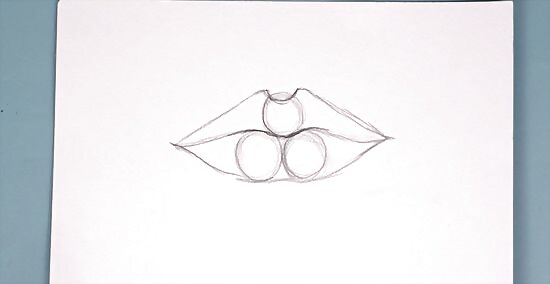
Draw a curved line below the bottom two circles to create the bottom lip. With your pencil, draw a curved line with center of the line touching the bottom edge of the lower circles. Feather out the ends of the bottom line so that they almost meet the ends of the upper line. If you want a more defined, dark lip look, you can extend the edges of the bottom line so that they completely meet the top line. If you don’t feel like your drawings look as good as you’d like them to, you can always improve your drawing skills by practicing these methods more or by finding a drawing teacher.
Shading the Lips
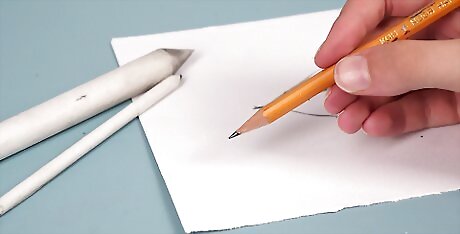
Use the side of your pencil to shade and blend the area inside the lips. Hold your 5B or 6B grade shading pencil at an angle against the page with your index finger near the tip to get thick, smooth lines. Use a blending stump or wrap a soft tissue around your finger to gently blend the graphite out so that the shading is even across the lips—contouring will come next. You can always do a test scribble off to the side of the drawing to make sure your lines are even, thick, and smooth. If the graphite in your pencil doesn’t give you thick enough lines, consider carefully using a knife or box cutter to shave away some of the wood on the side of the pencil. Shading the lips before doing any contouring can help your lips stand out from the page. Make this shading a little darker if you want your lips to be darker overall.
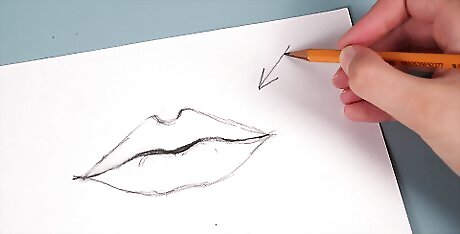
Decide on the direction you’d like the light to come from to shade your lips. The direction the light is in your drawing determines where your highlights and the darkest parts of your shading will be. For example, if you’d like the light to come from the top left, sketch a feint outline on the top left edge of the top lip and in the right middle area of the bottom lip. It might be helpful to think about how light would hit the lips from the side—if a light comes from above, the tops of the curves of the lips will be lighter while the areas below the bottom lip and where the lips meet will be darker. Keep in mind that the bottom lip is almost always slightly larger than the top lip—make your highlights on the bottom lip a little more pronounced.
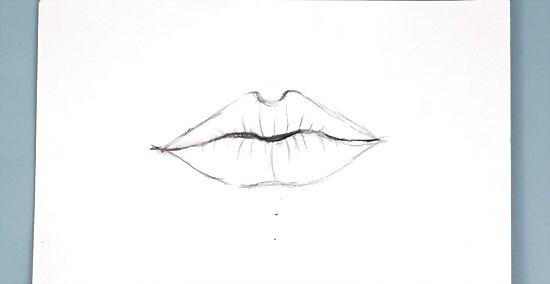
Using the tip of a sharp pencil, draw semi-circular lines for the lip wrinkles. Use a mechanical pencil with 0.5 mm lead or #2 HB pencil to draw thin semi-circular lip wrinkle lines wrapping around the top and bottom lips. As you work towards the center of the lips, the wrinkle lines should become more straight. As you work towards the other side of the lips, draw the semi-circle shapes so that they curve in the opposite direction.
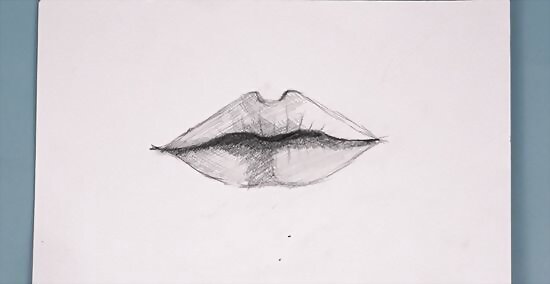
Shade the areas of both lips where the shadows should be. Your highlights should be the brightest part of the lips—as you go out from the highlights, the lips should be shaded darker. Use the side of your shading pencil to gently darken the edges of the lips so that it creates a gradient to the highlights. If you’re using a mechanical or #2 HB pencil, you may have to continue shading longer to get the lips as dark as you’d like them to be.
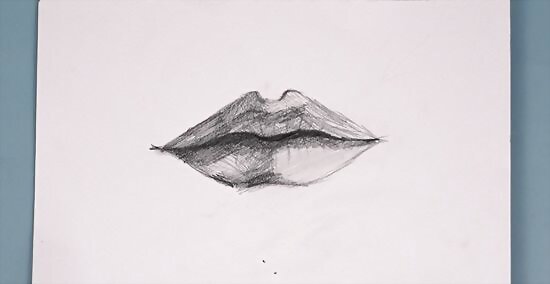
Shade the top portion of the bottom lip and the bottom of the top lip. Light naturally casts a shadow between the two lips. To create this effect, use your pencil to darken the middle line between the two lips and gently shade lighter as you move upward and downward. Use the tip of a blending stump or a rolled tissue to blend the shadow out. If you added teeth, draw a soft shadow to the top of the top teeth from the upper lip.
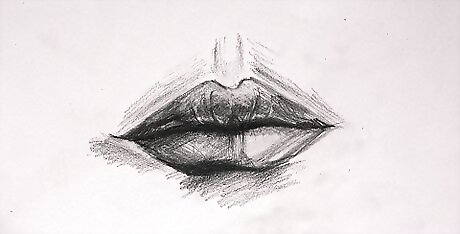
Brighten up your highlights using a moldable eraser. Mold your eraser into a pointed flat shape to erase along the wrinkles on top of your highlights. Do the same to the top lip, and lighten the U-shaped arch so that the lips look more natural. Erase a couple of extra spots below your highlighted spaces on the bottom lip to make it look more curved and plump. If you’d like, you can add a shadow to the bottom lip on the opposite side as your light source. It can be as light or as dark as you’d like it to be. Use a tissue or blending stick to blend the graphite out.






Comments
0 comment