views
Prep time (Venison Steaks): 20 minutes
Cook time: 6-12 minutes
Total time (sans marinade): 30 minutes
Preparing Venison

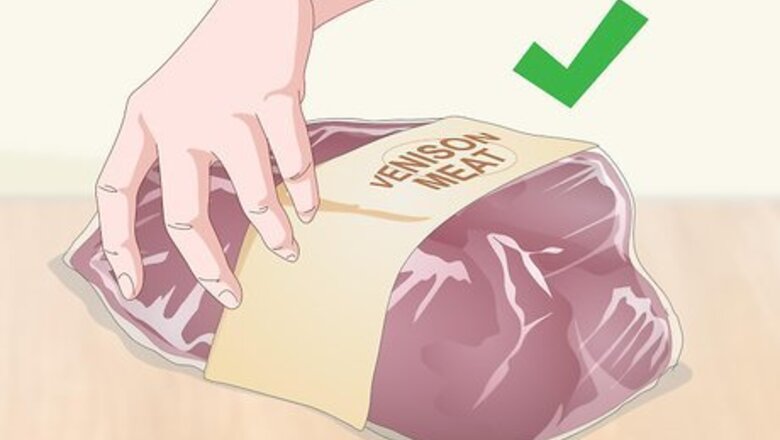
Use only venison that has been field-dressed correctly. If you shoot the deer yourself, you should remove internal organs shortly after taking down the animal in order to prevent the meat from spoiling. Choose only deer meat that was cut, skinned, wrapped, and refrigerated by an experienced hunter or a professional meat butcher. Venison can also be aged by hanging the deer carcass in a cold setting for a period of 10-14 days after being dressed out. This allows the meat to dry out some, reducing the gaminess and making the meat more palatable.
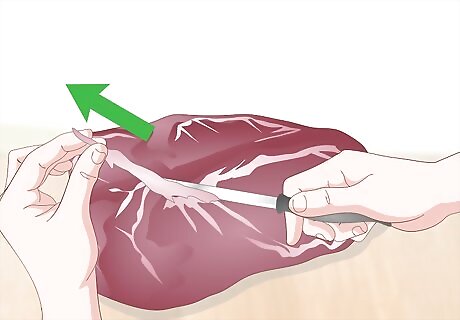
Trim away all visible fat. Unlike beef fat, which imbues the meat with flavor and helps to keep the meat moist, venison fat does not taste good, and will do nothing for the texture of the meat. Using a sharp knife, trim away the connective tissue and fat from your cuts of venison before attempting to cook it. You can discard deer fat, though it's also commonly rendered into tallow, and makes for excellent soaps, and suets for feeding birds. "Silverskin" is a thin membrane that you'll find on many recently-processed cuts of venison, which you'll want to remove if it hasn't been already. It can be somewhat tedious, but peeling it off the meat as much as possible will improve the flavor and also make it easier to cook.
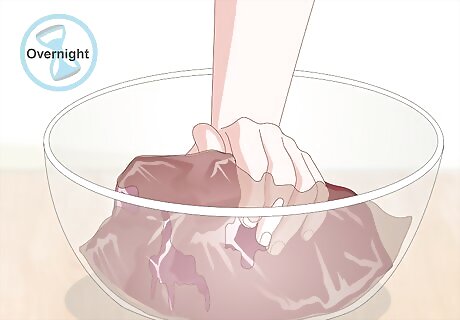
Marinate the meat overnight before cooking it. Venison has a strong, gamey flavor that you can highlight or mask, depending on the cut and what you hope to do with it. Learning a bit about how to match a cut to a marinade will help you tenderize the meat and add flavor. The best way to marinade venison is in a large gallon Ziplock bag in the refrigerator overnight. Use thinner cuts with marinade and brine larger cuts. At most, an overnight marinade will only penetrate about an 1/8th on an inch into the meat, making marinading a large roast kind of pointless. Use thin strips of flank or backstrap to marinade to get the most out of the process. For a simple marinade, use Italian salad dressing, or make your own with a half-cup each of vinegar and olive oil, a clove of minced garlic, and a teaspoon each of brown mustard and Italian seasoning (or oregano and basil). For a BBQ marinade, sautee half a finely-chopped yellow onion and 3-4 cloves of minced garlic in about 5 tablespoons (74 ml) of butter until translucent. To this, add two cups of tomato sauce (or a cup of ketchup), a half cup each of apple cider, apple cider vinegar, and brown sugar, and two tablespoons of chili powder. If you're not a fan of the "gaminess" of venison, use a citrus-based marinade. Citrus tends to mask the strong flavor of venison, and can make it more palatable to children and less adventurous eaters. Try marinading a half-cup of lime juice mixed with a half-cup of olive oil, half a cup of chopped cilantro, a minced green chile, a teaspoon of ground cumin, and a shot of tequila.

Substitute the removed deer fat with another fat source. Although the deer's own fat will affect the flavor of the venison adversely, venison lacks the "marbling" needed to keep it moist and tender, making it very easy to dry it out. Because of this, many experienced venison cooks will "bard" or "lard" the meat with another fat source, such as butter, margarine, oil, or bacon fat. Barding is done by adding fat to the outside of the meat. This method works best on the grill or in the skillet, because it involves essentially basting the meat with a fat source. After turning the meat over, you can brush some melted butter or olive oil onto the browned side of the meat to imbue flavor and moisture. Larding is done by inserting fat into the meat, through little cuts. This method works well for larger cuts and roasts that you cook in the oven, and works especially well with other meats like ham or bacon. Use the tip of a chef's knife to make incisions into the thick parts of your venison roast, then push small cuts of bacon, or fatty pork, into the slits. As it cooks, the fat will help to keep the meat moist.
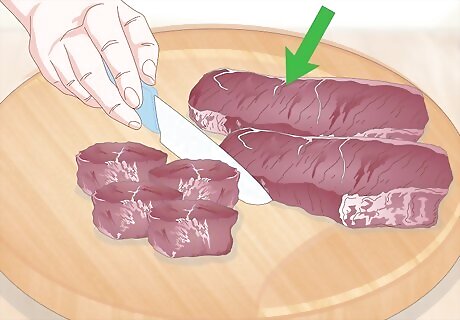
Match the cut to the cooking method. Different cuts are more appropriate for different cooking methods. Some are great cooked up as steaks, while others make better stew meats or candidates for venison sausage. Whether you have a specific dish in mind and want to get the right venison for the job, or you want to find the best vehicle for your cuts, you can point yourself in the right direction: Backstraps or tenderloin are the tenderest and usually the most desirable cut, and can be cooked whole, cut into individual steaks, or cut into smaller chunks for stews and stir-frys. Tenderloin can be served rare-medium. Roasts are best from the lower hams, which should be braised or stewed at a low temperature for a long period of time to ensure tenderness. Steaks are best from the top half of the hams, which are the most versatile section of venison. While it's initially a bit tough, after being properly-tenderized, this meat can be used for a variety of purposes. Stew meat should come from the lower ribs, the belly, and the neck. If you've got a meat grinder, this also makes excellent ground venison or venison sausage.
Cooking Venison Steaks
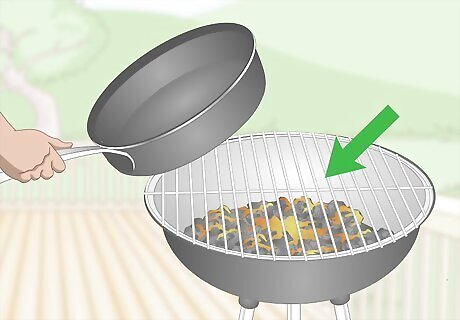
Grill the steak or cook it in a skillet. The best ways to cook venison steaks are on a hot grill, or in a very hot skillet on the stove. Both methods afford the ability to sear the meat and cook it to the proper internal temperature, essential for a venison steak cooked properly. Both gas grills and charcoal grills are perfectly appropriate, if you want to imbue the meat with that smokey flavor associated with grilling. Heat the coals for 30 minutes before grilling, or turn the gas grill onto medium. A good cast-iron skillet is the perfect way to cook a venison steak on the stove. Heat the pan on medium-high heat, and add a tablespoon or two of olive oil before cooking. The pan needs to be hot before adding the meat, to get the right sear on the outside. Wait until the oil is just about to smoke to add the steak.

Bring the steak up to room temperature before cooking. 20-30 minutes before cooking your venison steak, it's important to take it out of the refrigerator and out of any marinade that you've used to bring the meat up to room temperature, ensuring that the meat is at an even temperature throughout. If you add a steak to a hot pan or grill grate just out of the fridge, the outside will heat while the inside will remain cold, making it very difficult to cook to the proper internal temperature without burning the outside black. Cooking room-temperature meat is much easier and more efficient, yielding a better finished product.

Season both sides of the steak with salt and pepper. Regardless of whether or not you've used a marinade, it's a good idea to sprinkle fresh-cracked pepper and salt on the outside of both sides of the steak, just before it goes on the heat. Salting the meat too early can draw some of the moisture out, making it tough, so it's better to wait until just before the meat goes onto the grill.
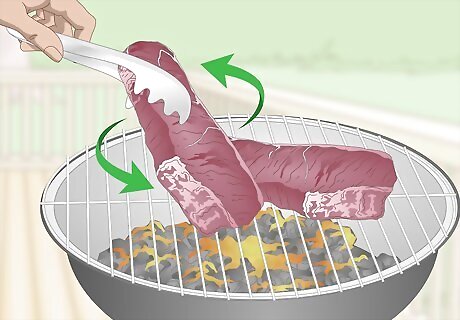
Sear both sides. A steak is best cooked at medium-high heat, so add your steak to a skillet just as the oil smokes, or to the grill over the hottest part of the coals. You should hear a distinctive sizzle when adding the steak, and if you don't, you should remove the meat right away and wait until it gets hotter. The meat should be cooked 3-4 minutes on each side to get a proper crust on the outside, then moved to a cooler part of the grill, or the skillet should be turned down. If you're cooking your steak in a cast-iron skillet, remember that your skillet will hold the temperature for a long time and stay hot, so after giving it a sear, it's probably ok to turn the heat off completely to avoid scorching the outside of the steak. The length of the sear will depend on the thickness of your steak. Even steaks an more than an inch thick should only be in the pan for about 10-12 minutes at the most, though. Keep a close eye on the meat and check the underside to make sure it's not over-cooking. Venison is done at an internal temperature of 130 °F (54 °C). At 150, it will start to toughen up some. Steaks more than 2-inches thick will probably need a cooler part of the grill to cook for slightly longer, or will need to have the heat turned down on the skillet to cook to the proper temperature.

Bard the meat with butter. If you've ever wondered why your steaks at home don't turn out quite so well as steaks ordered at a restaurant, the answer is butter. After turning the meat over once, it's a good idea to brush a little butter onto the top of the meat to help keep it moist. If you're cooking the steak in the skillet, add a pat (no more than a tablespoon or so) into the pan to melt, tilting the skillet so the butter runs toward the steak.
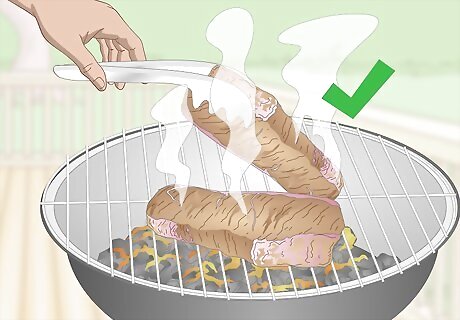
Cook the steak to rare-medium. You won't have to fiddle with the steak much, turning it once and cooking it roughly 3-4 minutes on each side. Because overcooking venison is very easy and can happen very quickly, you should periodically feel the done-ness of the meat with your finger to recognize when it's ready to come off the heat and rest before eating. For a good short-hand to steak done-ness, touch your fingertip to your thumb, and with your other hand feel the fatty part of your thumb, where it meets your palm. Meat cooked rare should offer the same resistance. Meat cooked medium-rare should feel like your thumb meeting your middle finger, medium should feel like your ring finger, and well-done like your pinkie. I had never eaten deer meat. "My son-in-law shot a deer and gave me some of the deer meat. I had never eaten eat deer meat and this helped me learn how to cook the meat for my family and give a small piece to my dog for treats." - Patricia W. I previously overcooked venison. "After learning how to properly cook venison our steaks were pink and tender; I served the venison with a blackcurrant jus plus sautéed potatoes and green beans. The tartness of the blackcurrant jus worked well." - Elizabeth E. Have a story our readers should hear? Share it with 1 billion+ annual wikiHow users. Tell us your story here.

Rest the steak for 5-7 minutes. Let the steak rest on a plate or a cutting board for at least five minutes before slicing into and serving. This will allow the muscle fibers to cool down some, so the meat will retain its juices, rather than spilling them out onto the plate. The meat will also continue cooking gently, if you cover it at this point. You can serve your steaks whole, or slice them against the grain into generous-sized slices.
Cooking Roast Venison

Lard the roast with aromatics and bacon. After cleaning up your roast by trimming it of fat, silverskin, and connective tissue, make several slits into the meat, about an inch wide and two inches deep. Make 10 or 12 cuts all over the surface of the meat. Stuffing the roast with aromatic vegetables and a fat source, like bacon, will help to inject flavor and moisture into the meat. For aromatics, use whole cloves of garlic, sprigs of rosemary, thyme, or sage. For adding fat, chopped bacon makes the best addition, but you could also use cold pats of butter.
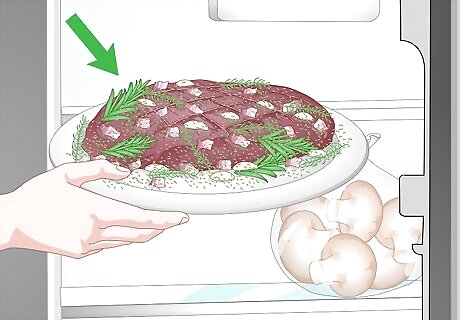
Coat the roast with dried herbs and refrigerate for several hours. Dry rubs are excellent for venison roasts. You can use a commercial dry rub or mix up your own in a variety of flavors. Use what tastes you like and experiment with different dry rubs–it's awfully hard to screw up. Simply take a handful of your dry rub spice mixture and rub it into the outside of the meat. For a basic dry rub, mix up equal portions of oregano, basil, parsley, paprika, onion powder, salt and pepper. For a whole-seed dry rub, toast up a quarter-cup each of fennel seeds, coriander seeds, and cumin seeds in a dry skillet. When they become fragrant, remove them from the pan and crack them with the flat side of a kitchen knife. Mix in dried chili powder, paprika, and brown sugar. Alternatively, you can also brine roasts in a salt brine overnight, which many venison-enthusiasts swear by. Salt-brines can help soften the flavor of the meat and tenderize it. Either way, let the meat refrigerate overnight, or for several hours before baking.
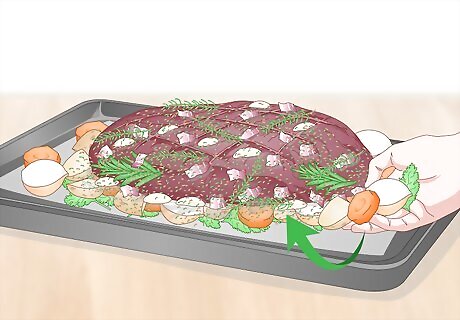
Bake the roast in baking pan on a bed of vegetables. Lining the bottom of your baking pan with vegetables will help to keep the meat off the bottom, resulting in a more even distribution of heat, as well as adding flavor and fragrance to the dish. The most-common vegetables for the job are onions, carrots, potatoes, and celery. After rinsing your vegetables, chop them into big pieces–doesn't need to be pretty. You won't need to season the vegetables, since the meat juices will season the vegetables as they cook. Because venison has such a tendency to dry out, it's also good to add a little water or water and chicken stock to the bottom of the pan. This will help to keep the interior of the oven moist, creating a kind of hot climate that will keep the meat from drying out.

Cover and roast at 325 F for about 3 hours. Set the meat on the bed of vegetables and cover tightly with tin foil. Place into the oven and bake for around three hours, basting periodically with the juices from the bottom of the pan. If you're using a meat thermometer, you can remove the venison when it's reached an internal temperature between 130 F and 150 F, depending on how "done" you like your meat. Any higher and it'll start to toughen. Remove the roast from the pan, but let the meat rest covered for about 10 or 15 minutes before cutting into slices to serve. You can strain the pan drippings to make a nice gravy to serve with the venison.
Making Venison Stew
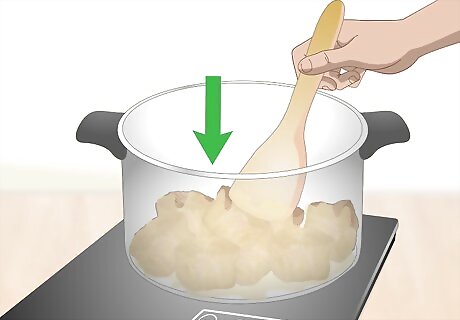
Brown your stew meat. In a heavy-bottomed pan, heat some olive oil and brown your stew meat on all sides, over medium-high heat. You don't need to cook the venison all the way through, and in fact you should avoid cooking it through as much as possible. Rather, you want to create a good char on the outside of the meat to create a layer of flavor, and to build up good color on the bottom of your pan. If brownish stuff builds up, that's a good thing. A good stew can be made with about a pound of good stew meat taken from the ham, neck, or rib section of the venison. It should be cut into bite-sized chunks. To help brown the meat and also thicken the stew you make, it can be good to dust the stew meat with a little bit of white flour, as when starting a roux. You won't need to use much more than a teaspoon or two per pound of meat.
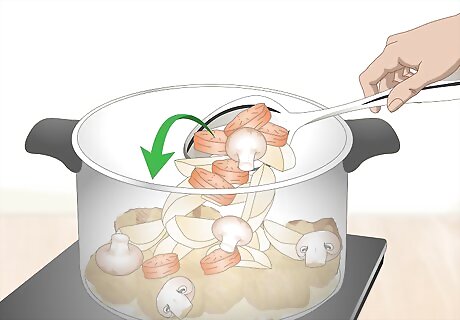
Add vegetables and aromatics. After browning the meat, remove it from the pan and add in the vegetables you'd like to include in the stew, starting with the heartiest and moving to the lightest. You want to add the vegetables that will need the longest time cooking first, to make sure everything cooks at roughly the same time. So, you'd add root vegetables like potato, carrot, or turnips first, and add mushrooms, peas, and fresh basil last. For a basic stew, start by adding two potatoes, chopped into bite-sized pieces, two medium-sized chopped carrots, and a whole small white onion. Turn the heat down to medium and stir until he onion starts to become translucent. Add three or four cloves of minced garlic and continue cooking for a minute or two. When the vegetables start to brown up, it's time to legalize the pan.

Deglaze the pan. The bottom of the pan should now be covered with good color and flavor, but you can only get it up by adding some liquid and stirring vigorously. To deglaze you can use two or three cups of dry red wine, dark beer, or chicken stock, which all pair nicely with venison. If you want, you can use a combination of liquids, or use half water and half of another liquid, to soften the flavor some. After pouring in the liquid, it should bubble up vigorously and then calm down some. Stir the bottom of the up to get up the flavor from the bottom, then season the stew to taste. Dried thyme, salt and pepper would all combine nicely. Return the meat to the pot and turn the temperature back up until the liquid just reaches a boil. Stir periodically to keep the broth moving. When the broth gets to a boil, reduce the heat to low, and cover the pot, removing it to stir periodically.
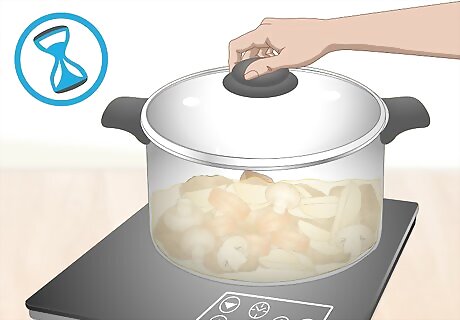
Cover and cook at a low temperature for several hours. Keep the pot covered and cook it for at least an hour, and as many as three or four. Longer cooking time and lower temperature will ensure in very tender and tasty stew meat, making it important that you save enough time to cook it. The meat will technically be "done" after an hour, but it'll be even better after a few, when the proteins get a chance to break down more and the meat becomes fork-tender. If you want to add more vegetables, like mushrooms, or any kind of fresh green vegetables, wait until 10 or 15 minutes before you're ready to eat, or they'll cook down into mush. A sprinkling of fresh-chopped parsley finished a bowl of venison stew nicely. Serve with crusty French bread, or cornbread for a perfect meal.
Making Venison Chili
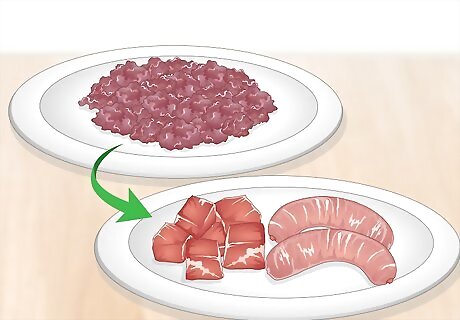
Use ground venison alongside other meats. Ground venison works well for burgers, meat loaves, and as a general alternative to any ground beef recipe, but it's perfectly-suited for chili. Whether you want to make straight-up venison chili, or combine venison with a small amount of stew beef or pork sausage, it's a great base for a hearty chili. A pound should make 8-12 servings. "Chili meat" refers to a specific coarseness of grind, usually somewhat finer than "ground" venison. If you want a finer grind, have your deer processor grind up some chili meat, or purchase your own meat grinder to grind up your own. If you like a more Texas-style chili, stew meat chunks would be more appropriate, and you'll probably want to cook it at a lower temperature for a longer period of time, though the ingredients and the technique will be basically the same.

Brown up the ground venison and onions. Add one or two tablespoons of cooking oil to the bottom of a heavy-bottomed stew pot, and add your ground venison. Using a wooden spoon, stir the meat around as it browns up. Just before it turns dark all over, add one medium chopped yellow onion, a diced red pepper, and three or four cloves of minced garlic to the ground venison.
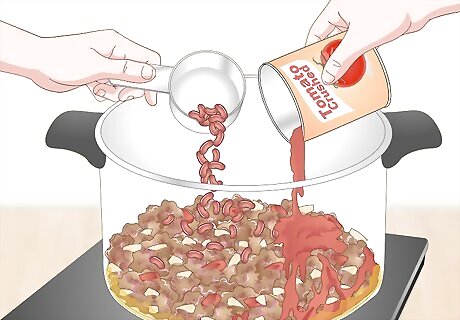
Add beans and crushed tomatoes to the base. As the onions start to brown, it's time to add the beans and the tomatoes. Use a can of drained red kidney beans, or a mixture of red beans, navy beans, and garbanzo beans, if you like. About 12 ounces should be perfect. Use an 18 oz. can of crushed tomatoes, plus a tablespoon of tomato paste to provide the bass for the chili. If you want to use fresh tomatoes, start with about four ripe tomatoes, chopping them roughly and saving all the juices. Keep a close eye and add a little water if the chili needs more moisture added. If beans aren't your thing, follow the chili recipe you like to make. Venison is perfectly amenable to most green chili recipes, or other types of regional chili you might prefer. Use the flavors and seasonings that you like and see if you like it better with venison.
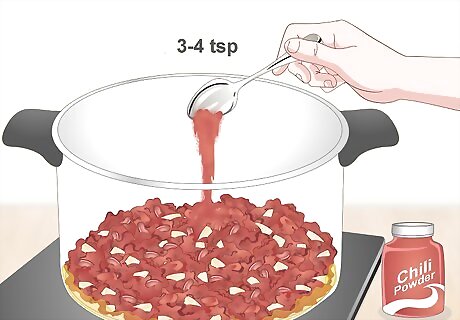
Season with three or four tablespoons of chili powder. Season the chili to your taste. If you like it very strong, you can add more, or stronger chili powder, alongside a teaspoon of cumin, cayenne, and any other spices you like in your chili. If you don't like chili strong, add thyme, cumin, some coriander powder, and other aromatics. Add salt and pepper to taste. To get at that distinctive chili taste, you'll need at least a bit of chili powder. Add a teaspoon at a time. You can always add more later.

Cover and simmer over low heat for at least an hour. Turn the heat to low, pop the lid on, and let the chili simmer gently for a couple hours. The meat should cook in about 30 minutes or so, but the flavors will really come together with at least an hour or two of slow cooking. Taste it after thirty minutes to adjust the seasoning and add more chili powder, if necessary. Serve with cornbread. If you prefer, you can also transfer the chili to a slow cooker and let it sit all day, or overnight to really let the flavors blend. In general, the longer it cooks, the better it'll be.


Comments
0 comment