views
Creating the Spreadsheet
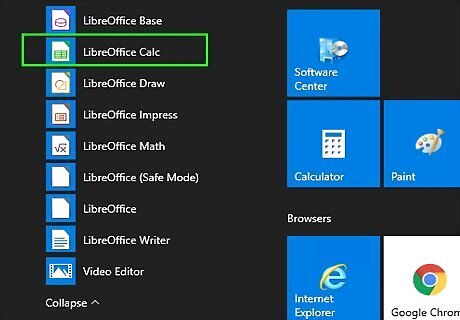
Open LibreOffice Calc. You'll find it in your Windows Start menu or your Mac's Applications folder. Calc is a spreadsheet app that's very similar to Microsoft Excel and Google Sheets.
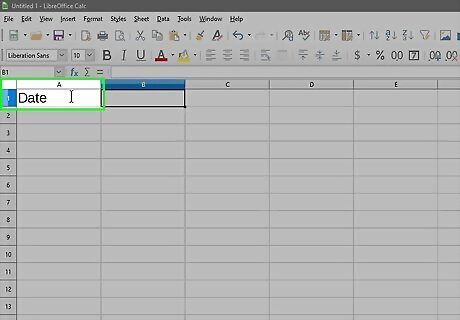
Label your column headers. You'll want to use relevant header titles like Name, Address, State and Zip, etc. These labels should go into separate cells in the first row of the spreadsheet. It can be helpful to label each column for the smallest amount of information possible. For example, instead of a single column called Address, you could use StreetAddress, State, and Zip. Instead of one column for Name, you could do FirstName and LastName. The actual header columns should be personalized to your needs.
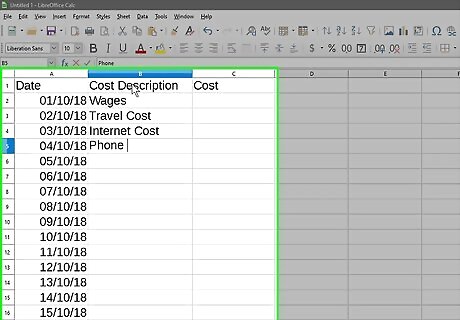
Fill columns with the data to be merged. Each row should contain the data for one contact. After entering the first contact on the first available row, enter the next contact on the next row, and so on. You don't need to use any special formatting or styles (such as bold print) since the data will be formatted by your mail merge document.
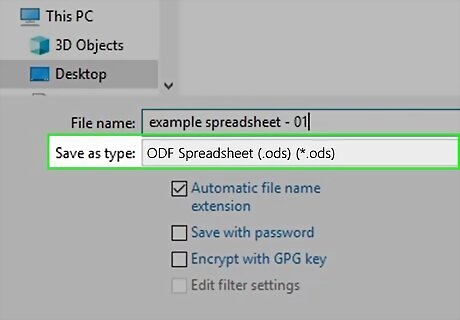
Save the file as in the ODF file format. The ODF file format ends with the .ODS file extension, which may seem a little weird, but it's correct. To save the spreadsheet: Click the File menu at the top-left and select Save as. Browse to the folder in which you want to save the file. You'll need to remember this location. Select ODF Spreadsheet (*.ods) from the "Save as type" or "Format" drop-down menu. Click Save. At this point, feel free to close the Calc app.
Connecting Address Data

Open Libre Writer. You'll find it in your Windows Start menu or your Mac's Applications folder. Don't worry about drafting your letter or document yet—you're just connecting the addresses to Writer for now.
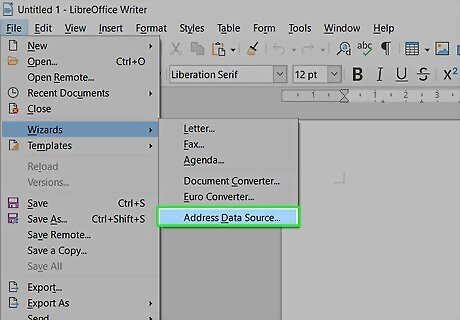
Open the Address Data Source Wizard. This tool makes it easy to create a database from your spreadsheet. To do this: Click the File menu at the top-left. Click Wizards on the menu. Click Address Data Source.
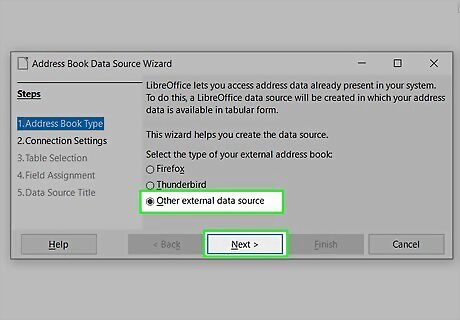
Select "Other external data source" and click Next. It's the last option.
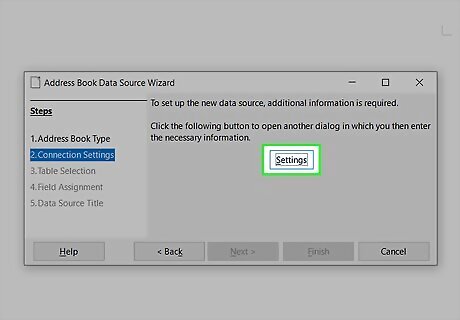
Click the Settings button. The "Create Address Data Source" window will appear.
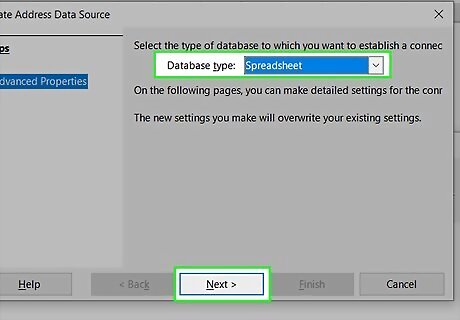
Select "Spreadsheet" and click Next. This tells Writer that you're working with the spreadsheet format.

Select the spreadsheet you created and click Next. To do this, click the Browse button, navigate to the spreadsheet containing addresses (ending with the .ODS file extension), and double-click the spreadsheet to select it. To verify that you've selected a spreadsheet that can be used, click the Test Connection button at the bottom-right corner. You should see a message that says the connection was established successfully. If you see an error, you may have selected the wrong file or saved it in the wrong format.

Click the Finish button. Now that you've connected the spreadsheet, you can start importing the data.
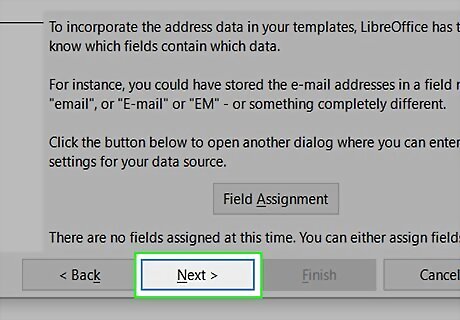
Click Next to continue. Do not click the "Field Assignment" button, as it won't work for your spreadsheet.
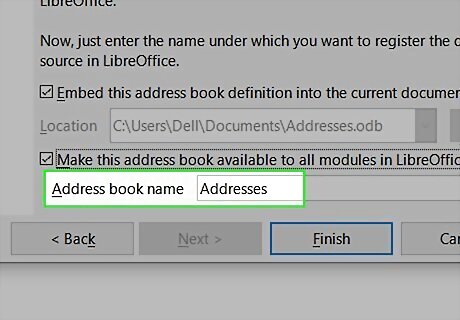
Name the database file (.ODB). Take a look at the file name in the "location" field—the file is called "Addresses.odb" by default. You can keep that name if you'd like, or change it to something else—just remember to keep the .ODB at the end of the file name. If the "Embed this address book definition into the current document" box is checked, uncheck it now. The "Address book name" field is the way this address list will appear in other LibreOffice apps. Feel free to change this if you'd like.

Click Finish. Your spreadsheet is now connected to LibreOffice Writer and ready to be used in your mail merge. The database will remain available for use in future form letters or documents as well.
Creating Your Document

Open a new document in LibreOffice Writer. If you've already created your form letter, label sheet, or envelope template, open it now.
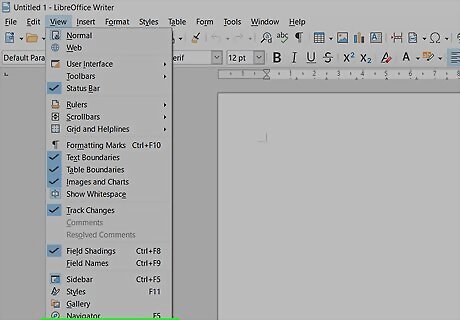
Open the Data Sources panel. To do this, click the View menu at the top, and then select Data sources. You'll see the values of your address spreadsheet in the panel at the top of the document. The panel will remain there to make things easy for you.

Format the document as you'd like it to appear. For example, if you're writing a form letter, compose the letter how you'd like it to look.
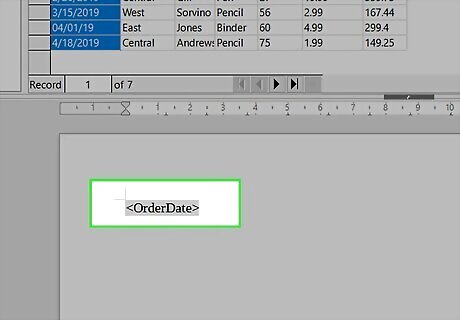
Drag the data column headers to their corresponding locations. The data column headers are the gray labels above the address data in that top panel. For example, if you're composing a letter and want it to begin with "Dear (first name)," you'd type the word Dear, drag the FirstName column header to where you'd type a name, and then type a comma.
When you drag a column header to the desired location, it'll show up with triangle brackets on either side (ex:
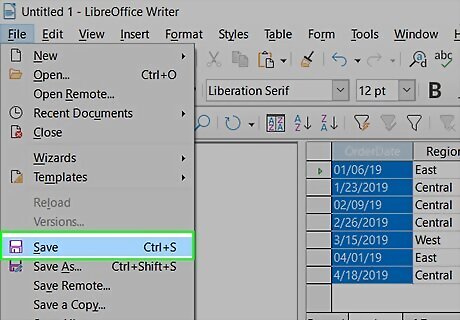
Save your document. To make sure nothing happens to your hard work, click the File menu and select Save as. The file should be saved with the .ODT file extension, so select ODF Text Document (*.odt) from the "Save as type" or "Format" menu.

Print your document. The steps to do this vary depending on what you're printing. If you're printing a form letter, click the File menu and select Print. You'll be asked if you want to print a form letter—select Yes when prompted. If you don't want to print letters for all of the people in the address list, hold the Ctrl (PC) or Command (Mac) key as you click the ones you do want to print. Click OK, and then print as desired. If creating labels, go to File > New > Labels, select the database, table, and fields. At the bottom, select the type of label paper you're printing to (e.g., Avery A4) and other additional label-making preferences, and then click Save. From there, on the Options tab, click Synchronize contents, and then New document to create your label sheet. You can then print that document as needed by selecting File > Print.




Comments
0 comment