

Making the Apron

Cut 2 pieces of 1 in × 4 in (2.5 cm × 10.2 cm) wood to 42 in (110 cm) long. Measure the length of your board and mark where you plan to make your cut with a pencil. Use a miter saw to cut an 8 feet (2.4 m) board down to size. If you don't have access to a miter saw, set the board on a workbench or between 2 saw horses and use a handsaw. Wear eye protection while working with power tools to prevent sawdust from getting in your eyes. You can work with any kind of wood you want. If you want to be cost-effective, use pine or oak. For an upscale look that's also durable, use maple or walnut.
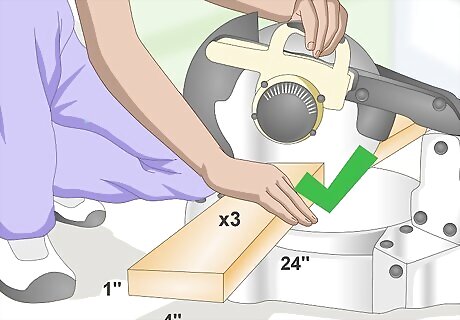
Saw 3 1 in × 4 in (2.5 cm × 10.2 cm) boards to 24 in (61 cm) long. Use another 8 ft (2.4 m) board, and cut the 3 shorter pieces with a miter saw or hand saw. Make sure the edges are straight so they lay flush with the other boards. The size of the table you build can vary depending on how much space you have.
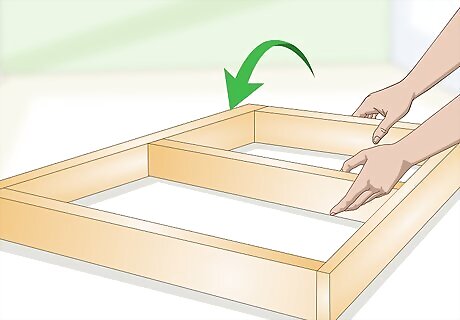
Arrange the boards in a rectangle on the floor. Lay the boards so the narrow sides are on the ground. Place 2 of the shorter boards between the ends of the longer ones to form corners. Put the third board in the middle to form a support beam. If you want the corners to look cleaner, cut the ends of each board to a 45-degree angle before putting them together.
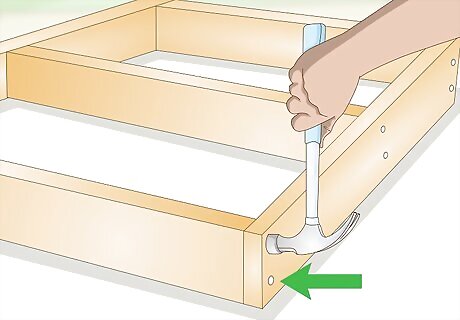
Nail the corners of the boards together to secure them. Use 2 in (5.1 cm) finishing nails on the sides of the 42 in (110 cm) boards. Pound 2 nails through the boards on each end of the shorter pieces to hold them in place. Make sure the corners are flush as you secure the boards. This forms the apron on the underside of the table so you can easily attach the tabletop and legs.
Adding a Tabletop
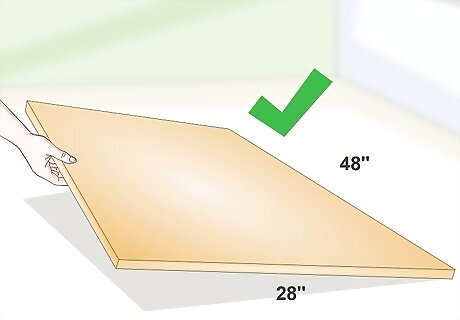
Use a 48 in × 28 in (122 cm × 71 cm) plywood sheet if you want a solid tabletop. Use a solid piece of plywood that's at least 1 in (2.5 cm) thick. Make sure you use the same type of wood that you used to make the apron for a consistent look. Avoid using chipboard or particle board since it's not as sturdy. Cut the board with a table saw to bring it down to size. Visit your local lumber yard to see what sizes of boards are available and see if they can cut it for you.
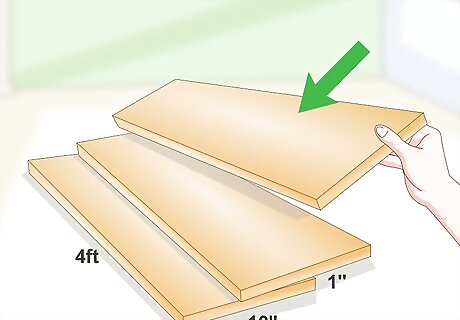
Make the surface out of multiple boards for a rustic look. Purchase 3 1 in × 10 in (2.5 cm × 25.4 cm) boards that are 4 ft (1.2 m) long. Lay one of the boards on the middle of the apron so it's 8 in (20 cm) from each end. Mark where the edges line up with a pencil. You can use thinner or wider boards depending on how much wood you want to use.
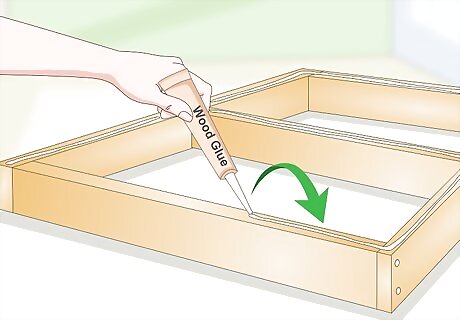
Apply wood glue to the top of the apron. Take the boards or plywood off the top of the apron. Squeeze a line of wood glue on top of the apron, and spread it evenly across the surface with a foam brush or finger. Wipe off any excess wood glue with the edge of your foam brush. If you're making a tabletop out of multiple boards, only put wood glue on the apron where you'll put the middle board.

Press the tabletop onto the apron so there's 1–2 in (2.5–5.1 cm) of overhang. Press the sheet of plywood or the middle board onto the surface and hold it there for 30 seconds to 1 minute. This ensures the glue gets a maximum amount of coverage and will hold better. If you don't want to hold the wood in place after setting it down, place something heavy on the spots you glued. Work quickly since wood glue can dry within 20 minutes.
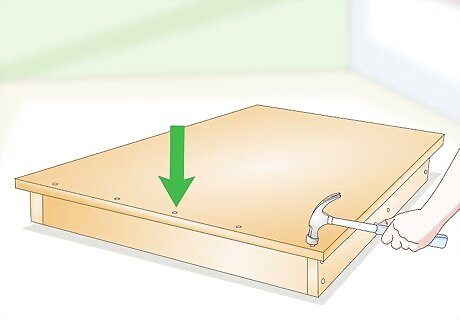
Nail the tabletop into place to secure it. Use your 2 in (5.1 cm) finishing nails and your hammer to keep the tabletop in place. Drive the nails in from the top of your table into the apron underneath. Put in 2 nails at each end of the tabletop as well as 2 nails into the middle support of the apron. Make sure the nails are flat against the table's surface. When you're making a tabletop from multiple boards, glue and nail down 1 board at a time. Look for any areas of the table bowing away from the apron. If you notice this happening, put in more nails to hold it tight. Although wood glue takes 24 hours to set completely, nailing the tabletop to the apron will hold the pieces together so you can keep building.
Attaching the Legs
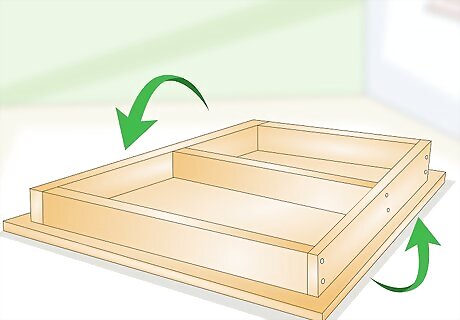
Flip the table over so it's upside-down. Grab the overhang of the table and lift it. Tip the table up and over so the apron faces the ceiling. Gently set the table back down on the ground. Ask a friend to help you if the table is too heavy to lift on your own. Don't slide your hands against the wood grain or else you could get a splinter.
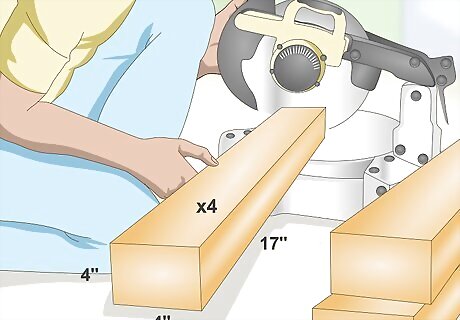
Cut 4 in × 4 in (10 cm × 10 cm) plywood into 4 17 in (43 cm) long pieces. Cut down an 8 ft (2.4 m) piece of wood into 4 equal sections using a miter saw or hand saw. Make sure the ends of the pieces are flat so they can stand up without wobbling. If your wood pieces wobble, use a sander to flatten the ends. Adjust the height of the legs accordingly to how tall you want the table.
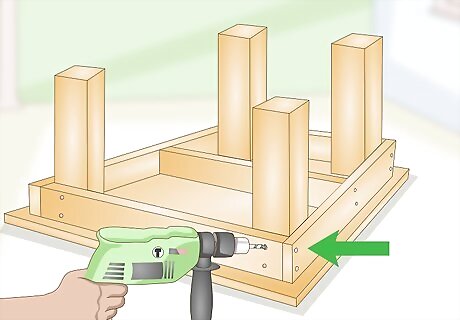
Pre-drill 4 holes in each corner and leg. Use a drill bit slightly smaller than the diameter of your screws. Set the 4 in × 4 in (10 cm × 10 cm) pieces in each corner so the sides of the legs are against the apron. Make 2 holes 2 in (5.1 cm) from the end of the apron, making sure the drill goes into the leg as well. Repeat the process for the other side of the leg against the apron. Stagger the height of the holes so screws won't run into one another.
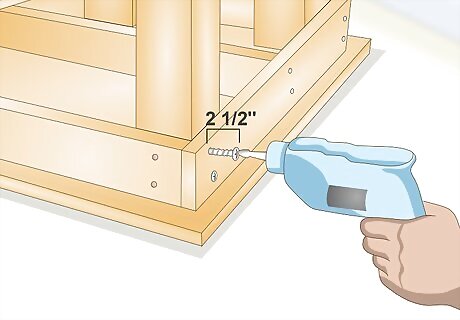
Screw 4 2 ⁄2 in (6.4 cm) construction screws from the apron into each leg. Hold the screws in the holes you drilled and use an electric screwdriver to secure the legs. Tighten the screws until they lay flush with the surface of the wood so they aren't as noticeable. Use darker colored screws on darker wood and light colored screws on light wood to conceal them better.
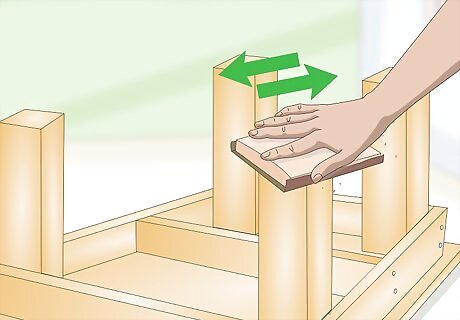
Sand the legs if they don't lay even. Flip the table rightside up to see if it wobbles or sits crooked on the floor. If so, use a coarse-grit sandpaper to shorten the longer legs so they're even with the shortest leg. An electric belt sander will work faster if you have access to one. Be careful not to over sand the legs or else the table may still wobble.
Putting on a Finish
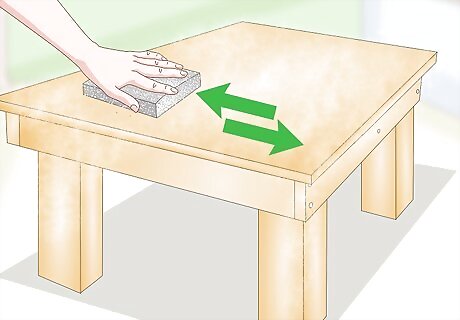
Sand the entire table with a sanding block. Use a 320-grit sanding block to smooth all the surfaces on your table. Work across the top, sides, legs, and apron so there's no chance of anyone getting a splinter if they run their hand across it. Round the corners of the tabletop if you don't want them to have a sharp edge. Use an electric sander if you want to get your work done faster. Wear a face mask and eye protection so sawdust doesn't get in your eyes.
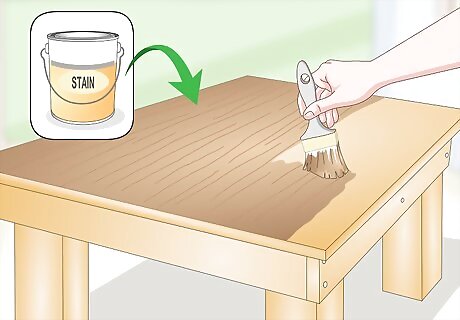
Stain the wood if you want to see the wood grain. Pick a dark or light stain depending on the rest of the room's design. Dip the bristles of a paintbrush into the stain and let the excess drip off. Work in long back and forth strokes to evenly coat the table. Wipe off excess stain with a dry cloth to get a uniform finish. Let the stain dry for 8 hours before adding a second coat. Put your table on a painter's tarp so you don't spill stain on your floors.
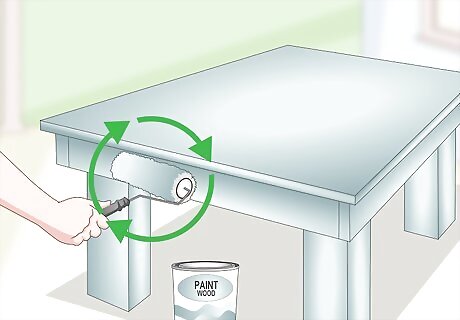
Paint the wood to make it a solid color. Put a thin coat of primer on the surface of your table so the paint can bond easier and stay true to its color. Allow the primer to dry for 1-2 hours before putting on any paint. Work in long back and forth strokes along the wood grain to evenly coat the table. Let the paint dry for at least 3-4 hours before applying a second coat. Paint your table a color to match other furniture in your room.
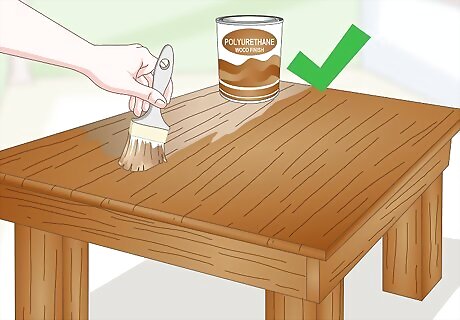
Apply a polyurethane wood finish to the tabletop to protect it from moisture. Work in a well-ventilated area when applying the finish. Use a paintbrush and work with the grain of the table to seal the wood and prevent moisture from coming in. Let the polyurethane coat dry for an hour or 2 before applying a second coat. Polyurethane finish can be purchased at your local hardware store.


Comments
0 comment