
Preparing the Surface
Choose a flat surface to put your decal on. You can put your decal on a wall, glass window, painted wood, the outside of a vehicle, or another non-porous flat surface. Avoid porous surfaces made out of things like brick, cement, and leather, or your decal may not stick properly.
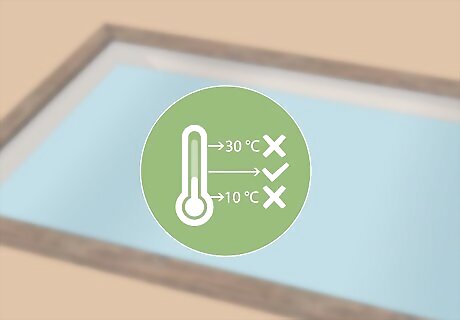
Avoid applying your decal in extreme temperatures. Put your decal on your chosen surface when it's between 50–90 °F (10–32 °C) outside or in the room you're applying it in. If it's hotter or colder, the decal won't stick properly. If you're not sure what the temperature is, use a weather thermometer or feel the surface you'll be putting your decal on with your hands. If it feels hot or cold to the touch, you may need to wait to apply your decal.
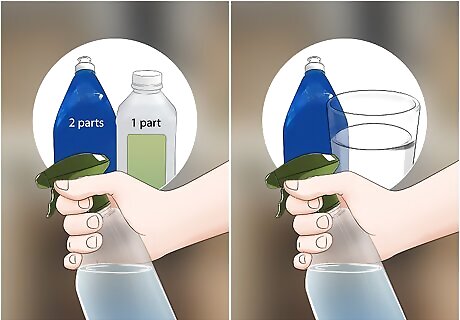
Prepare a cleaning mixture of rubbing alcohol and dish soap. In a spray bottle, add 2 parts dish soap and 1 part rubbing alcohol. Shake the mixture together thoroughly. If you don’t have a spray bottle, mix the alcohol and soap in a bowl and use a rag to apply it. You don’t need a lot of the mixture, just enough to clean the surface your decal will go on. This cleaning mixture should be safe to use on most surfaces. If you're worried about damaging the surface you're putting your decal on, use a milder mixture of dish soap and water to clean it instead.
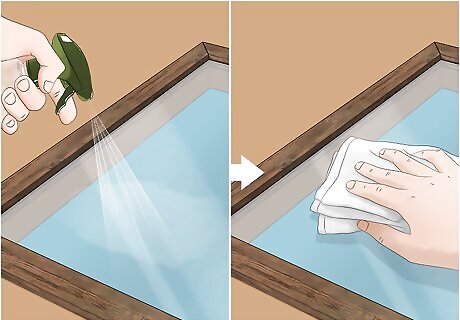
Clean the surface your decal is going on with the mixture. Spray a liberal amount of the mixture onto the surface (or apply it with a rag). Use a clean cloth to wipe down the area where your decal will go. Make sure you get off all the dirt and grime on the surface so nothing interferes with your decal.
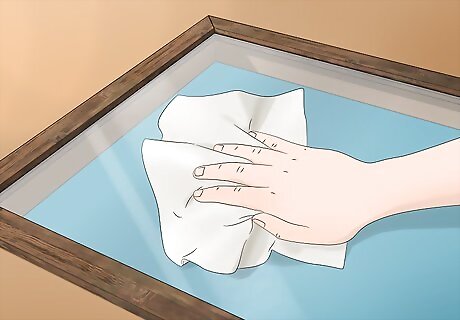
Let the surface dry completely. Use a microfiber cloth or a paper towel to wipe down the surface so it dries faster. Don’t try to put your decal on a wet surface or it won’t stick properly.
Positioning the Decal
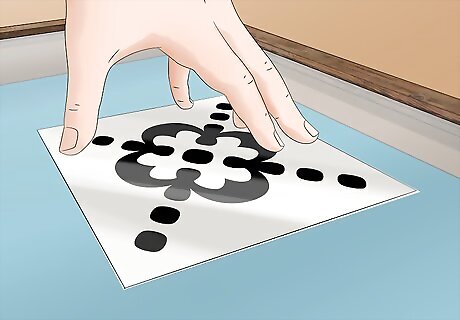
Choose where your decal will go on the surface. Hold your decal up against the surface you want it on. Move it around to see which positioning you like best. If you want the decal to be centered, measure the surface from top to bottom and side to side with a tape measure and mark the center. Use a level to make sure the decal is straight.
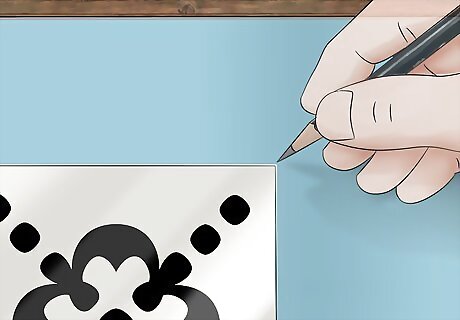
Mark where your decal will go with a pencil. Lightly draw a line along the surface to mark where the top edge of your decal will go. If you're working on a window or the outside of a vehicle, use a strip of tape to mark the surface instead.
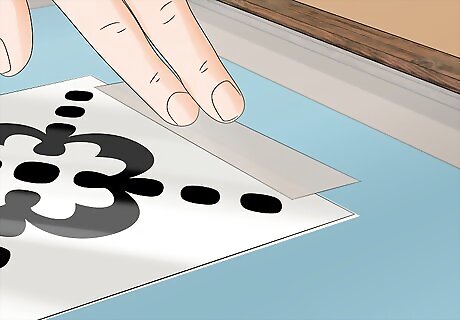
Tape the top edge of your decal to the surface with masking tape. The top edge is the edge at the top of your decal. Don’t remove the top lining or the backing on the decal yet. Line the decal up with the marks you made and apply the tape to the top edge of the decal. Use a long, continuous piece of tape to cover the entire top edge. If you’re putting up your decal alone, tear off a piece of masking tape before you hold the decal against the surface so you’re not struggling to do it with one hand.
Pressing the Decal onto the Surface
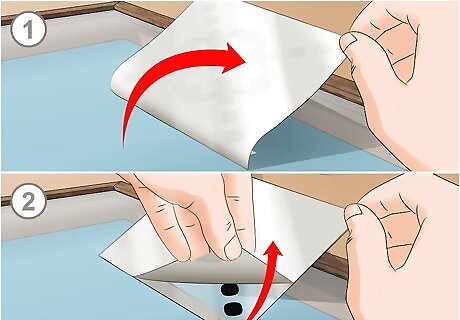
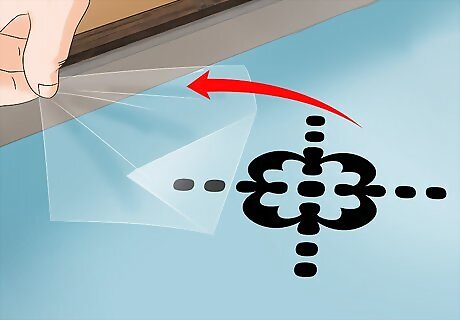
Lift the decal upward and peel off the backing. Use one of your hands to lift and hold the decal and top lining so they’re almost perpendicular to the surface. Then, use your other hand to slowly peel off the backing on the decal, starting at the top near the taped edge. Continue peeling the backing until it’s completely off the decal. Set the backing aside and keep holding the decal and top lining with your hand. The backing is the thin film on the back of your decal that's between the decal itself and the surface you're putting it on.
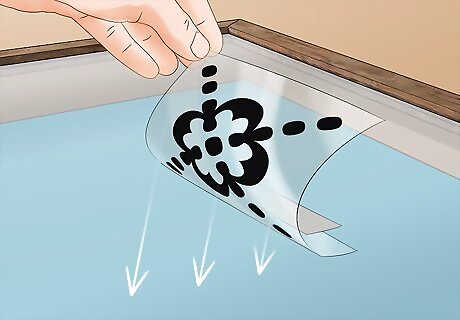
Lower the decal into place on the surface. Now that the backing is off, the decal will adhere to the surface beneath it. Starting with the top of the decal, gently let the decal touch the surface by lowering your hand that's holding the decal and top lining. Go slowly so the decal lays flat on the surface.
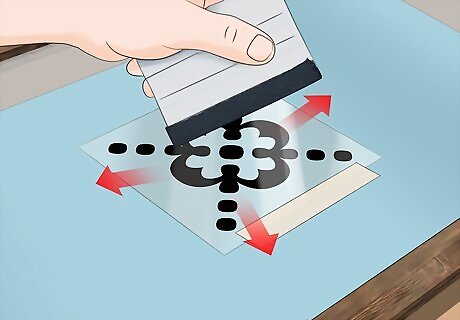
Press the decal onto the surface using a squeegee. Start at the middle of the decal and press against the surface of the decal lining in an outward motion. Continue bringing the squeegee from the center to the outer edges of the decal lining until you've gone over the entire surface. Go over any air bubbles you see with the squeegee. If you don’t have a squeegee to use, use the edge of a credit card instead.
Remove the top lining of the decal and the tape. Pull the strip of tape on the top edge of the decal off first. Then, slowly take off the top lining by grabbing the top left corner and pulling it down at a 45-degree angle. Make sure you go slowly so the decal doesn’t get stuck to the lining and lift off the surface. Once the tape and lining are off, your decal is finished!


Comments
0 comment