
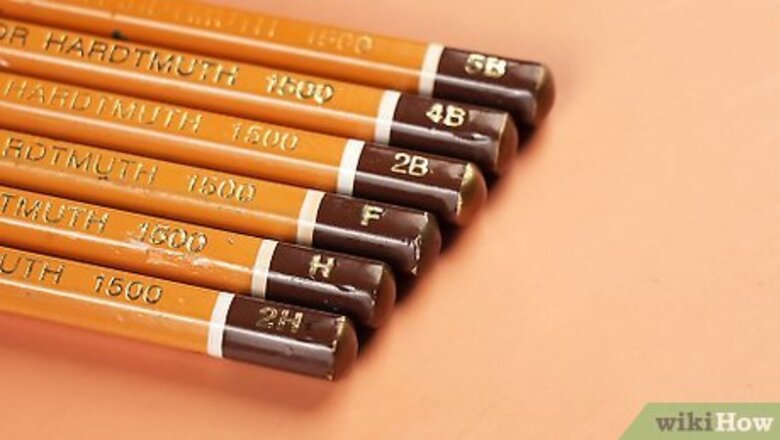
Work from hard to soft pencils.
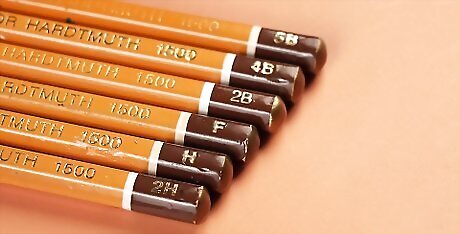
Starting with harder pencils lets you work from lighter to darker shades. Drawing pencils have different graphite hardnesses based on the marks you’re trying to make. Always start with the H pencil with a higher number, like 4H or 6H, to create the thin sketchy lines before committing to darker shades, like a 2B or 4B. “H” pencils are the hardest pencils used for sketching thin, light lines. “B” pencils are softer and are used for making darker lines and shadows. Standard #2 pencils have an HB hardness, which is perfectly in between H and B.
Hold your pencil loosely.
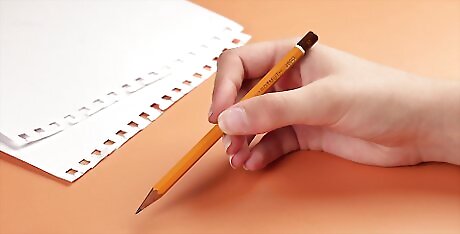
A higher, looser grip lets you draw lighter, sketchier lines. Rather than holding your pencil tightly and close to the tip, relax your grip. Slide your hand closer to the middle of the pencil so you’re able to make larger sweeping lines without applying too much pressure to the paper. Pressing too hard into the paper may also leave indents that could create dark or light spots that are difficult to get rid of in your final drawing.
Warm up by drawing lines and circles.

Spending a few minutes warming up improves the quality of your lines. Before you hop into your actual sketch, take out a fresh sheet of paper and start drawing straight lines, curves, and circles. Draw shapes at different angles and sizes to loosen up your artistic muscles and get a feel for your pencil. After 5–15 minutes of warming up, switch over to your sketchbook or paper. Warming up also commits the movements to muscle memory, so drawing difficult shapes will get easier with more practice. While you’re drawing, keep your wrist and fingers locked and move your shoulder to guide your pencil. Bending your wrist or fingers repeatedly could lead to pain or irritation.
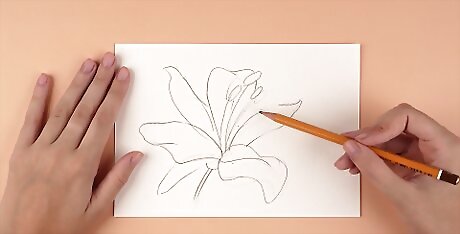
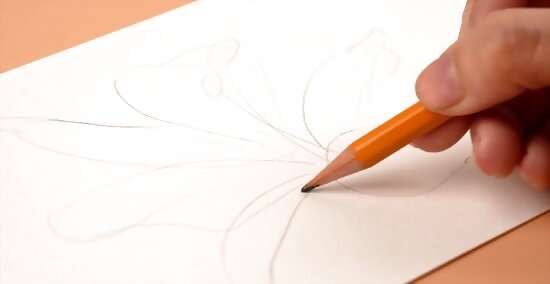
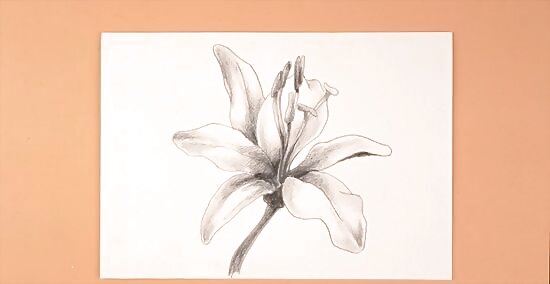
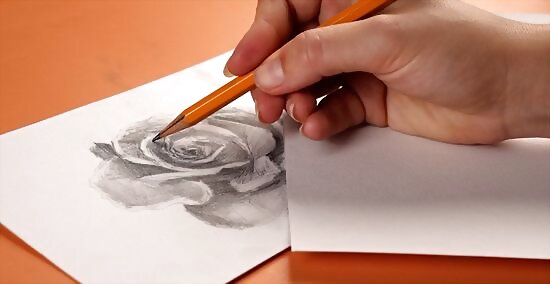
Try drawing from a reference.

Using a reference lets you compare your sketch directly to an original. Instead of drawing how you think the object should look, really focus on sketching in the shapes and lines you can actually see. Try to look at the real object more than your paper so you’re able to practice your proportional drawing even better. Choose a photograph that you want to copy or set up a still-life of objects in front of you to draw. While drawing from your imagination is a great way to be creative, finding a real subject to draw can help you improve your drawing skills. If you’re drawing a person, practice sketching different poses and body shapes so you’re more versatile as an artist. Some easy ideas for you to sketch from a reference include flowers, houses, cartoon characters, animals, fruits, tools, or anything else that’s nearby.
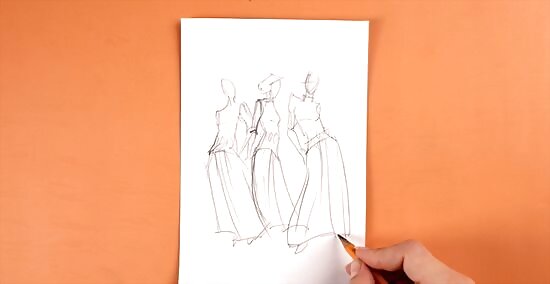
Sketch out basic shapes first.
Drawing in simple shapes helps you block out your sketch ideas. Rather than drawing the outline of your sketch, think about the simple 2- or 3-dimensional shapes that make up the composition. Break the subject of your drawing into multiple shapes, and sketch them in lightly so you get an idea of the composition. Example: If you’re drawing a face, you may start with basic ovals for the head and eyes, trapezoids for the nose and lips, and rectangles for the eyebrows. Example: If you’re sketching a mountain landscape, start with simple triangles or pyramids for the trees and mountain range.
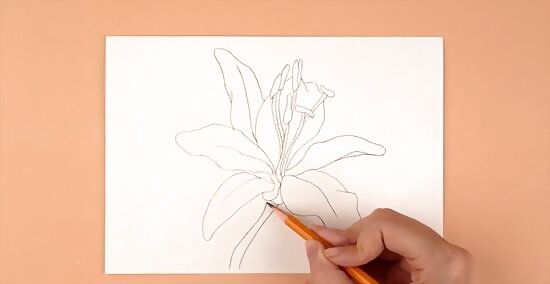
Start with loose lines to refine later.
Building up light lines helps you find the most pleasing shape. As you draw, move your hand very quickly, using minimal pressure so the pencil tip barely leaves behind marks. Layer up your loose lines and continue working over an area until you’re happy with how the shape looks. Example: If you’re drawing circles, draw a few loops to get the perfect round shape instead of trying to get it perfect in one go. Don’t worry about having messy lines in your sketch as you’re still figuring out your drawing. You can always erase the marks you don’t like later on.
Vary line thickness and style.
Different line qualities add more visual interest to your sketch. Switch up your line thickness and darkness to convey hierarchy in your drawing. Make thin, wispy lines with an H pencil to make objects in your sketch feel light or far away. Use a B pencil to make thick, dark lines that add emphasis and weight to focal points in your sketch. Play with different line weights throughout your entire drawing, making sure they draw your eye to the main focus of your sketch. Experiment with how you position your pencil as well. Holding the pencil on its side makes darker and fatter lines than if you were drawing with only the tip.
Make the focal point 30% of the image.
Having a small area be the main focus draws in the viewer's eyes. Try to pack the most important details and visually-interesting parts into a third of your sketch. Fill the remaining two-thirds of your drawing with minor details and lines that guide your eye to the focal point. That way, your sketch doesn’t look too busy or overwhelming at a glance. Example: If you’re drawing a self-portrait, then make the focal point of the image your face and spend less time and detail on your hair or clothes. The 70-30 rule for composition isn’t set in stone, so it’s okay if you don’t follow it with every single sketch.
Create hard and soft edges.
Changing the edge hardness creates transitions in your drawing. Make a hard, solid edge with your pencil in your drawing to make it pop out of the sketch and look more defined. If you want a smoother transition between objects and make them look deeper in the drawing, leave a soft edge between light and dark values to make the values blend together. Example: If you’re sketching a still-life of fruit in a bowl, you may leave softer edges on the fruit to make it appear 3-dimensional, and create a hard edge around the lip of the bowl to show that it’s solid.
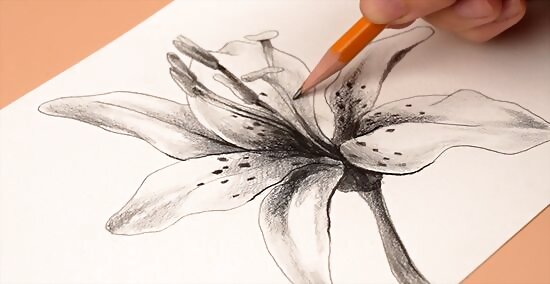
Experiment with shading techniques.
A variety of shading techniques changes the look of light and dark areas. Rather than filling your drawing in with a solid color, try out different types of applying shadows to add some variety to the darkened areas of your sketch. You may use smooth blends for shading skin but hatched marks to sketch in fabric. Some different shading techniques to try include: Circling: Make small circular strokes with the pencil. Apply more pressure when you want a darker tone. Hatching: Draw short parallel lines in a single direction. Make the lines more densely packed together to darken the value. Cross hatching: Draw short straight lines like you’re hatching. Then, draw perpendicular lines through the first set to darken the value. Stippling: Draw small dots in areas there are shadows. Position the dots closer together for a darker value.
Smooth shading with a blending stick.
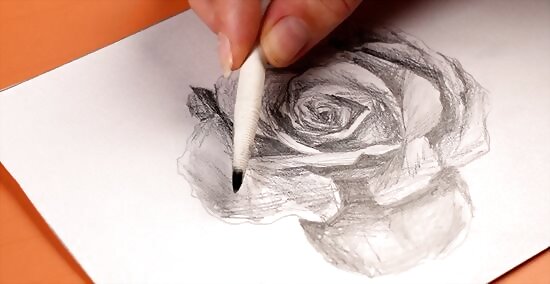
A blending stick removes pencil marks to create a smooth gradient. Blending sticks are tightly rolled pieces of paper that smooth out pencil marks. Use your blending stick by rubbing the side against the graphite on the paper, working from the darkest area to the lightest. Keep blending the graphite until it has a smooth transition between shades. Blending shadows are great if you’re sketching objects that are supposed to be smooth and round, like an aluminum can or ball. Try making different marks with your blending stick, such as tapping the drawing with the tip to make a stippled, dotted texture. When your blending sticks get dirty, rub the tips on a piece of fine-grit sandpaper to remove the residue. Make your own blending stick by tightly rolling a piece of paper into a pencil shape and sharpening the tip with a craft knife.
Use rubbings and indents for textures.
Rubbings and indents create textured patterns in your drawing. If you want to use rubbings (also known as frottage), place a textured surface, like stone or wood, behind your piece of paper and shade over it to transfer the texture to your sketch. To create highlights with indents, draw with a pointed stylus wherever you want lines of bright light. The indented areas will stay white and unshaded when you draw over them with a pencil. If you’re drawing a tree, for example, put bark behind your paper to copy the texture.
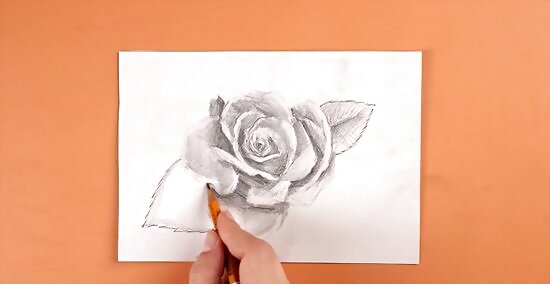
Add highlights with your eraser.
Erasing marks you’ve made creates bright spots that draw your eye. Rather than adding areas of darkness with your pencil, go in with your eraser to add light to your drawing. If you have areas that you want to draw attention to, rub away some of the graphite with a kneaded eraser to put in a bright highlight. Keep working the eraser around your drawing to lighten up lines or focal points. Eraser marks are a great way to create beams of light in a landscape drawing or lighter strands of hair in a portrait drawing. Keep in mind the direction of the light source in your drawing and only add highlights to areas that would be lit up. Otherwise, the drawing may not have a realistic look. Go in next to your highlights with a 4B or 6B pencil to add darkened areas for deep shadows and contrast. EXPERT TIP Megaera Lorenz, PhD Megaera Lorenz, PhD wikiHow Staff Writer Megaera Lorenz is an Egyptologist and Writer with over 20 years of experience in public education. In 2017, she graduated with her PhD in Egyptology from The University of Chicago, where she served for several years as a content advisor and program facilitator for the Oriental Institute Museum’s Public Education office. She has also developed and taught Egyptology courses at The University of Chicago and Loyola University Chicago. Megaera Lorenz, PhD Megaera Lorenz, PhD wikiHow Staff Writer "Staedtler Mars plastic erasers are excellent for erasing pencil or charcoal marks cleanly, without leaving smudges or damaging your paper. I always keep one handy when I’m drawing."
Add asymmetry to your sketch.
Asymmetrical details make your sketch more visually interesting. Symmetrical drawings are pleasing to the eye, but they may not hold someone’s attention. Even if the base of your drawing is symmetrical, add new details and inconsistencies to make the sides of your sketch unique but still balanced. Example: If you’re drawing a landscape, you may have a large tree on the left side of your drawing and a smaller grouping of trees on the right. Example: If you’re sketching a car, you may add dents in different places on each side to make it look more interesting.
Check proportions in a mirror.
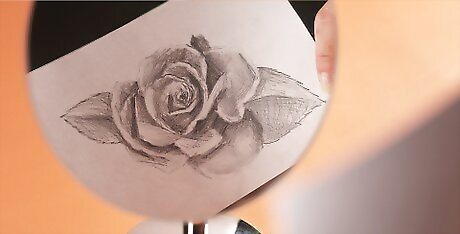
Mirrors make it easier to see inconsistencies in your reflected drawing. Hold your drawing up to a mirror and look at it in the reflection. Check if there are any areas that look out of place or disproportionate now that you’ve reversed the image. Go back to your drawing to erase and sketch in areas where you need to correct the proportions. If you’re trying to draw a human in proportion, measure the height of their head and make their body about 7–8 heads tall. Keep checking your drawing in the mirror every few minutes so you catch any mistakes before you get too far into your piece.
Rest your hand on a separate piece of paper.
The layer of paper stops you from rubbing areas you’ve already drawn. If you’re accidentally smudging areas you’ve already drawn while you’re working, take a clean sheet of scrap paper and set it down on your sketch. Rest your drawing hand on the paper while you sketch so you don’t rub against the graphite on the actual drawing. Reposition the paper whenever you move to a new section of your drawing. Shade from left to right if you’re right-handed and right to left if you’re left-handed. That way, you’re less likely to smudge your drawing in the first place.
Protect your work with spray fixative.

Spray fixative prevents your sketch from marks and smudges. If you’re finished with a sketch or just want to preserve it in between work sessions, shake the fixative for about 30 seconds. Then, hold the fixative about 1 foot (30 cm) away from your drawing and lightly spray it. Move the nozzle over the surface so the fixative builds up evenly over the drawing. After you apply fixative, you won’t be able to erase any of the marks on your paper, so make sure you’re happy with how the drawing looks. If you want to keep blending or erasing, then cover the drawing with a clean sheet of paper instead. Fixative sprays are flammable and contain strong chemicals. Keep them away from open flames and only use them outdoors or in a well-ventilated area.
Try new variations of your sketch.
Brainstorming different ideas helps you find the style and layout you like best. Instead of going with your first instinct on a sketch, try out a variety of different styles and poses. After you do a quick sketch of your first idea, keep ideating and trying out new details. After you have a few ideas down on paper, choose your favorite and keep fleshing it out more. Try to make each of your sketches within a few minutes so you don’t spend too much time on them. Think outside of the box while you’re ideating. If you’re sketching a character design for a fairy, you may immediately think of a beautiful forest creature. Experiment with what a fairy may look like if it lived in a different environment or if it were evil to see what ideas pop into your head.
Practice sketching every day.

Making drawing a daily habit lets you keep improving your skills. Carve out about 15 minutes every day to add a new drawing to your sketchbook. As you continue drawing each day as part of your routine, sketching will get a lot easier and faster. Make it a point to try drawing something new every day. If you’ve mainly been drawing tools or inanimate objects, try sketching your pet or another person.


Comments
0 comment