
Whipping Natural Fiber Rope
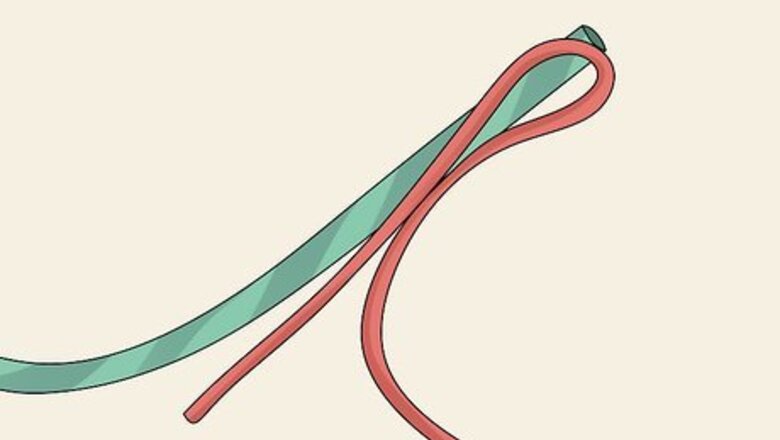
Create a 2–4 in (5.1–10.2 cm) loop at the end of some dental floss. Pull out a length of dental floss. Do not cut the floss off from the spool it’s attached to. Grab the tip of the dental floss and fold it down to make a 2–4 in (5.1–10.2 cm) loop. Pinch the floss at the junction where the working end meets the standing end to hold it in place. There must be at least 4 inches (10 cm) of floss remaining on the working end of the floss.Variation: If your rope is thicker than 1 in (2.5 cm), use twine instead of dental floss for this. This process, known as whipping a rope, is the main way to keep natural fiber ropes from fraying. You can do this with synthetic ropes if you’d like, but it’s a lot more work than simply burning the end. The working end refers to the tip of the floss that is furthest from the spool. The standing end is the long length that is closest to the spool.
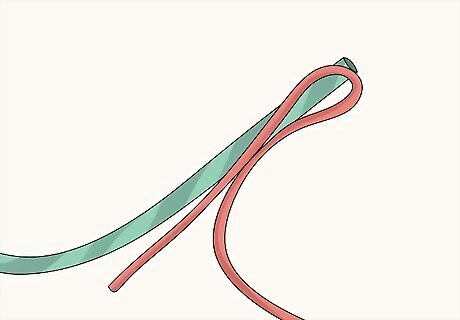
Hold the loop against the working end of the rope. Take your large loop and place it against the very end of your rope. Make sure that at least 0.5 in (1.3 cm) of the loop is sticking out past the end of your rope. Use your thumb and index finger to pinch the loop against the body of the rope to hold it in place. You are going to pinch the loop in place for the rest of these steps. Use your thumb and index finger to hold the loop in place and keep it from unraveling.
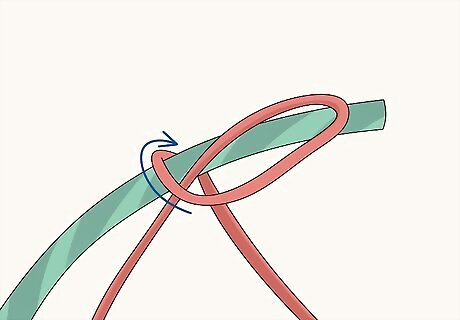
Wrap the standing end of the dental floss around the bottom of the loop. Grab the long spool of floss and pull it around the rope. Pull it tight and wrap it around the loop and the rope in the area closest to your nondominant hand and index finger. Keep the floss as tight as possible.
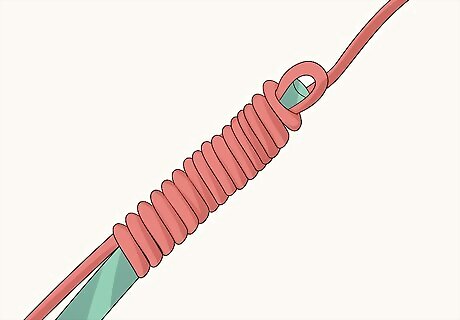
Continue wrapping the dental floss towards the tip of the rope. Pull out more dental floss as needed and continue to wrap it tightly around the loop and the rope. Work in small, parallel layers to work your way from the bottom of the loop to the top of the rope.
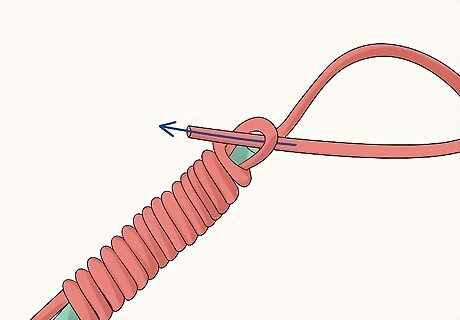
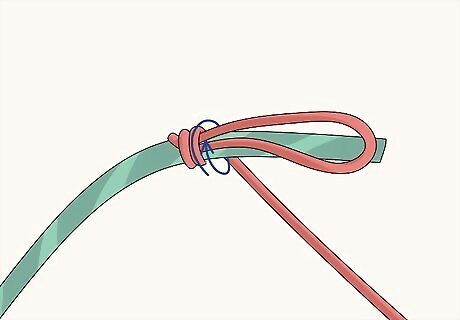
Tear off 6–8 in (15–20 cm) of floss from the spool and pull it through the loop at the top. Use the serrated edge on the box of floss to tear the floss off so that at least 6 inches (15 cm) of floss remains. Grab the standing end you’ve just torn off and carefully thread it through the small portion of the loop at the top of the whipping. Once you slide it through the loop, pull it all the way through and tug gently on it to ensure that it is tight. The tighter the floss is, the more secure your rope will be. Just be careful about ripping the floss while you do this.
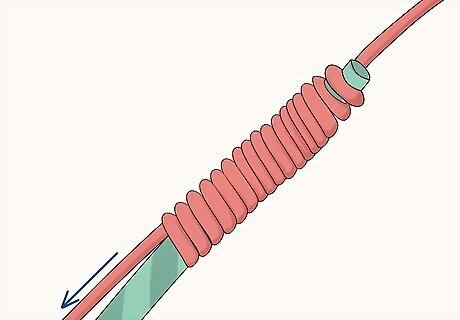
Tug on the small amount of floss sticking out at the bottom. There should still be 4 inches (10 cm) of floss sticking out at the bottom of the whipping. Grab this length of floss and pull it down. The loop at the top of the rope will slide underneath the layers you wrapped. Continue pulling the floss until the loop is roughly in the middle of the wrapping. Since you’re pulling the rope underneath the wrapping, you can’t actually see how far you’re pulling it. To keep it roughly in the middle, only pull the floss down 1–2 inches (2.5–5.1 cm) based on how big your original loop was.
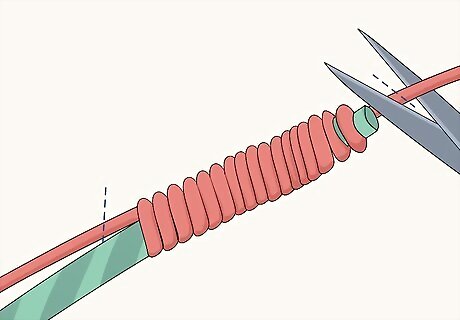
Trim the remaining dental floss using scissors to finish tying the end off. Once the loop is tucked underneath the wrapping, the end of your rope is completely secure and will not fray. Use a pair of scissors or a utility knife to trim the excess floss off at the top and the bottom. If the whipping ever comes undone, you can always repeat this process.
Cauterizing Synthetic Rope
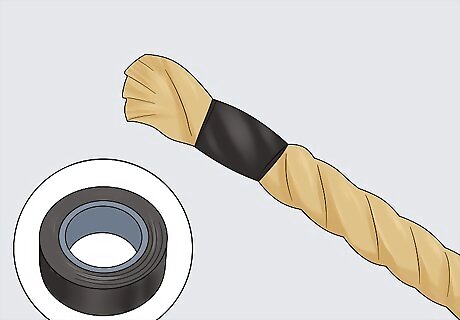
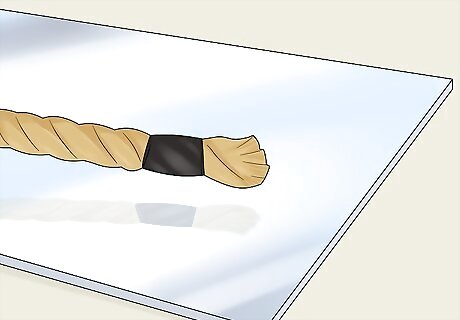
Wrap 3–5 in (7.6–12.7 cm) of electrical tape around the end of the rope. Peel your electrical tape off of the roll and put the edge of the tape 3–5 inches (7.6–12.7 cm) below end of your line. Pull the roll of tape tightly and wrap it up towards the tip of your rope. Continue pulling the tape and wrapping it until you reach 1–2 inches (2.5–5.1 cm) from the end. Rip or cut the tape from its reel and pull the end of the tape tight against the rope. This process will work on any rope that is not made out of natural fibers since natural fibers simply burn when you heat them. However, it will probably work on cotton rope, which is often coated in plastic to keep the rope from fraying.
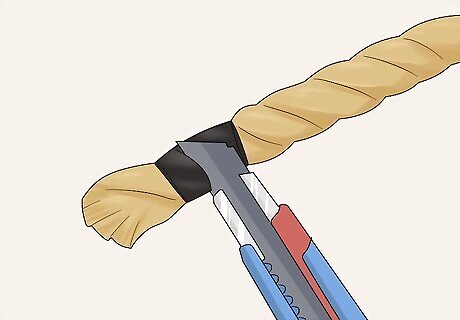
Cut through the electrical tape and rope to trim the rope down. Use a utility knife to cut through the rope in the middle of the electrical tape. Gently drag the blade back and forth while bracing the standing end of the rope. Press the blade down slightly while moving it to keep the tape or rope fibers from splitting. Continue cutting until you’ve removed the last bit of the working end entirely. The standing end of the rope refers to the long length leading away from the end. The end that you’re cutting or tying off is known as the working end.
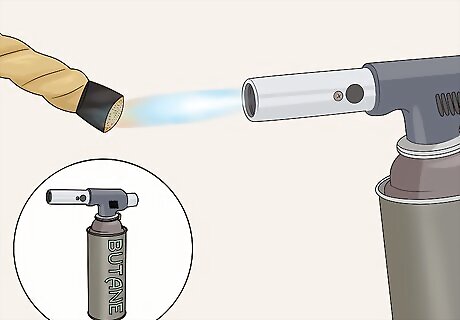
Use a butane torch or lighter to heat the end of the rope for 3-5 seconds. Lift the rope up in your nondominant hand and keep your hand 12–16 inches (30–41 cm) away from the end. If you’re using a torch, point it 5–6 inches (13–15 cm) away from the end that you’re cauterizing and slowly move it closer until the tip begins to burn. If you’re using a lighter, hold the rope 5–6 inches (13–15 cm) above the flame and slowly lower the rope until it starts to burn.Tip: Since electrical tape is resistant to fire, the fibers will burn in place and fuse together. If you do this without electrical tape, the strands of rope may fray outwards as they burn. A butane torch will do a better job of cauterizing the fibers, but you can use a lighter if you don’t have one. The butane torch will heat the fibers more evenly and will result in a cleaner fusion at the end of the rope. Keep the flame at least 12 inches (30 cm) away from the flame of your butane torch. Point the flame away from you and do not do this near any flammable materials.
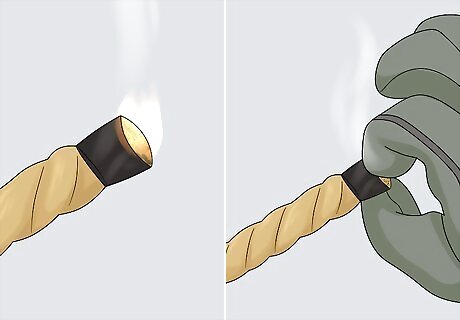
Blow any flames out and tap the end of the rope with a thick leather glove. Release the torch or lighter after heating the end of the rope for 3-5 seconds. If there is an open flame on the rope itself, blow it out. The end of your rope should now look black and burnt. Tap the burnt end of the rope against a thick leather glove to push the melted fibers together. Let the end of the rope cool for 15-30 seconds to finish cauterizing it. If your rope ever gets wet, the electrical tape may fall off. Your rope will be unlikely to fray even if this happens, though. You don’t need to put the glove on if you’re handling a small rope. You can simply dab the burnt end gently against the leather.
Cutting Synthetic Rope with a Hot Knife
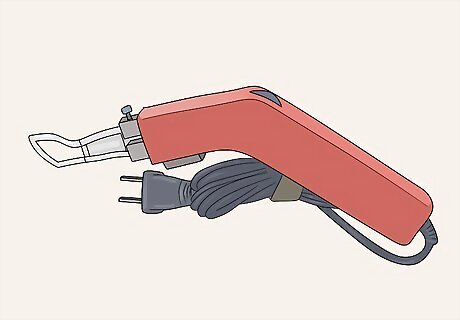
Use a hot knife to cut rope and avoid fraying in the future. A hot knife is basically an electric knife with a blade that heats up. They have a thin rod at the end that gets hot enough to melt materials. Using a hot knife to cut your synthetic rope is the best way to avoid fraying in the future.Tip: You can use a hot knife on any kind of synthetic rope. It basically cauterizes the rope as you’re cutting it. This will not work with natural fiber ropes for the same reason the electrical tape and torch won’t work. The fibers will simply split when they get too hot. You can purchase a hot knife online or from a construction supply store for $25-50.
Set a piece of glass or tile under the rope to create a cutting board. Since the hot knife will singe rubber, plastic, or wood surfaces, put a piece of thick glass or tile under the rope. This way, if your hot knife’s blade hits the surface underneath, it won’t damage the table or cutting surface. Don’t use a piece of tile that is laminated or coated in plastic. The plastic coating may melt when you touch it with your knife.
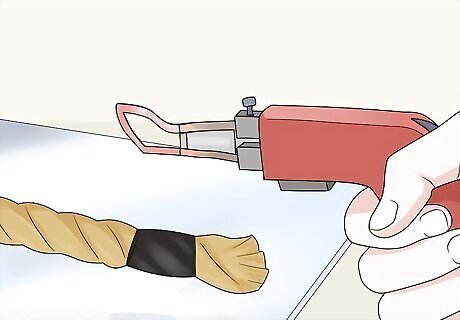
Press the trigger and let the knife heat up for 5-10 seconds. Plug your hot knife in to an outlet and set your rope down over your glass or tile cutting board. Pull the trigger on the knife to start heating the blade. Wait 5-10 seconds to give your hot knife time to heat up. Hot knives tend to reach their peak temperature pretty quickly.
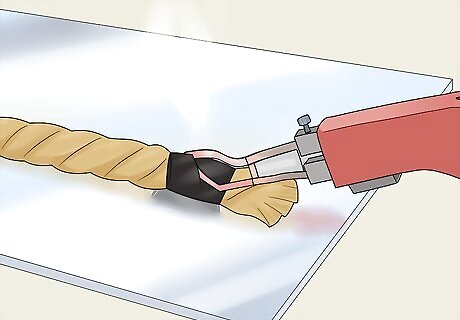
Push the blade against the rope and slowly melt through it. Keep the trigger on the hot knife pressed down. Carefully press the blade against the top of the rope where you want to cut it. The rope will begin melting and separating. Continue gently pushing the blade downwards while moving the blade slowly back and forth until you’ve completed your cut. Set the hot knife down on its side for 20-30 seconds to give it time to cool. Gently moving the blade back and forth as you cut will ensure that you heat the rope evenly as you cut through it.


Comments
0 comment