
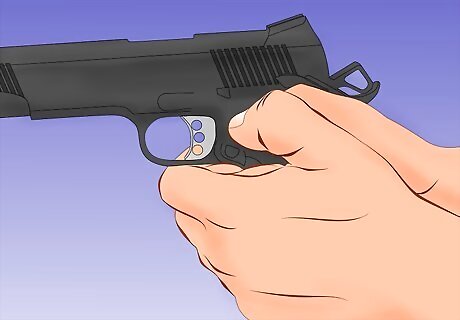
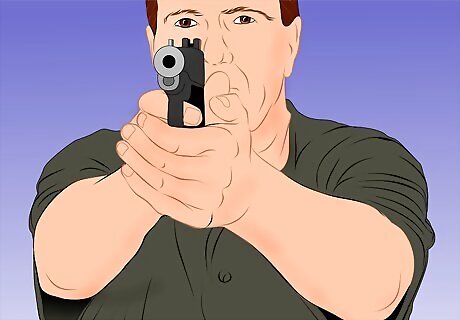
One-Handed Grip
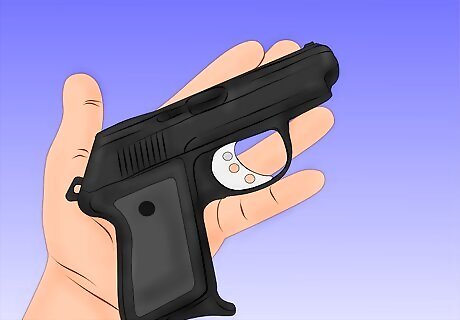
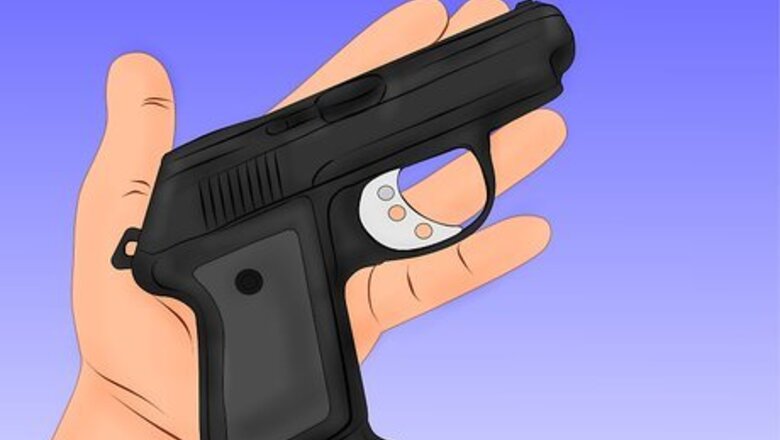
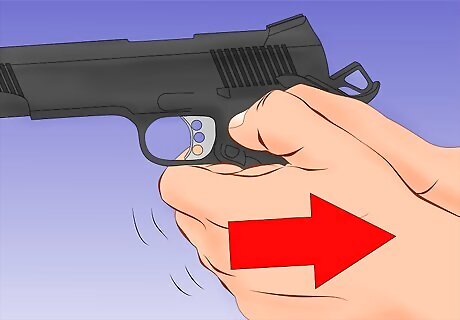
Know the proper form. A one-handed grip can be difficult and even dangerous if not used correctly. You automatically have less stability when you only hold the pistol with one hand, but if you distribute the force of your dominant hand as securely as possible, this grip can work. Hold the pistol with your non-dominant hand.Grip a Pistol Step 1Bullet1 Version 3.jpg With your dominant hand, form a "V" by spreading apart your thumb and index finger. Place the gun into the center of this "V" so that the front and rear sights line up evenly with your dominant arm.Grip a Pistol Step 1Bullet2 Version 3.jpg Wrap your middle, ring, and pinky fingers around the grip of the pistol. Make sure that you apply equal pressure with all three fingers, and use enough pressure to squeeze the grip of the gun into the back of your hand. Use your thumb to wrap around the other side of the grip, securing it in place.Grip a Pistol Step 1Bullet3 Version 3.jpg Use enough pressure to cause your hand to tremble slightly. Relax it just a bit so that the trembling stops. Remember this amount of pressure; it is the proper amount of pressure you will need in order to make this grip style work.Grip a Pistol Step 1Bullet4 Version 3.jpg Place your index finger on the trigger. The portion of your finger that lies between the tip and second joint should be the portion on the trigger. You need to make sure that your index finger can pull the trigger without disturbing the other fingers.Grip a Pistol Step 1Bullet5 Version 3.jpg Remember the placement of your fingers and the amount of pressure you have applied. This is the right way to use a one-handed grip.Grip a Pistol Step 1Bullet6 Version 3.jpg
Understand the pros and cons of a one-handed grip. A one-handed grip should be avoided if at all possible since it is a fairly unstable grip style. The primary advantage of this grip is speed. If you need to fire your gun in a hurry, knowing how to do so with one hand might shave a life-saving second off your draw time. Note that this grip will be much easier to pull off if you are using a pistol with less recoil.Grip a Pistol Step 2Bullet1 Version 3.jpg Use a two-handed grip whenever possible. In a two-handed grip, your non-dominant hand gives your dominant hand support and stability as you fire.Grip a Pistol Step 2Bullet2 Version 3.jpg
Two-Handed Grip Types
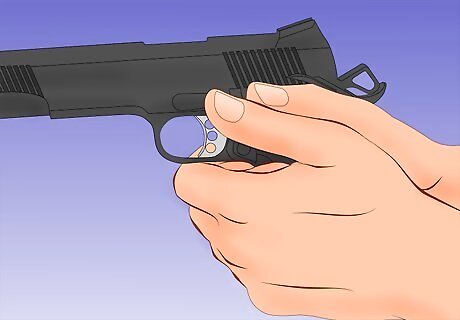
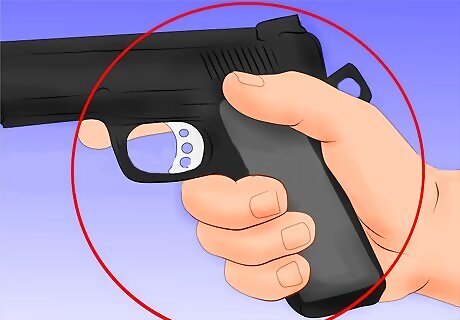
Try a thumb-over-thumb grip. While the thumb-over-thumb grip is not often used by professional sport shooters, many beginners find it to be the easiest grip technique to master since it provides more stability and makes it easier for the shooter to control the gun during recoil. It is slightly less quick and less precise, but you can still have basically good aim while using it. Place the gun securely into your dominant hand. Spread apart your thumb and index finger. Place the gun into the crook that forms, keeping the gun back strap as high as possible. Wrap your middle, ring, and pinky fingers around the grip of the pistol. Your middle finger should rest just below the trigger guard. For the time being, rest your index finger along the opposite side of the gun frame. Wrap your thumb around the grip. It should touch the top side of your middle finger from the other side. Notice that there is a gap between the heel of your hand and the tip of your fingers to the left side of the grip. Take your non-dominant or support hand and wrap it around the strong hand so that this gap is no longer visible. Position the thumb of your non-dominant hand so that it overlaps with the thumb of your dominant hand. When it comes time to fire the gun, place your index finger on the trigger. The space between the tip of your finger and the top knuckle should be the only part on the trigger. The most common problem faced with the thumb-over-thumb technique is a tendency to "muscle" the pistol, or grip it too tightly. This causes the gun to become unstable during recoil, and if you aren't careful, it may end up twisting in your hands.
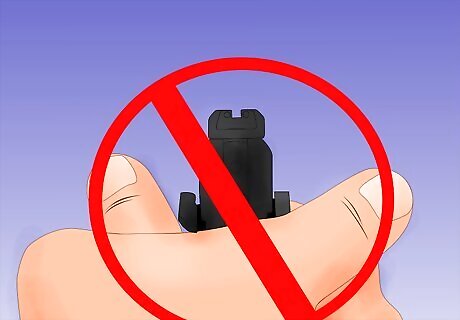
Use the straight thumbs technique. The straight thumbs technique, also called the forward thumbs technique, is very similar to the thumb-over-thumb grip. The only real difference is the placement of your thumbs. This grip tends to be more precise and allows for a faster draw, but it can also be a bit more difficult to master for beginners. As with the thumb-over-thumb grip, the straight thumbs grip starts with proper placement in your dominant hand. Place the pistol in the crook between your thumb and index finger. Make sure that you keep your hand as high on the grip of the gun as possible. Wrap your middle, ring, and pinky fingers around the grip of the gun so that the fingers are all side-by-side. The middle finger should also lie just below the trigger guard. Keep your index finger on the opposite side of the gun frame. Wrap your thumb around the grip as you would do with a thumb-over-thumb technique. The tip of the thumb should touch the top side of your middle finger. There will be a gap between the heel of your hand and the tip of your fingers. Use your non-dominant hand to fill this gap. Wrap it around the dominant hand from the opposite side, positioning the index, middle, ring, and pinky fingers over your dominant fingers. Line up your non-dominant thumb so that it lines up in front of the dominant thumb. Both thumbs must be pointing forward. Note that your dominant thumb will no longer be touching your dominant middle finger at this point. Instead, it will end up resting on top of the side of your non-dominant thumb. When you decide to fire your gun, place the top of your index finger on the trigger and pull. You should only pull with the portion of your index finger between the tip and the top knuckle. Note that there are some pistols that are difficult to shoot with a straight thumbs grip. With a SIG, the dominant thumb has a tendency to ride up the slide stop and prevent the slide from locking open when empty. With a Glock, the shooter may find himself or herself pushing up on the slide stop with the heel of the support hand and locking the slide open prematurely. With a Browning Hi-Power, the dominant thumb can put pressure on the slide stop at the rear and the non-dominant thumb can bang into the front of the slide stop during the recoil, thereby preventing the shell from ejecting.
Dangerous Grip Types
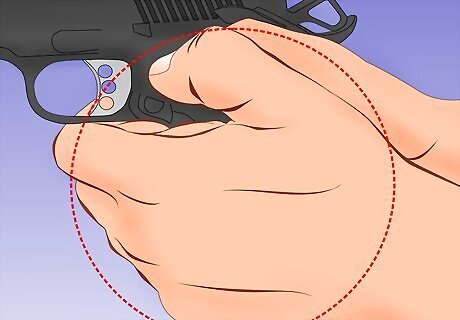
Avoid tea-cupping. Tea-cupping, also known as the cup-and-saucer grip, is a somewhat popular two-handed grip technique, but it is also a fairly unstable one. It is not advisable to use it. Your non-dominant hand does not provide your dominant hand with enough support, and as a result, your aim is more likely to be skewed and the gun is more likely to fly back during recoil. With a teacup grip, the dominant hand rests on the gun as it would with any other two-handed grip. The non-dominant hand rests below the dominant hand, essentially "cupping" it from the bottom. The non-dominant thumb is usually positioned somewhere around the middle and ring fingers.
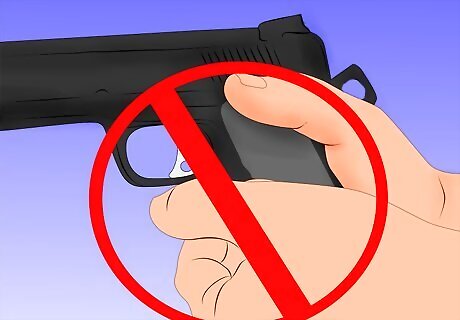
Do not cross your thumbs. While no experienced shooter crosses his or her thumbs intentionally, a beginner may make this mistake without thinking. When you cross your thumbs, you are putting your thumbs at risk for injury. The slide of the pistol moves back once you fire the gun. When you hold the gun in this manner, you place your thumbs in the path of the slide, causing the slide to crash into the thumbs at full force. A shooter with crossed thumbs holds both hands around the grip of the gun from either side. The fingers overlap in front of the grip, and the thumbs cross over each other from the back of the grip.
Additional Considerations
Keep your grip tight. As a general rule, you will shoot better if you grip the pistol with as much strength as possible while still maintaining the ability to control the trigger. It is important, though, that you only grip with your hands. When you grip the pistol, pay attention to what your shoulders and arms are doing. If they feel tense, you need to relax them. Your hands should be the only part of your body in which you feel the tension of the grip. You may find it easier to keep tension out of your arms if you grip the gun before your arms are in a shooting position. Push your arms out in front only after you have a secure grip on the gun. A pistol grip that is too relaxed will cause the pistol to recoil too much, but a grip that is too hard may mess with your sight alignment or cause your hands to weaken too quickly.
Set your wrist. Position your wrists so that the heel of your non-dominant hand is as high and flat on the gun as possible. In doing this, you can ultimately support and control the pistol better. As a general rule, you want both hands to be as high up on the gun as they can be. You need to secure the center of weight or pivot point to prevent the gun from flipping over during its recoil. If you keep your grip too low, you will not be able to steady the gun at this point.
Apply isometric tension when firing the gun. This technique is also known as the push-pull method. As you apply forward pressure with your dominant or firing hand, you should pull rear pressure using your non-dominant or non-firing hand. This technique reduces the amount of recoil you will encounter and can improve your aim. The supporting (non-dominant) arm should be bent with the elbow pulled down. The firing (dominant) arm should be fully extended with the elbow and wrist locked.


Comments
0 comment