

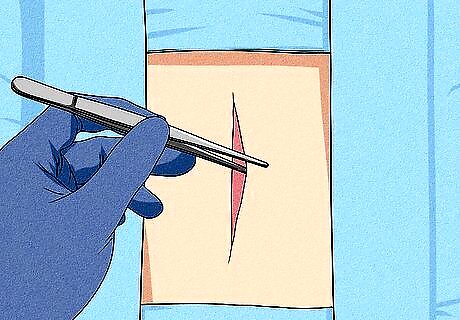
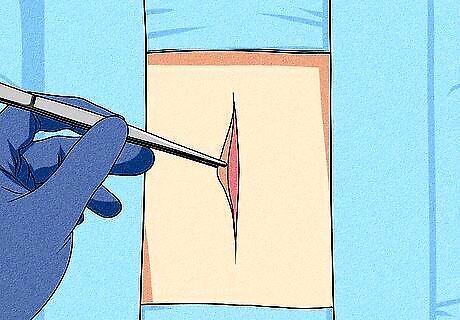
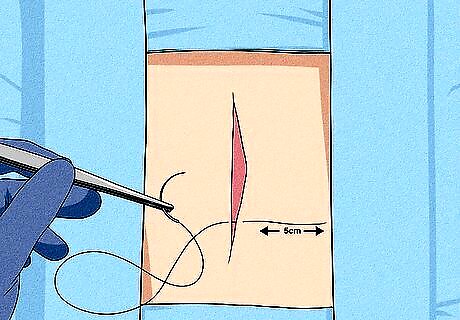
Use the forceps to evert the right skin edge. Hold the forceps with your left hand and lift the right skin edge.
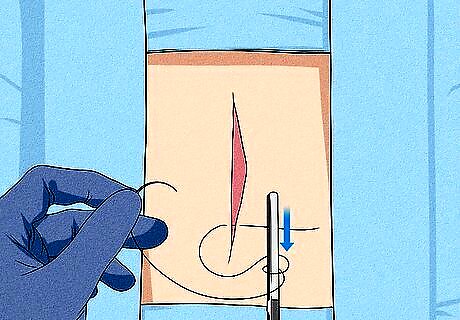
Push the tip of the needle through the right skin edge to the center of the wound. Hold the needle so that the tip of the needle is perpendicular to the skin. Penetrate the skin and turn wrist inward, following the curvature of the needle, to push the needle through the tissue until the tip of needle is seen in the middle of the wound. *CAUTION: Do not push the needle to close to the opening of the wound or too far away.
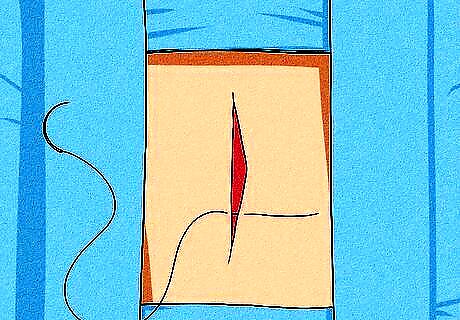
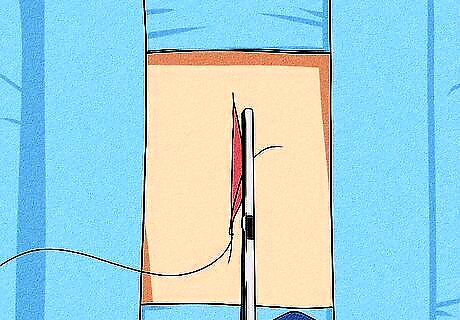
Pull the needle out of the right skin edge. Release the needle and pick it up again at the tip of the needle. Pull until the entire needle is out on the right skin edge.
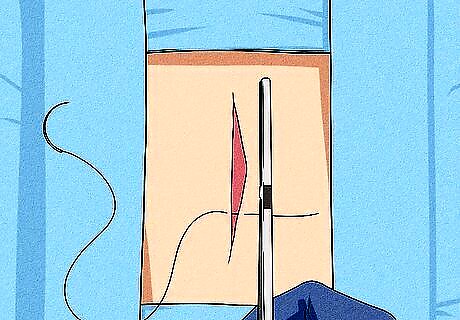
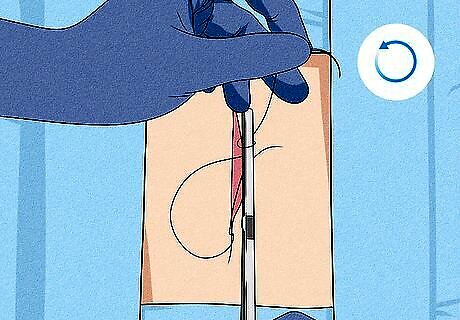
Reposition the needle in the needle holder. Use the forceps to hold the needle and then correctly reposition the needle in the needle holder.
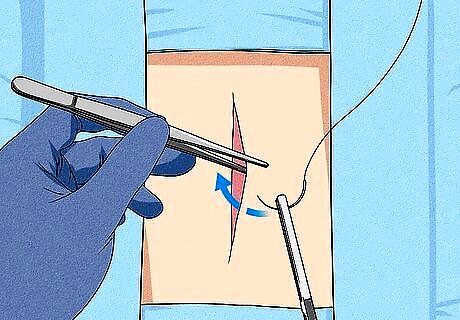
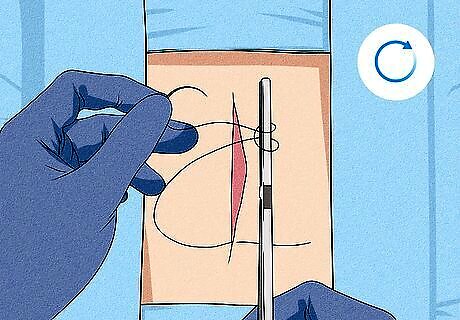
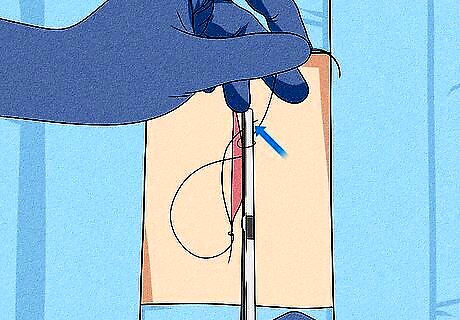
Use the forceps the evert the left skin edge. Grasp the part of the left skin edge that is straight across the wound from where you first inserted the needle on the right side.
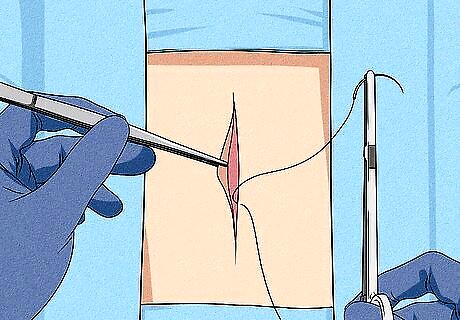
Push the needle through the left skin edge. Place the tip of the needle perpendicular to the inside of the wound. Penetrate the skin and turn the wrist inward, following the curvature of the needle, to push the needle through the tissue until the tip of needle is seen on the outer left side of the wound. *CAUTION: Do not push the needle to close to the opening of the wound or too far away.
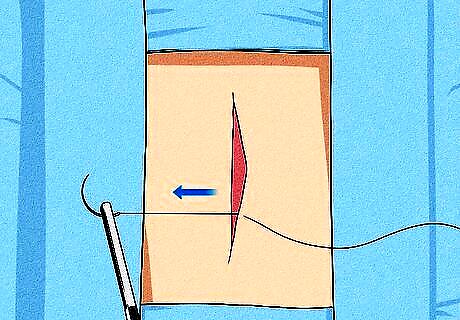
Pull the needle out of the left skin edge. Release the needle and pick it up again at the tip of the needle. Pull until the entire needle is out on the left skin edge.
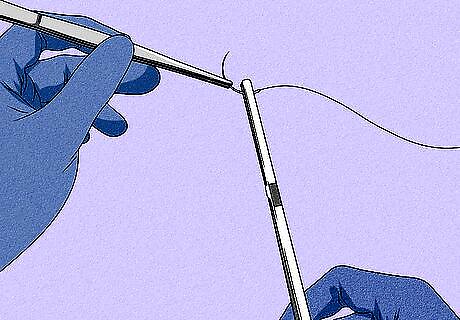
Transfer the needle from needle holder to left hand. Grasp the needle farthest away from the tip and release the needle from the needle holder *WARNING: Be careful; the tip of the needle is sharp.
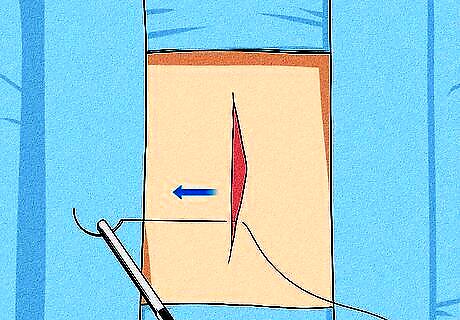
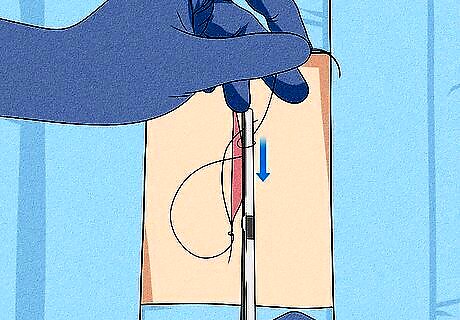
Create a 5 cm short end on the right side of the wound by gently pulling the suture thread through the wound. The suture thread pulled through is the long end of the suture thread which is now on the left side.
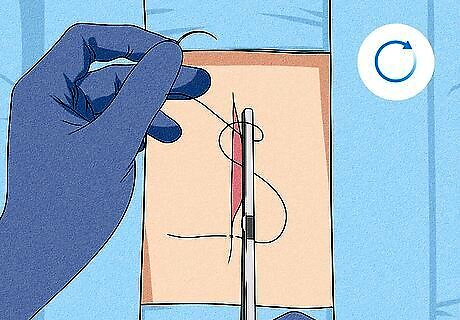
Put the needle down and out of the way. The needle will not be used for the remainder of the procedure.
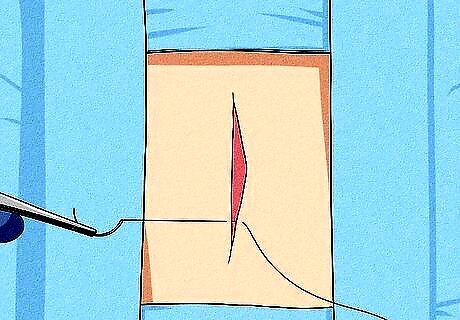
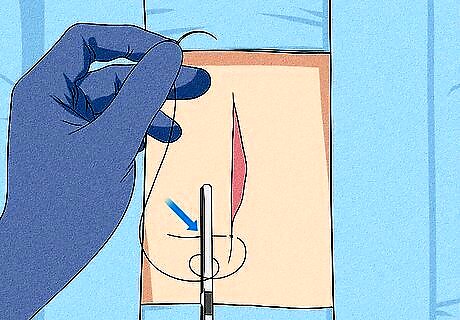
Place needle holder parallel to the wound in the middle of the two strands. Do not make contact with the wound.
Loop the long strand around the needle holder twice (clockwise). Lift the part of the long strand, that is closer to the wound, up and over the instrument. Loop the thread twice around the needle holder.

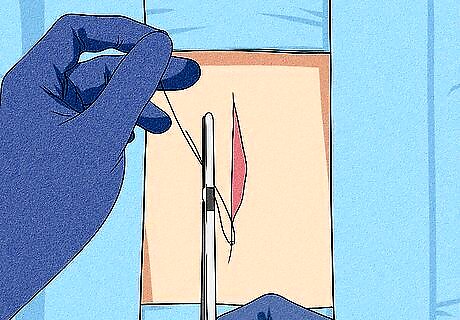
Grab the short side of the thread using the needle holder. Grab the short side of the thread as close to the end as possible. More than one degree of tightness may be necessary, so that the suture material doesn't slip out of the jaws of the needle holder.
Pull the short thread through the loops. When pulling the thread, cross your left hand over your right and pull so that the edges of the wound touch. Release the short end of the suture thread. Note that the short side of the thread is now on the left side and the long side of the thread is on the right side. *WARNING: Pulling too tight can cause tension in the skin or the suture could break. Not pulling tight enough will leave the wound open.
Place needle holder parallel to the wound in the middle of the two strands. Do not make contact with the wound.
Loop the long strand around the needle holder once (counterclockwise). Lift the long strand up and over the instrument. Loop the thread once around the needle holder.
Grab the short side of the thread using the needle holder. Grab the short side of the thread as close to the end as possible. More than one degree of tightness may be necessary, so that the suture material doesn't slip out of the jaws of the needle holder.
Pull the short thread through the loop. When pulling the thread, cross your left hand over your right and pull so that the edges of the wound touch. Release the short end of the suture thread. Note that the short side of the thread is now on the right side and the long side of the thread is on the left side.

For one last time, place needle holder parallel to the wound in the middle of the two strands. Do not make contact with the wound.
Loop the long strand around the needle holder once (clockwise). Lift the long strand up and over the instrument. Loop the thread once around the needle holder.
Grab the short side of the thread using the needle holder. Grab the short side of the thread as close to the end as possible. More than one degree of tightness may be necessary, so that the suture material doesn't slip out of the jaws of the needle holder.

Pull the short thread through the loop. When pulling the thread, cross your left hand over your right and pull so that the edges of the wound touch. Note that the short side of the thread is now on the left side and the long side of the thread is on the right side.
Using the suture scissors, cut the suture thread. Pick up both the long and short ends of the thread in one hand. Cut the threads evenly and close to the knot. *Caution: Be careful not to cut too close to the knot or it might come undone.
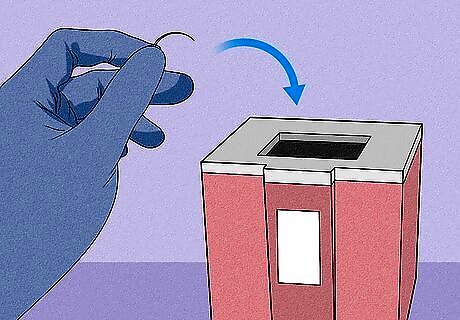
Dispose the needle in a sharps container. Grasp the needle with the needle holder and drop it in the sharps container.


Comments
0 comment