
Choosing the Right Brush

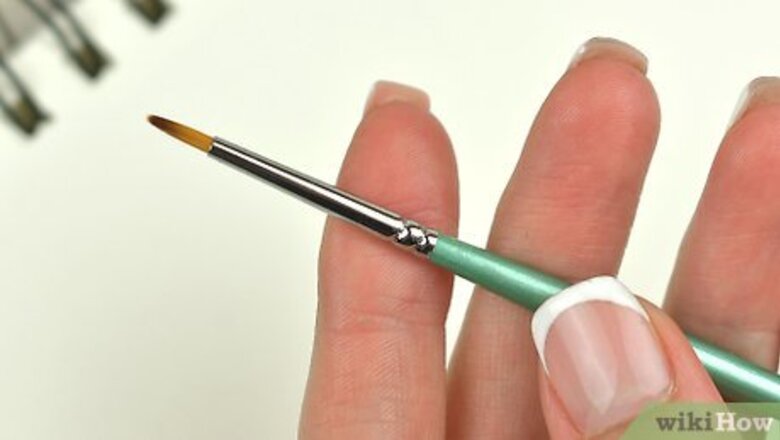
Choose a pointed round brush for standard thin lines. For lines thinner than 0.5 in (1.3 cm), a pointed round brush is your best bet. A flat brush will lead to uneven lines as you change directions with it, while a regular round brush won’t give you a lot of freedom when it comes to the width of your line. This brush is perfect for painting facial features, tree branches, cloud details, and other objects that require definition and control. The size of the brush will determine the width of the line, so choose your specific pointed round brush based on how thick you want the mark to be. For thin lines, you’ll likely need a #8 brush, or smaller.
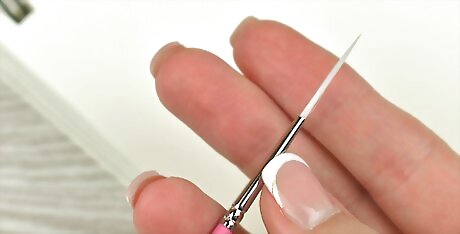
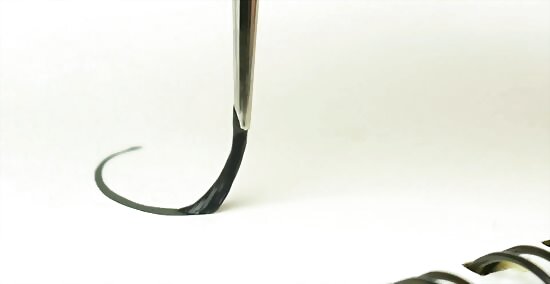
Use a liner brush for exceptionally thin lines. For lines thinner than 0.125 inches (0.32 cm), grab a liner brush. Liner brushes have an extremely low number of bristles that are bundled tightly together, which makes them perfect for extremely thin marks. Grab a set of liner brushes to make the smallest lines possible.Tip: When brushes get this small, the sizing conventions can seem a little odd. Brushes that are size 0 are actually the biggest liner brushes, followed by 00, 000, and 0000. After that, the bigger the number over zero is, the smaller the brush. For example, 4/0 is bigger than 10/0. The smallest brush is 20/0. These brushes are great for adding tiny details, highlighting small objects, and painting background figures with a high degree of accuracy. They’re also phenomenal for adding small objects like hair, grass, and rain. Liner brushes are also known as detail brushes. These brushes are identical. Brushes do not get smaller than the liner brush.
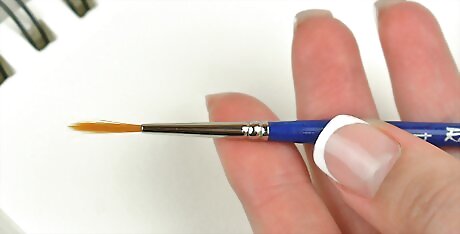
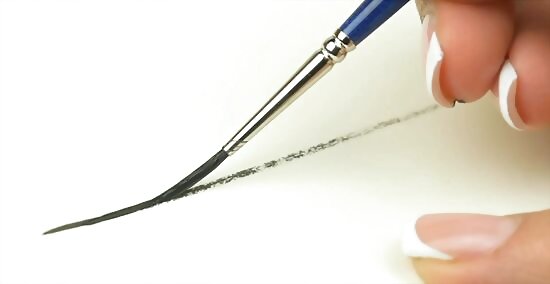
Grab a rigger brush to keep thin lines straight and even. If you’re trying to paint an even line and keep it thin, use a rigger brush. A rigger brush is much longer than a standard brush, which makes it easier to control the bristles with minimal wrist movement. The longer bristles also help to maintain uniform contact with the surface you’re painting when you drag them at an angle. This leads to flatter, even colors in your lines. This brush is the best choice for medium-sized lines that need to be straight. This is a great choice for rays of light, comets, light poles, straight tree trunks, and shooting stars. This brush is not the best choice for lines thinner than 0.25 inches (0.64 cm), since the bristles make more contact with the surface when you use the brush.
Use brushes with synthetic bristles for acrylic paint. Since acrylic paint has water in it, natural bristles will absorb the water and result in weaker, more inconsistent lines. Inversely, synthetic bristles don’t mind water at all and will retain their shape even when they’re wet. Choose brushes with synthetic bristles when working with acrylic paint. When it comes to the size of the brush, use whatever feels good in your hand. There are no hard rules surrounding what size your brush should be. At the art store, pick brushes up and hold them in your hand to see how they feel.
Using Your Brush
Wet the brush and dip it into the paint without overloading it. Dip your brush in water to get the bristles wet. Gently lower the tip of your brush into the paint on your easel. The amount of paint that you load into your brush directly correlates with how paint will be applied when you use the brush. Keeping the paint on the tip of your brush will keep your lines from being too wide when you paint. How deep you dip the tip depends on the size of the line you’re trying to paint. For an extremely thin line, only dip the top 0.10 in (0.25 cm). Keep in mind, you’ll need to reload you brush frequently when painting lines this thin. You can use a gel medium instead of water if you prefer.
Brace your hand by resting it on the painting surface to stabilize the brush as it moves. It’s hard to maintain a thin line if your hand is hanging in the air and has nothing to keep it stable. To avoid this, press the base of your wrist or the side of your hand against your painting surface as you paint. Use your wrist or hand to keep the brush level with the painting surface.Tip: Acrylic paint dries pretty quickly. If your canvas or paper is wet with paint and you can’t use it to brace your hand, simply wait 1-3 hours and let your painting surface dry.
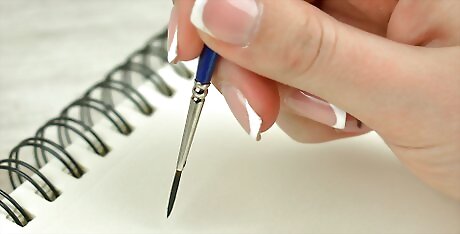
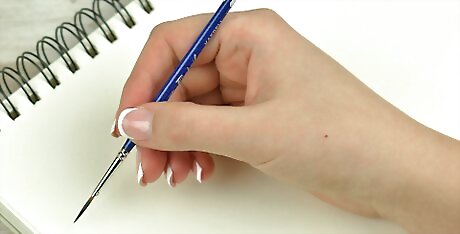
Hold the brush perpendicular to your painting surface and steady your hand. For the thinnest lines possible, hold the brush perpendicular to the surface that you’re painting. Grip your fingers around the brush, 1–3 inches (2.5–7.6 cm) above the bristles based on your personal preference.
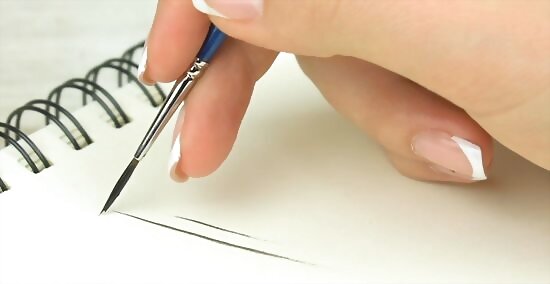
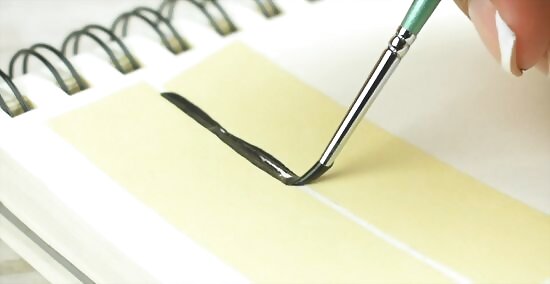
Lower the tip and drag your hand slowly across the paper to create the line. Lower your brush until the tip is barely touching the surface. Then, without moving your wrist, drag your entire hand in the direction you’re painting your line to apply your paint. Do not change the angle of your brush as you’re painting.
Reload your brush every 1–3 in (2.5–7.6 cm) whenever it dries out. If you’re only using the very tip of your brush to paint, you’ll need to reload the brush every 1–3 inches (2.5–7.6 cm). If you’re dragging the bristles behind at an angle, you’ll likely need to reload the brush every 4–6 inches (10–15 cm). Whenever your lines start to thin out and become patchy, reload the bristles with more paint. Rigger brushes are generally good at retaining paint and do not require as much reloading as pointed round brushes. Liner brushes need to be reloaded most often.
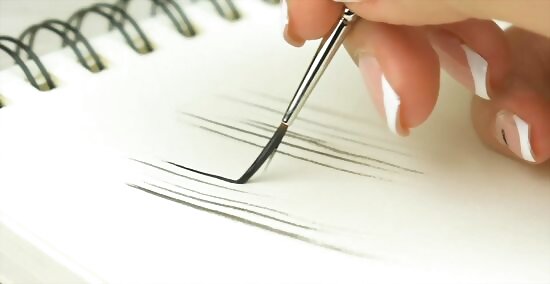
Push lightly and drag the bristles behind the paint for fuller lines. For thin lines that are a little fuller, hold your brush at a 45-degree angle to the surface that you’re painting. Press the tip of the brush into the surface and drag the brush without moving your wrist up or down. This way, the bristles will drag behind the tip of your brush as you paint, resulting in a full line. This is the better option if you’re painting lines that are roughly 0.25–0.50 inches (0.64–1.27 cm) in width, since you won’t need to reload your brush as often.
Paint over thinned-out lines to darken them. When you paint thin lines, your brush is more likely to miss small portions of the surface as you’re applying your paint. To fill these lines in, use multiple applications of paint to darken the line. Use the same method that you used to apply the paint the first time to ensure that the texture is even. Paint directly over your line as needed until the color is even and uniform. Thin lines don’t always come out cleanly because the individual bristles don’t always retain the same amount of paint as you’re applying it. Since a smaller number of bristles are applying your paint, the odds are higher the paint won’t come out evenly.
Using Additional Tools to Paint
Use artist’s tape to paint thin, straight lines with sharp edges. Pull out a length of tape and hold it taut. Then, slowly lower the tape against your painting surface. Repeat this process and put a second piece of tape parallel to your first piece. The gap between the 2 pieces will be where your line appears. Use any kind of brush to paint between the 2 pieces and pull your tape up to make a perfect line.Tip: Artist’s tape is extremely similar to painter’s tape. The main difference is that artist’s tape is designed to adhere to canvas and paper that has already been painted. It is less likely to pull the paint on your canvas up. You cannot use artist’s tape on paper. Unfortunately, the adhesive tends to remove texture from the paper.
Opt for a fine line bottle to paint like you’re using a pen. Set your painting surface up vertically by leaning your canvas against a wall. You can use clothespins or magnets to hold paper up. Fill the bottle with your paint and attach the top of the bottle. Set your canvas or paper up vertically. Turn the bottle on its side and press the tip of the bottle against your painting surface. Squeeze the bottle while moving your wrist to apply the paint like you’re using a pen or marker. A fine line bottle looks kind of like a condiment container. It has a small opening at the tip where paint leaks out like a ball point pen. Purchase a fine line bottle online or at an art supply store. If you use a fine line bottle while your painting surface is laying flat, gravity will naturally pull a larger amount of paint out of the bottle as you use it. This can lead to some messy lines.
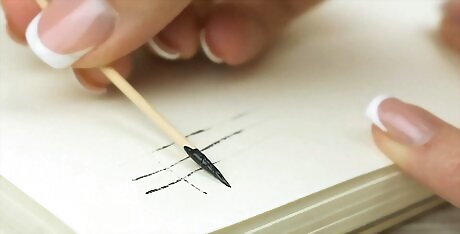
Choose a toothpick for tiny lines and to add movement to wet paint. Dip the tip of your toothpick in the paint and drag the tip into the surface that you’re painting to apply an extremely thin line. You can use the sharp point of the toothpick for barely-visible lines, or the flat edge on the side of the point for slightly larger lines. Alternatively, you can use the tip of a toothpick to add small lines to wet paint. After painting a surface, drag the tip of the toothpick in the wet paint. Drag lightly to add movement to the paint or drag firmly to remove the paint and create a light line where the paint used to be.


Comments
0 comment