
Cutting and Stretching the Pantyhose
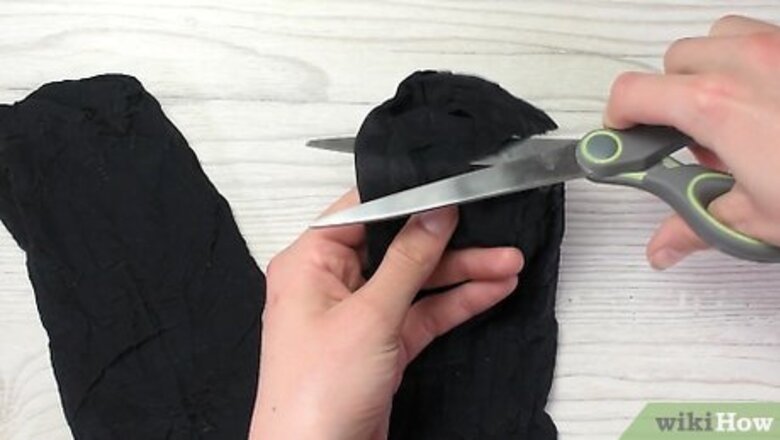
Remove the legs from a pair of pantyhose with fabric scissors. Set the leg sections aside and discard the rest of the material. Ideally, try to use new or gently used pantyhose for this project. You can buy nylon pantyhose online or in most clothing stores. They’re typically a dusty brown color, but you can use whatever color or pattern you want!
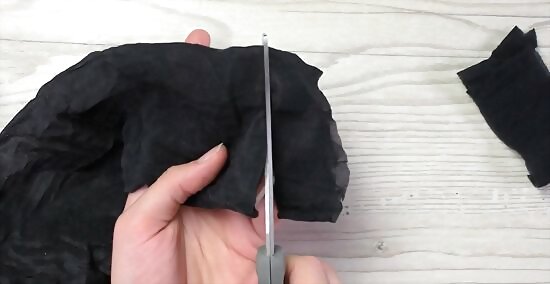
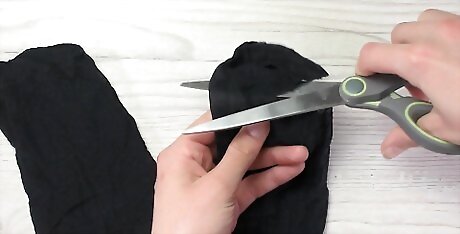
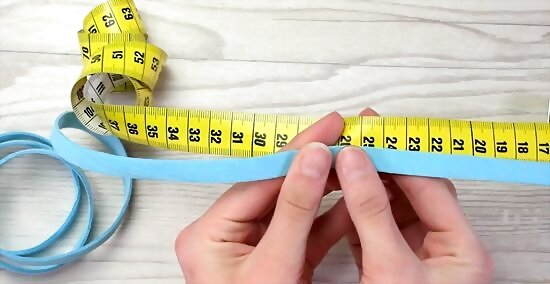
Cut a 1.5 in (3.8 cm) strip straight across the leg of the nylon. Take a ruler and measure about 1.5 in (3.8 cm) from the edge of the pantyhose leg. Trim in a straight line across the pantyhose, removing and setting the section of nylon aside. You can make your ring thinner or thicker, depending on what you prefer. It’s best to cut from the upper leg portion of the pantyhose, as the headband needs to fit around a baby or infant’s head. If you’d like to make a smaller headband, you could try cutting from a lower part of the pantyhose.
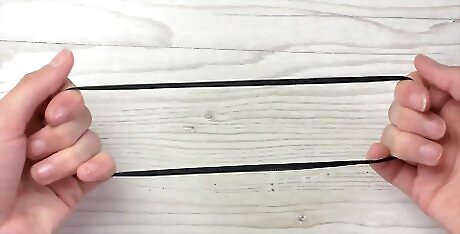
Pull on the nylon ring with both hands to make it stretchier. Hold the section of nylon in both hands and stretch it to the sides. Continue pulling on the makeshift headband until it forms a ring shape. You need to stretch the pantyhose if you want it to fit on an infant’s head.
Decorating the Headband
Measure and cut 2 strips of velvet ribbon to make a bow. Snip off a 1 ft (30 cm) section of thin ribbon, then form 2 large loops to serve as the base of your bow. Trim the ends of the bow to be your desired length so it fits on the headband properly. Once you‘ve done this, cut a separate 2 in (5.1 cm) long section of ribbon and set it aside. You can use any type of ribbon for this. You’ll use the smaller section of ribbon to secure the center of the bow.
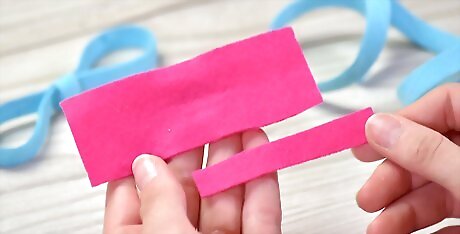
Cut out 2 strips of felt to make a sturdier bow. Use a pair of fabric scissors to cut a 3 to 4 in (7.6 to 10.2 cm) long strip of felt. To make the bow especially sturdy, make sure that the felt is around 1 in (2.5 cm) wide. Set this longer strip of felt aside, then cut out a thin, 2 in (5.1 cm) piece of felt. Make sure that both strips of felt are the same color. The thin strip only has to be about 0.5 in (1.3 cm) wide.Did you know? You can trim a large section of fabric to make a fluffier bow. Cut out a large, 6 by 18 in (15 by 46 cm) section of soft fabric. Lay the fabric out flat, then fold the material lengthwise several times to create a fluffy bow. Leave 2 in (5.1 cm) or so of extra material hanging off the bow so you can tie the fabric to the headband.
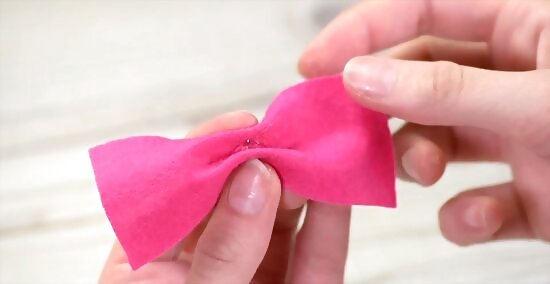
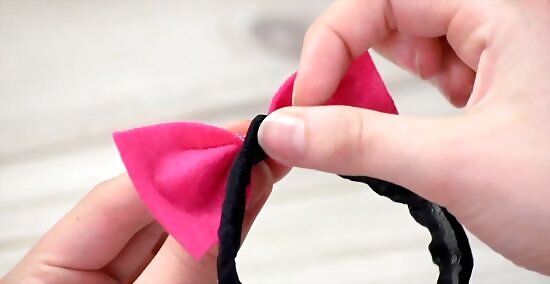
Make your felt into a bow shape and arrange it on the headband. Pinch the center of your felt strip to make it look like a bow, then add a dot of hot glue to the center to hold it in place. Next, center your ribbon or felt on the edge of your nylon headband. It may take 30 seconds or so for the glue to dry completely.
Squeeze a pea-sized amount of hot glue beneath the bow to hold it in place. Let the glue cool and harden for several seconds before you continue. Try not to touch the glue as you work!
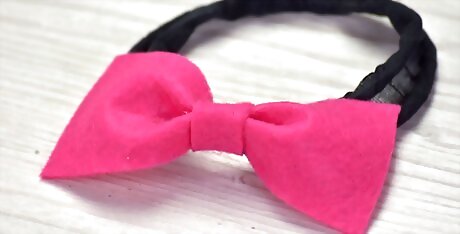
Glue the smaller strip vertically around the center of the bow. Take the thinner strip of felt or ribbon and arrange it vertically on the center of your bow. Use a dot of glue to secure the thin strip of ribbon or felt to the back of the bow, then wait a few seconds for the glue to dry. Continue wrapping the strip around the center of the bow, using an additional dot of glue to keep it in place. Cut off any excess ribbon or felt once you’ve wrapped and glued the center strip into place.


Comments
0 comment