views
Getting Started
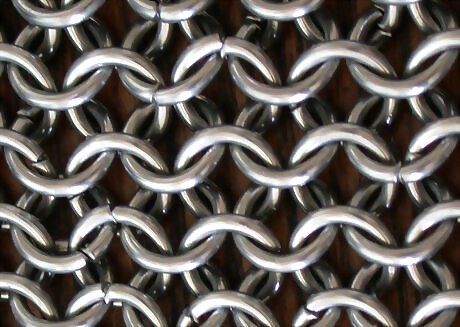
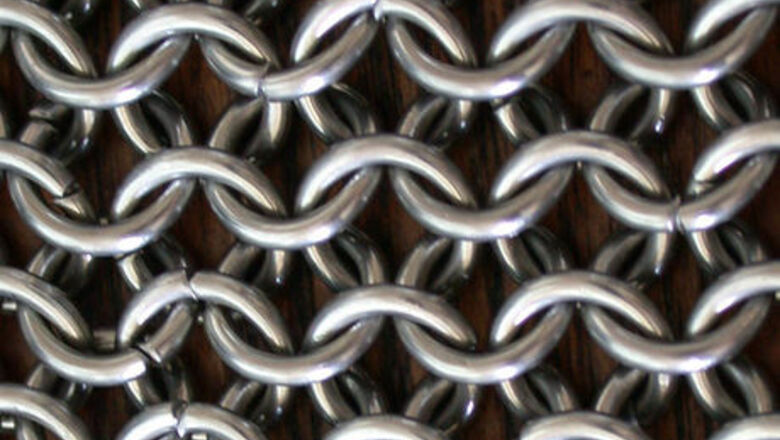
Choose a weave that you like. If you’re just getting started on making chainmail, go for an easier weave. You can pick from the European 4 in 1, the European 6 in 1, the Box Chain, the Full Persian, the Half Persian, or Butted chainmail. As you get better at making chainmail, you can move onto tougher weaves.
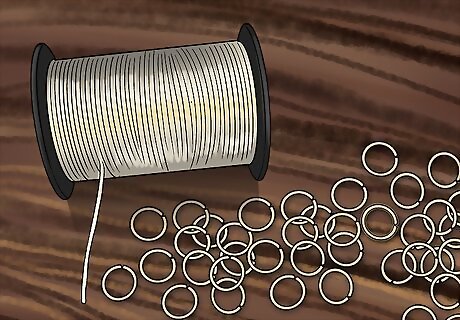
Pick out wire or pre-made rings. Now you can decide whether you will make your own rings from wire or purchase pre-made wire rings. Rings are available in a variety of combinations of inside diameters (distance between the inside edges of the ring--abbreviated to ID) and gauges (wire thickness, or wire diameter [abbreviated WD]). The relationship between these two numbers, using the formula ID/WD, is the aspect ratio (abbreviated AR). Bigger rings will cover an area with fewer rings and less weight, but the texture will be coarser, regardless of AR. Rings with a larger AR will not be as strong as smaller AR rings of the same material, regardless of the material. Wire of a thicker gauge will be more durable, but also weigh more and be harder to work with. Materials for rings are not limited to plain iron or steel. You can also get rings in galvanized steel, stainless steel, aluminum, titanium, inconel, niobium, silver, gold, and rubber. You can also get rings in a variety of colors and create many different inlays with them. An easy source of wire to get started is coat hangers. They are fairly easy to bend. The downside is that you have to cut your own rings and the result is not very strong. You can also find wire in the Fencing section of the hardware store.
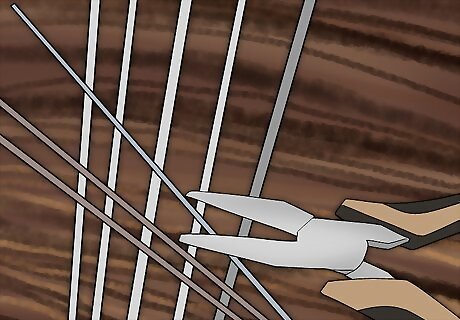
Gather your pliers and a metal rod. If you aren’t working about marring or scratching the rings, get 2 pairs of needle nose pliers with teeth. If you want to keep the rings pristine, get some needle nose pliers without teeth. You should also grab a ⁄2 in (1.3 cm) metal or wooden dowel. If you’re working with super thin or small wire (like for jewelry), you can use tweezers instead of pliers. Your metal or wooden rod can be almost anything, as long as it’s about ⁄2 in (1.3 cm) in diameter.
European 4 in 1
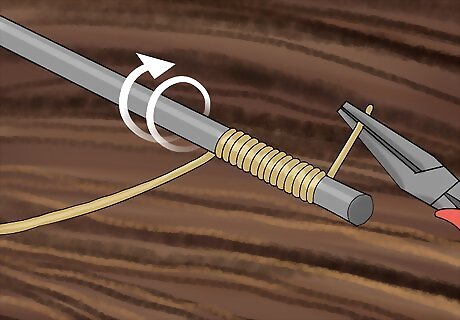
Wind the wire firmly around a rod. Place the end of your wire on your metal or wooden rod and slowly wind it up. The goal here is to get as many rings as possible that are even in size and shape, so try to be consistent with your winding. You may need to control one or both ends with pliers. Aim for even, consistent loops and try to avoid putting tight kinks in the wire. If the wire came in a coil or spool, wind with the curvature that the wire already has. For making large quantities, make a small hole in the rod to fasten the wire and use a drill to rotate the rod. If you do this, wear heavy gloves to protect your hands.
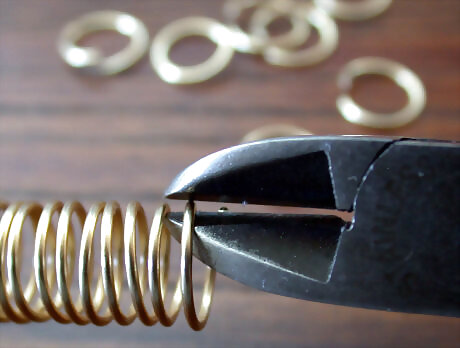
Cut the rings out with wire cutters. Slide your spool of wire off the rod and carry it over to a workbench or table. Cut off the end of the wire that isn’t in a full ring, then start carefully snipping rings out of the spool. Aim for full, 360 degree rings that are cut evenly. Try to hold your wire cutters at a slight angle so they’re easier to cut. If you’re worried about the rings flying everywhere, put on eye protection. Keep all the rings that you’re cutting out in the same place.
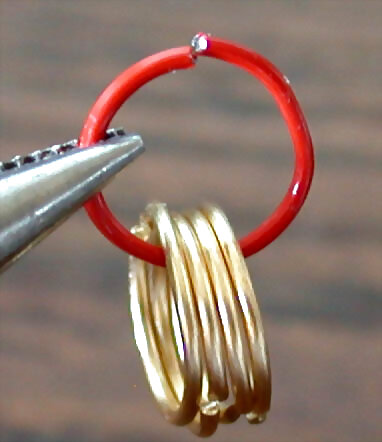
Thread 4 rings onto a fifth ring. Grab 4 of your rings and thread them onto 1 ring that’s slightly open in the center. Once they’re all threaded, close the fifth ring using your needle nose pliers. To open and close the rings, always twist the ends of the ring away from each other. If you pull them straight away from each other, your ring won’t be round anymore. This is the first chain in your chainmail.
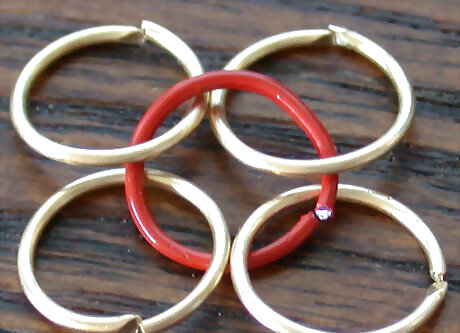
Arrange the 5 rings in an alternating pattern. Keep the top ring on top and spread out the 4 rings around it with 2 under and 2 over. It looks a little silly right now, but that’s only because you haven’t added the rest of your pattern. It’s very important to be working on a flat surface so you can spread out your chainmail as you go.
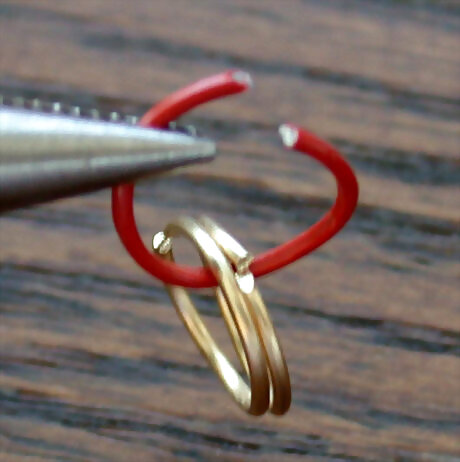
Thread 2 more rings onto a separate ring. Grab 3 rings total and open 1 up. Slide the other 2 onto the third ring, but don’t close it just yet! This is where you’ll start to build your weave pattern.
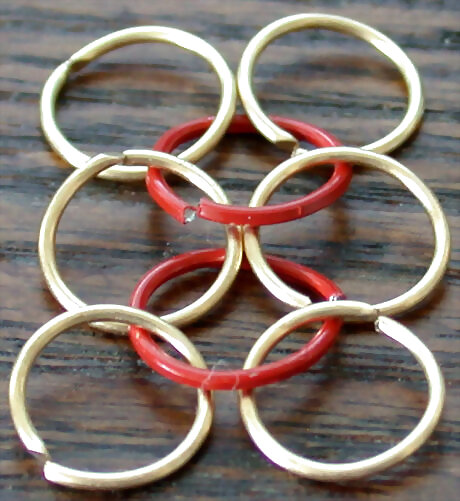
Loop the open ring through the bottom of the 5 rings. Head over to the 5 rings you laid out on the table and loop the 1 open ring you still have through the bottom 2 rings. Close the open ring with needle nose pliers so it stays shut, then arrange the rings into a flat repeating pattern. Make sure the pattern always looks even so your chainmail will be symmetrical.
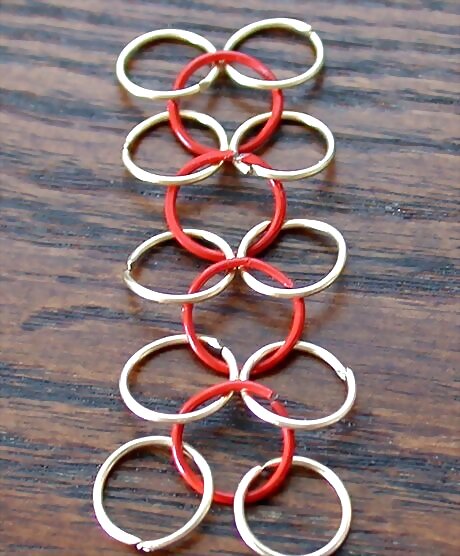
Keep attaching new loops until your chain is long enough. You can use up the rest of the rings in your rod, make more, or stop when you’ve only used some of them. Keep opening up 1 ring and attaching 2 rings to it, then slipping it onto the bottom 2 rings of your last weave. When you’re done, make sure your pattern is laid out flat on the table and that everything repeats evenly. The length of the strip depends on what you’re making with the chainmail. For clothing, you’ll want a large strip; for jewelry or small items, you can use your discretion.
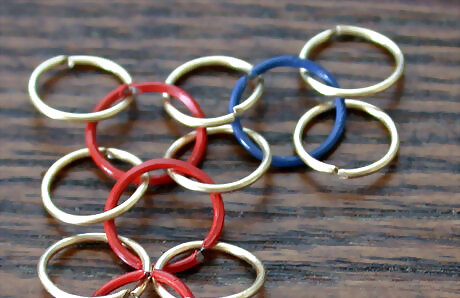
Build the next row by attaching rings to the side of the strip. Now it’s time to add some width to your chainmail. Grab 2 closed rings and put them onto 1 open ring, just like you did before. Loop the open right through the top 2 rings from the first row, then spread the rings out so they’re side by side with the strip you’ve been building. Make sure that all of the rings are oriented the same way.
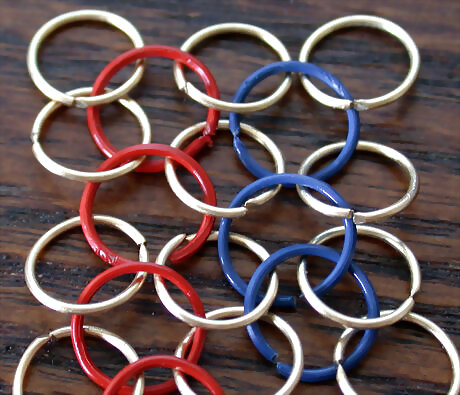
Continue down the line to complete this new row. To match the row you already did, keep adding 2 rings to 1 open ring, then attaching them to the side of your first row of chainmail. When you reach the bottom of the row, you can stop.
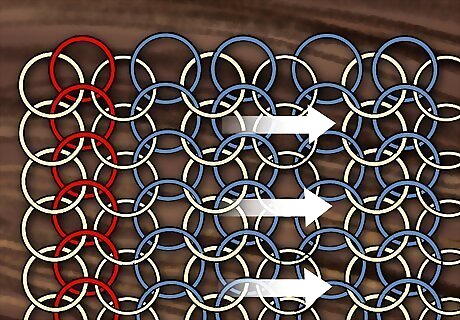
Add new rows until your chainmail is as thick as you want it to be. If you’re making a shirt, you’ll probably need at least 7 rows, if not more. If you’re going for jewelry, 1 or 2 rows might be enough. Keep adding rows of chainmail until you’ve got enough of them to make your project. If you want to make a chainmail shirt, you’ll need to make an entire new piece of chainmail for the back of the shirt too. Then, you can connect them with rings down either side.
Box Chain
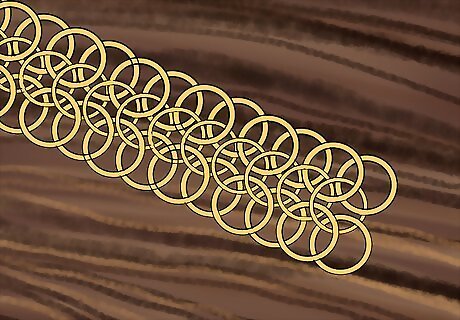
Create a strip of European 4 in 1. If you thought you could skip out on the European weave, you’re out of luck. To start your box chain, make a strip of chainmail in the European 4 in 1 style just slightly longer than you’d like your box chain weave to be. This means that you’ll need to wind the wire and use wire cutters to create loops, then attach them together 3 rings at a time. The box chain is great for making jewelry, but not so great for shirts or armor.
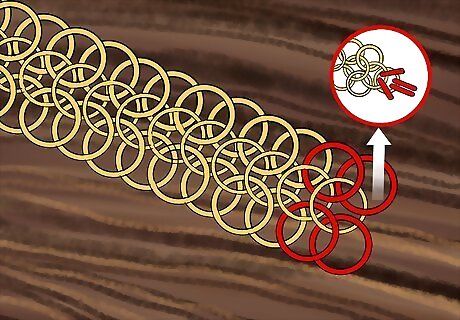
Fold the last 4 rings upwards. With your strip of chainmail spread flat, grab the last 4 rings at the bottom of the strip and fold them so they’re sitting on their sides. This should now look like a flat strip with 2 hanging rings on the bottom and 2 hanging rings on the side. From above, the bottom 4 rings might look like an arrow pointing upwards at the rest of the strip.
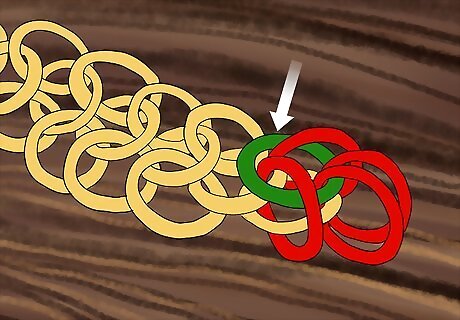
Loop an open ring through the upturned 4 rings. Grab a new ring and open it up with your needle nose pliers. Thread it through all 4 of the rings that you turned upwards, then close the open ring. This new ring will sit on top of the strip of chainmail you already have.
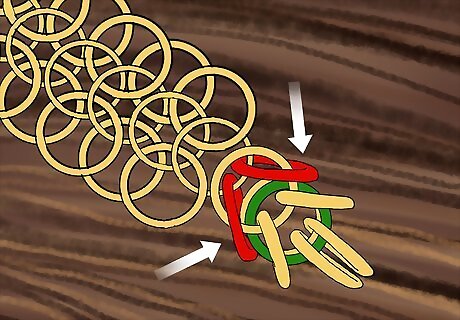
Fold up the next 2 outside rings. Take a look at your strip of chainmail and find the 2 rings on the outer edges. Flip those rings up so they’re on their sides, just like you did with the first 4 rings. Seeing a pattern here? This is how you’ll get your rings to stand up on their own.
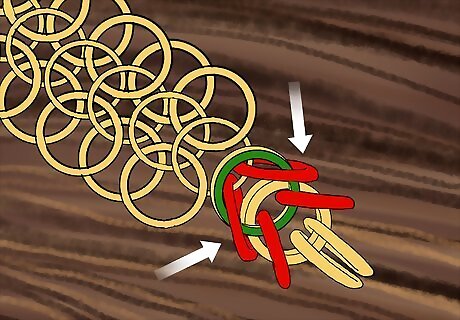
Thread an open ring through the closest 4 rings. Open up a new ring with your needle nose pliers and thread it through the 2 rings you just flipped up as well as the 2 rings behind them. Now, you’ll have a linked pattern of upturned rings in a row. You can close the open ring with needle nose pliers when you’re done. It’s super important to thread the new ring through both the 2 that you flipped up and the 2 behind it. That way, all of the rings will stay connected.
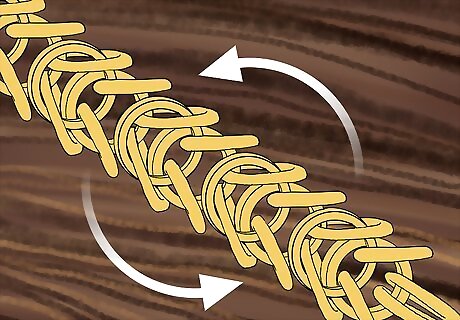
Keep going until you’ve connected your entire strip. Now, you can head up the strip of your chainmail, flipping up the outside 2 rings and threading a new right through the closest 4. When you’re done, you’ll have a strip of block chain chainmail that’s perfect for bracelets, necklaces, or dangly earrings. If you’re new to chainmail, be patient with yourself! These skills take time to learn, and you might not get it perfect on your first try.
Using Your Chainmail
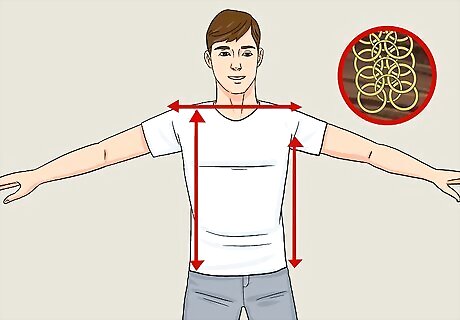
Make a chainmail shirt out of a European 4 in 1. Start by measuring the width and length of your torso so you know how much chainmail to make. Then, measure the length from your waist up to your armpits. Create a European 4 in 1 weave that spans the length and width of your torso from your armpits down, then add a longer strip on either side to make sleeves. The most time-consuming part of making a chainmail shirt is attaching all of the loops, since you need so many of them. You can find free chainmail shirt patterns online if you need a more specific guide.
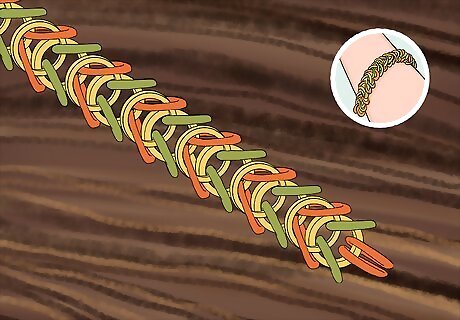
Use the box chain to make bracelets or necklaces. The box chain weave is perfect for creating flashy jewelry that you can show off. When you’re done with your strip, just connect the 2 ends using an open loop, then put it on your wrist or your neck. If you do want to wear your chainmail as jewelry, consider using colored metallic rings to make it stand out more.
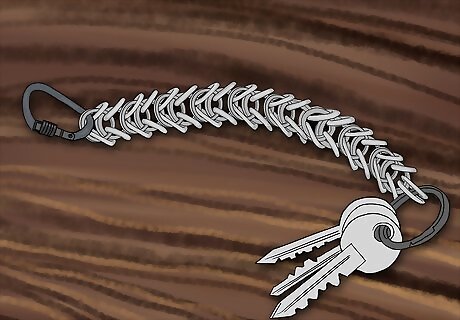
Make a keyring out of a box chain weave. Once you complete your strip (try to make it about 3 to 4 in (7.6 to 10.2 cm) long), simply attach a keyring to one end and a carabiner to the other. Now you have a cute way to show off your chainmail creation while giving it a function as well. Try using alternating ring colors, like blue and silver, to make your keyring more interesting.


Comments
0 comment