
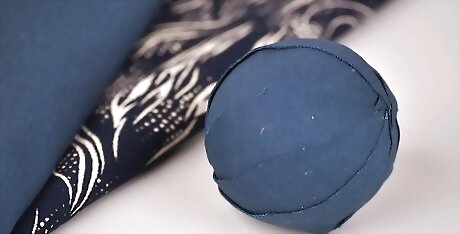
Making a Basic Ball Ornament

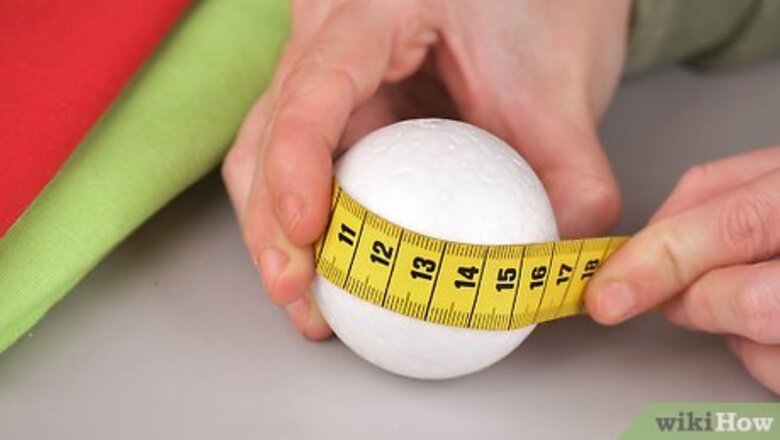
Get the measurements for the templates. Measure the height of the ball. This will be different from the diameter. One side top to bottom. This is the height/length of a section Divide the diameter of the ball by the number of sections and round up to the nearest inch or centimeter, millimeter. This is the width of the section.
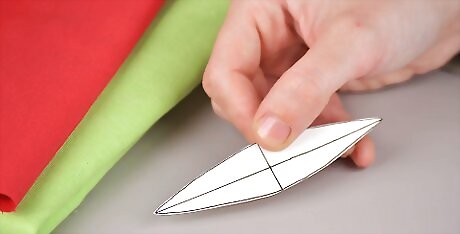
Form measurements into a template. Draw a vertical line the height of the section. Draw a horizontal line the width intersecting the two at the center. Connect the line ends forming the shape of an eye.
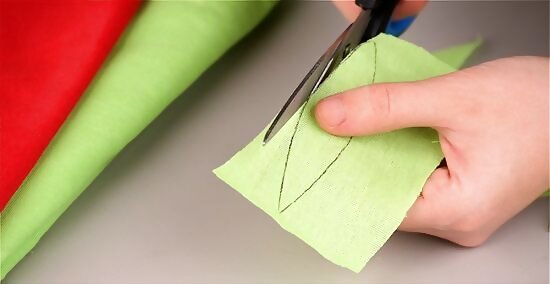
Cut out the fabric for the sections. On a piece of sturdy paper or stiff fabric draw the template. Cut this out. On a piece of fabric pin the template to the fabric. Cut the number of desired section pieces you need for the ball. Allow extra width for trial and error because it's easier to take away extra than an add-on. Also, different materials have different degrees of stretchiness, fraying etc.
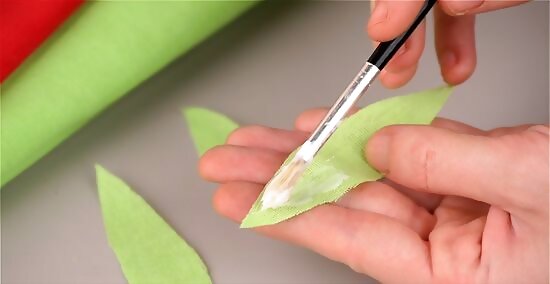
Cover the ball. With a paintbrush, paint the glue on the wrong side on one piece of the fabric. Fluffy fabric (felt) doesn't have a wrong side. Press one fabric shape onto the ball and hold it for a while until the glue grabs and the fabric stays on the ball. Glue a second opposite of the first piece overlapping the top and bottom tips. Glue on the third fabric piece one side in between the first and second piece. Overlap the tips top and bottom and the edges. Glue on the fourth piece in the final empty spot. Overlap the tips top and bottom as well as the edges. When the fabric dries, cut off the excess overlapping fabric until the ball is smooth. Don't worry about the seams (where the section edges meet). A lacy, lattice or mesh fabric can be glued or pinned after the ball is covered with the base material using the same above procedures. This material does not show obvious seams
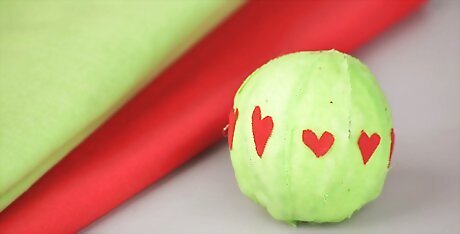
In the center of each section, place a form of ornamentation. Take a ribbon or trimmings and measure enough to around the ball once glue and repeat for the other side. It's best that the two cut ends meet the bottom. Or glue or pin sequins, rhinestones, old jewelry, pins etc to the center of the section If the decoration has a shank (like the back of some buttons) or clips ( clip-back earrings) with a sharp instrument make a hole the size just enough to make a tight fit through the fabric into the ball. Dip this bottom of the decoration into glue and push it into the ball.
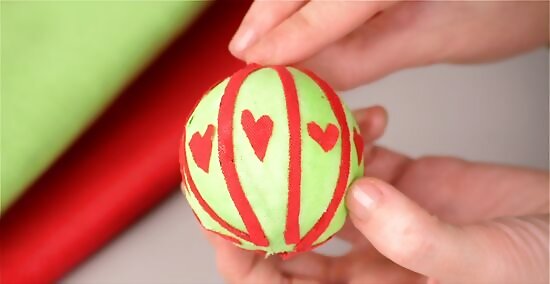
Cover the seams of the sections with ribbons and cording. Do this the same way as the center ribbon was placed on. Cover the raw edges as necessary with large rhinestones, flat beads or sequins.
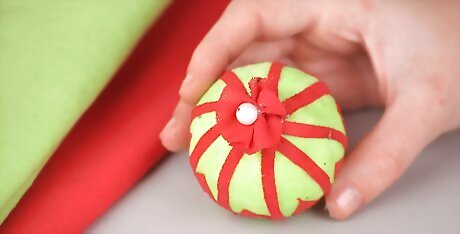
Add a bottom decoration (optional). If a large sequin or bead already covering the bottom, skip ahead. If a bottom decoration is desired, use some of the suggestions below. On a long nail, place a series of beads on that pin in colors that suit the ornament and pen that pin to the bottom. Or use a very large bead. If the ornament is to be stood up on a table setting or mantel, stick three beaded nails in a radiating fashion so the ball can stand up. Or make a "canopy". This is a series of loops made of beaded wires arranged like a flower. Ornaments with a "canopy" will stand on its own. This can also be used as a bottom hanging tassel effect or made smaller as a bead cap on top of a large bead. Or place it on a napkin ring or bracelet round enough to support the size of a ball. Nail a tassel to the bottom of the ball.
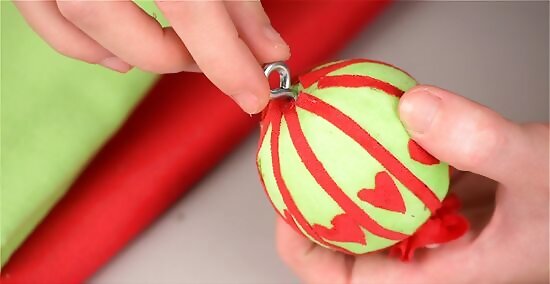
Add a hanger to the ornament (optional). Hairpins make excellent hangers. Also, consider other hooks sold in the hardware department.
Making an Ornament with Beading, Center Decorations, and Other Decorations
Repeat the procedures above for a basic ball. Skip to here after you glued the fabric to the ball.
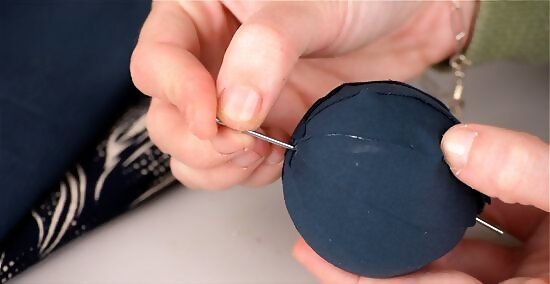
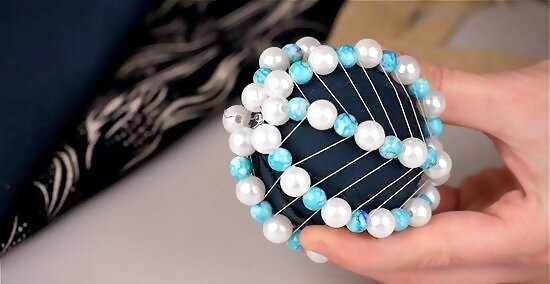
Place nails on the top and bottom tips of the sections where the beads are to be placed. Don't full insert these in the ball fully yet, because you are going to be wrapping the wire for the beads around the pins. These pins can also be used for other decorations like fine silver cording surrounding the beading if desired.
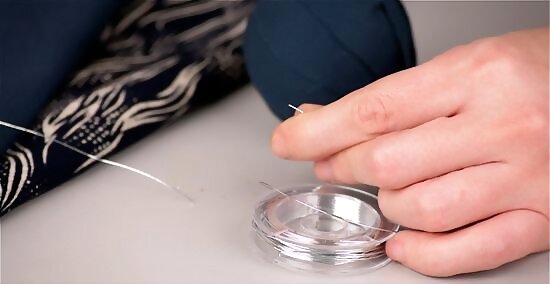
Cut two lengths of fine wire sufficient to around the ball once and extra for four sections there will be two wires. If the beads are heavy and large cut enough to do one section instead of two because they are awkward to handle.
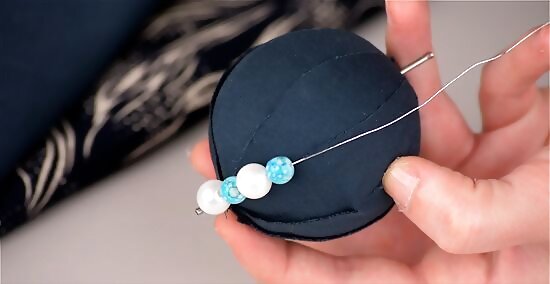
Wire the beads counting the pattern as you go. Slipknot the wire around the top pin do the beads until you reach the bottom pin. Wrap around the bottom pin once in a slipknot. Counting the beads helps ensure the pattern is uniform on all sections. Begin and end the bead line with a flat bead (bugle or seed bead) or the seam coverings applied afterward will have lumps and not be smooth. If doing a center decoration within the beading line, mark its width and position on the ball with two pins. Do the beads until that line comes to the top pin stop and wrap the wire around this pin. Cut it off push the pin fully in. Repeat for the bottom. Apply this centerpiece after the rest of the ornament is complete because it's clumsy and will get in the way. Frames can put on before or after beading. These can be used to surround ornamentation. Necklace links with hoops on the ends can be placed on the beading line and glued on or using the tip above.
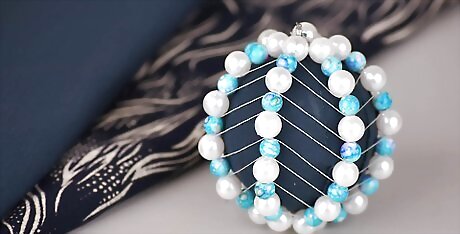
After the beading is completed, use the same pins to secure threads and cords that'll outline the beads in an "egg" pattern if desired. Cut enough of the trimming to go around twice for two sections. Start by pinning through the cording at the top pin bring down to bottom pin. Stick the bottom pin through the cording and go back to top on the opposite section. Criss-cross over the first row to the bottom and go back to the top. Metallic threads and other small trimmings are just slipknot at the pins and follow the same above procedure. There are many more variations, like a double row of central beads or outlining a ribbon with beads on 2 sides. Add more pins and wire lengths. If doing the "egg" outline with ribbons or other trimmings dip the pins in glue and push them completely into the ball. Then glue.
When finished with the central decorations, dip the pins in glue and push them firmly into the ball. Continue with the procedures to complete the basic ball.
Creating a Designed Ornament Using the Fabric and/or Trimmings
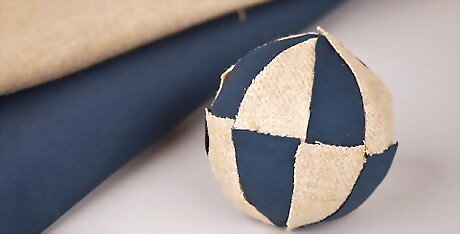
Create a harlequin or checkerboard design using two colors. Repeat the measurements procedures for basic ball cutting the sections, then cut the sections horizontally in half. Glue one half-section with the tip on the top of the ball. Glue one of other colors on the bottom of the first glued half section. Repeat alternating the colors. Finish the seams with narrow trimmings. Finish off by pinning sequins, beads, and rhinestones at the intersections.
Make a half color ball. Follow the procedures for the measurements of the sections and cutting. Then skip to here. Cut two desired colors (4 sections equals 2 of each color). For a vertical split. Glue one color first then on the opposite section with top and bottom tips overlapping glue the second color. Cover the ball and complete procedures for the basic ball. For a horizontal split cut the sections horizontally in half equally. Glue the first color with the tip at the top of the ball. Glue the second color with the tip at the bottom of the ball. To the opposite, glue the third section (same color as the first top section) with tips overlapping and repeat. When the ball is covered, either cover that center seam before doing the other procedures (thin or flat trimmings) or after doing the other procedures. (thick trimmings) covering the vertical seams. Then complete the procedures for the basic ball.
Create a flower pattern. Repeat the steps of the Basic Ball ornament until the ball is covered. Cut twice the number of the template pattern as the number of sections ( if it's four sections cut eight), half the height of the original sections. Glue these on top of the sections between the seams in the same direction as the original. Repeat on the bottom half of the ball. Cover the seams of these petals with a narrow trimmings or braids. Cover the seams of the ornament and complete the basic ball.

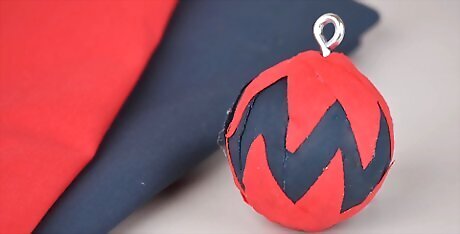
Create "lines" ,"v's" ,"x's", designs with the ribbons and trimmings. These require carefully measuring to make sure the ends of the design meet at and are on the same height in each section for each quarter and the rows go in a single straight row in each section. Mark each measurement with measuring tape and pins or marker marks at the points of intersection in each quarter next to the seam. If you are using the pins to wrap cording or securing the decor for the ball, don't insert fully. Use the same technique for making swags with chains. Once the desired design is achieved, glue and push each pin fully into the ball and follow procedures of completion for the basic ball.


Comments
0 comment