

Designing a T-Shirt Decal
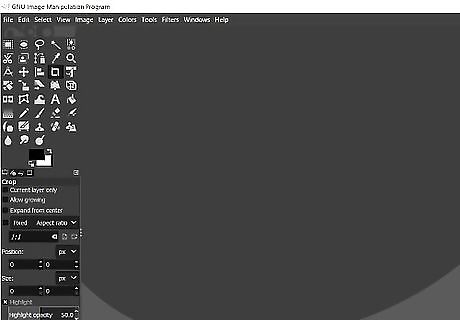
Open an image editor. You can use any image editor to design a decal for a T-shirt in Roblox. You can use Photoshop, GIMP or even Microsoft Paint.

Create a new file. Use the following steps to create a new file in Photoshop, GIMP, or Paint. Click File in the upper-right corner. Click New.
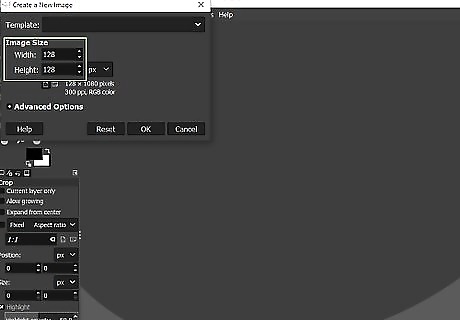
Set the image dimensions to 128 x 128 pixels This is the recommended image size for Roblox T-shirt decals. You can make them a little bigger, but make sure the height and width of the image are the same numbers of pixels. To set the dimensions, select "Pixels" or "px" in the drop-down menu next to "Height" and "Width", and then type 128 in the boxes next to "Height" and "Width". To resize the image in Microsoft Paint, click Resize in the "Image" panel at the top. Click the radio button next to "Pixels". Uncheck the "Maintain aspect ratio" box and then type 128 next "Horizontal" and "Vertical".

Design the T-shirt decal. Use the program tools to design the decal. You can use the Paintbucket tool to color the background, text tool to add text the T-shirt decal. You can use Brush too to draw or add texture to the T-shirt decal. You can also use the marquee tool to copy and paste an image or pattern from another image and paste it onto your T-shirt. Get creative!
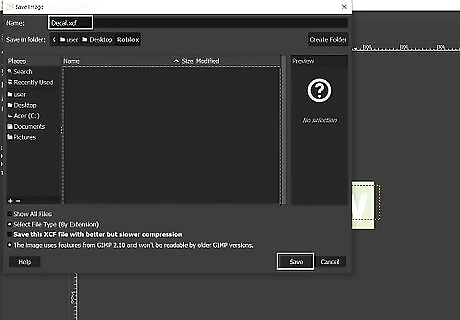
Save the file. It's a good idea to save the image in its native Photoshop or GIMP format incase you need to edit it later on. Use the following steps to save the image in its native format: Click File. Click Save as. Type a name for the file next to "Filename" or "Name". Click Save.
Designing a Shirt From a Template
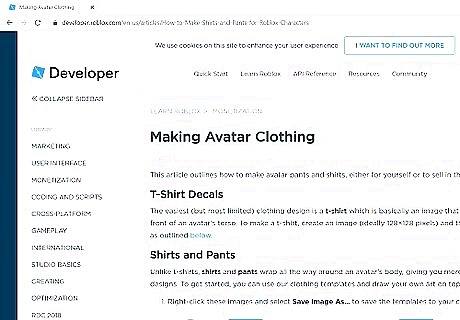
Go to https://developer.roblox.com/en-us/articles/How-to-Make-Shirts-and-Pants-for-Roblox-Characters in a web browser. This website contains image templates for shirts and pants for Roblox avatars. Note: You must have a Roblox subscription to upload a shirt design to Roblox.
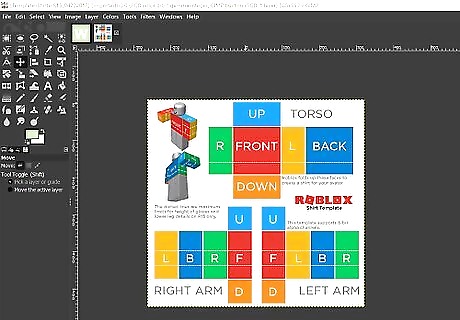
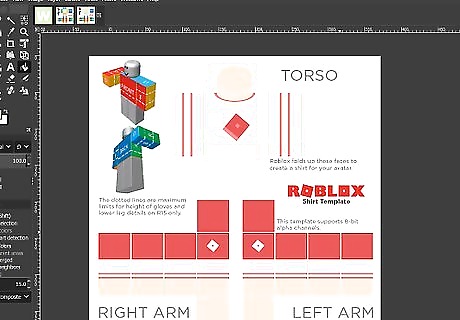
Download the template for the shirt. The shirt template is the image labeled "Torso + Arms" on the left side of the page.er]] Right-click the image. Click Save image as Click Save.
Open the template in an image editor. It's recommended that you use a professional image editor, such as Photoshop or GIMP which is a free alternative to Photoshop with similar tools. Use the following steps to open the image in Photoshop or GIMP. Press "Windows Key + E" to open File Explorer on Windows, or click to open the Finder on Mac. Navigate to the "Template-Shirts-R15_04202017.png" image file. Right-click the file and select Open With. Click Adobe Photoshop or GNU Image Manipulation Program.
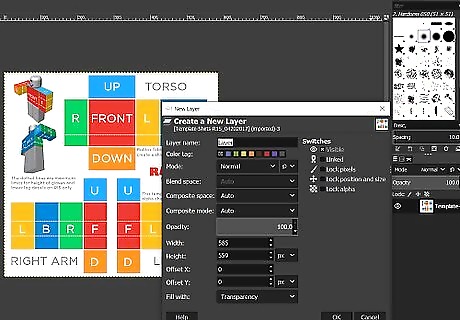
Add a new layer to the image. This will be the layer you use to design the shirt. The Layers panel is in the lower-right corner on both Photoshop and GIMP. To add a new layer, click the icon that resembles a blank sheet of paper below the Layers panel. If you don't see the Layers panel in Photoshop, click Windows in the menu bar at the top, and then click Layers.
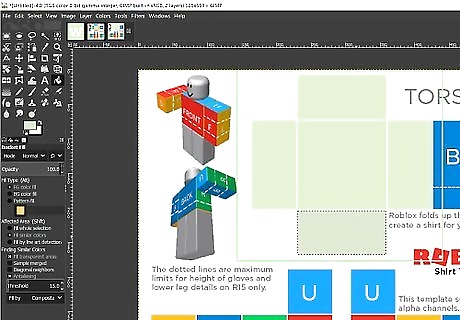
Color the shirt using the template. The shirt template in Roblox consists of three parts, for the torso, and the right and left arms. The fronts are color-coded in red. The backs are color-coded in blue. The rights are color-coded in green, and the lefts are color-coded in yellow. The tops are color-coded in light blue, and the bottoms are color-coded in orange. In both Photoshop and GIMP, you can use the rectangle marquee tool to select the area you want to color, and then use the Paintbucket tool to fill the area with a color of your choice. Make sure you have the top layer selected when you color your shirt. Do not select the layer with the template. Click the top layer to select it. If you want the shirt to have short sleeves, do not color passed the top dotted line on the template for the right and left arms. Do not color passed the bottom dotted line on the template for the left and right arms. This leaves some space blank for the hands.
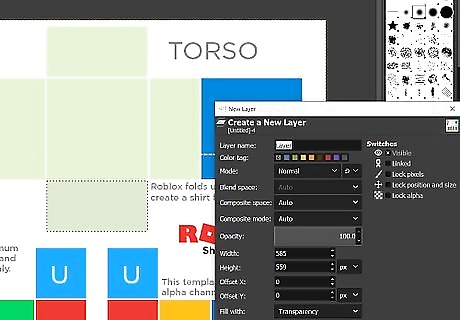
Add a new layer. Simply click the icon that resembles a blank sheet of paper to add a new layer in Photoshop and GIMP. This new layer will be the layer you add your design elements to.
Design your shirt. This is the part where you get creative. You can add anything you want to your T-shirt. You can use the text tool to add text to the shirt in Photoshop or GIMP. You can use the Brush too to draw or add texture to the shirt. You can also use the marquee tool to copy and paste an image or pattern from another image and paste it onto your shirt. Some clothing designs may look distorted on the R15 avatars, which have curved shapes.
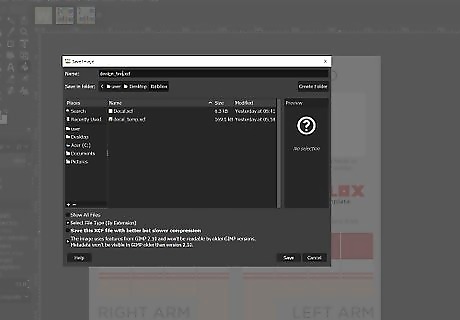
Save the file. It's a good idea to save the image in its native Photoshop or GIMP format in case you need to edit it later on. Use the following steps to save the image in its native format: Click File. Click Save as. Type a name for the file next to "Filename" or "Name". Click Save.
Uploading the Shirt to Roblox
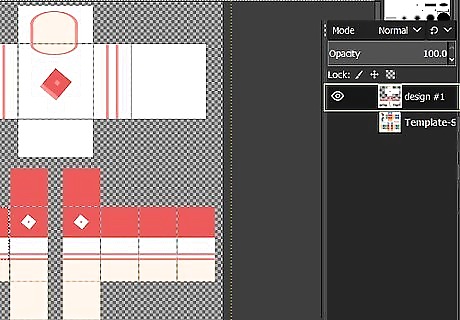
Turn off the layer with the template (shirts only). The layer with the template should be on the bottom in the Layers panel in Photoshop and GIMP Click the icon that resembles an eyeball in the layers panel to turn off the layer with the template. You should now only see the t-shirt design without the template.

Save the image as a PNG. Use the following steps to save the image as a PNG in both Photoshop and GIMP. Using Photoshop and Microsoft Paint Click File in the menu bar at the top. Click Save as. Use the drop-down menu next to "Format" to select PNG. Click Save. Using GIMP Click File in the menu bar at the top. Click Export as. Click Select File By Type (By Extension). Scroll down and click PNG Image. Click Export.
Go to https://www.roblox.com/develop in a web browser. You can use any web browser on PC or Mac. If you are not logged into Roblox, click Log In in the upper-right corner and then sign in with the username and password associated with your Roblox account.
Click the My Creations tab. It's the first tab at the top of the page. If you do not see this tab at the top of the page, click Manage my games at the bottom of the banner at the top of the page.
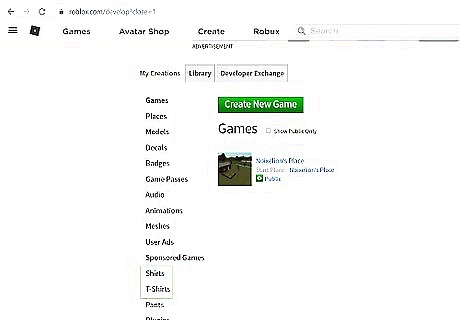
Click T-shirts or Shirts. It's in the menu bar to the left of the page.
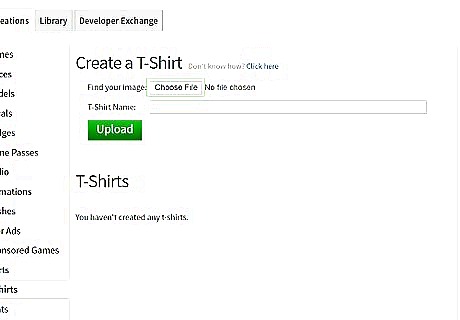
Click Choose File. It's the first at the top of the page below "Create a T-Shirt". You need a subscription to upload shirts to Roblox. If you do not have a subscription, you can only upload T-shirt decals.
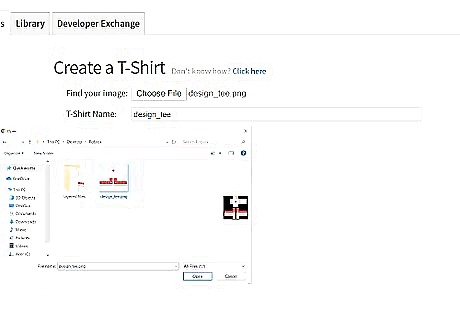
Click the PNG file for your shirt or T-shirt decal and click Open. This uploads the T-shirt design image to Roblox.
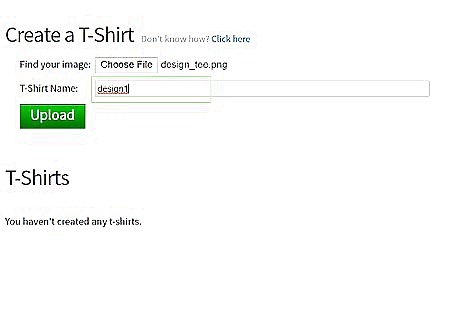
Type a name for the shirt or T-shirt decal. The file name for the T-shirt will autofill by default. If you want to use a different name for the T-shirt, type it in the box next to "T-Shirt name:".
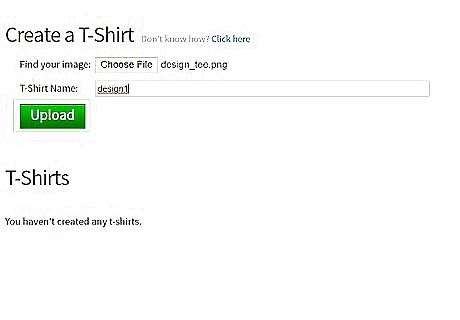
Click Upload. This uploads the image to Roblox.
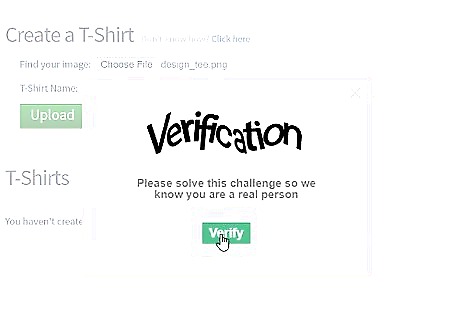
Go through the verification process. To verify that you are a person, you need to go through a verification process. To verify that you are a person, you will be presented with two images. Click the arrow icons on the left or right to rotate the image. Click Done when the image is right-side-up. Your shirt or T-shirt design will be available momentarily.


Comments
0 comment