views
- Go to https://pixlr.com/e/ and upload your image. Click the padlock icon to allow editing. Resize, crop, and use the Clarity filter.
- In Microsoft Paint, click "Resize" → enter a smaller dimension → "OK".
- With Photoshop, crop the image, use the "Reduce Noise" filter, or use the Clone Stamp tool to hide textures.
Using Pixlr
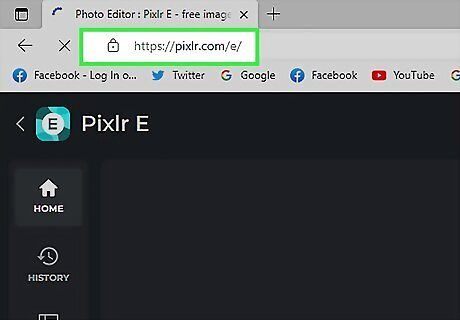
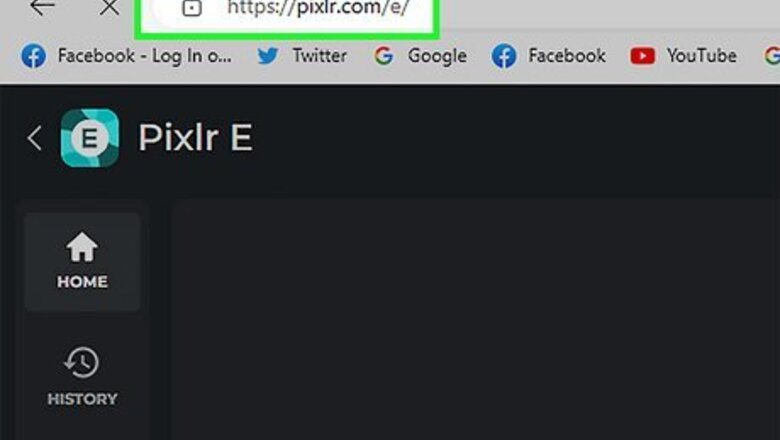
Go to https://pixlr.com/e/ in a web browser. Pixlr is a powerful photo-editing tool used by professionals and photo-editing enthusiasts. Pixlr offers a free online editor. You may also upgrade to a more advanced version of the product with a regular subscription. Pixlr E supports images up to 4k (3840 x 2160) resolution. If you need to edit images that are larger than that, you may want to use professional photo editing software like Adobe Photoshop.

Open the image you want to edit. Click Open Image in the center of the screen, then locate the image you want to edit. Use the navigator window to find the image. Double-click the image to open it, or select it and click Open.
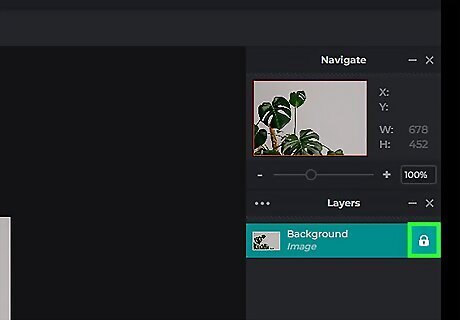
Click the padlock icon. This will be in the Layers panel on the right side. You'll now be able to edit your image.
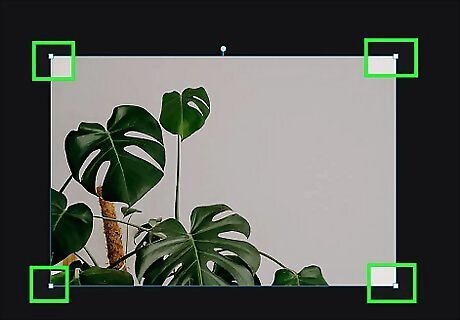
Resize the image (optional). A file’s size is determined by its pixel count—the higher the pixel count, the larger the file. Emailing, uploading, and downloading large JPEGs is a slow process. Resizing your image to a smaller pixel count will allow you to share your pictures faster. Note: Increasing an image size will not increase the quality of how an image looks. However, reducing an image size may result in loss of detail. To resize the image, drag one of the four corners of the image inward. Your aspect ratio should be Fixed automatically, which means the height and width ratio will stay the same as the image shrinks.
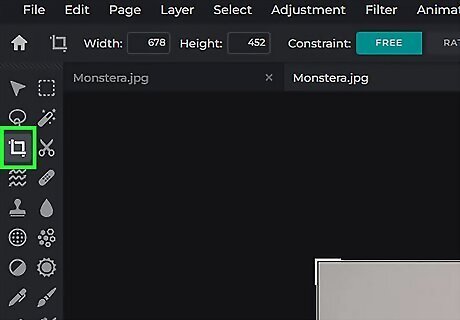
Crop the image. Cropping allows you to easily remove unwanted portions of a photo. Cropping an image will also reduce the file’s size. The crop tool has an icon that resembles two right angles overlapping. You can find this below the Lasso Select tool. To crop the image, select the corner closest to the select you want to crop. Drag it upwards to frame the parts of the image you want to keep. Adjust the frame as needed, then click Apply at the top toolbar.
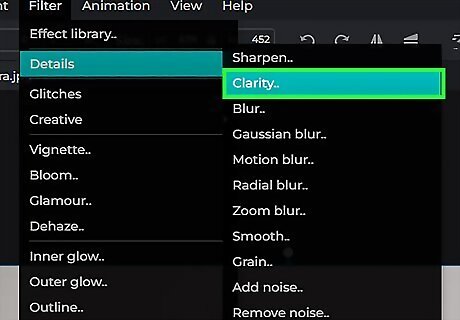
Use the Clarity filter. The Clarity filter can be used to either enhance details in a photo, or blur a photo that has too much detail. At the top toolbar, click Filter → Details → Clarity... Drag the circle to the right to enhance details or towards the left to decrease details. Click Apply when finished.
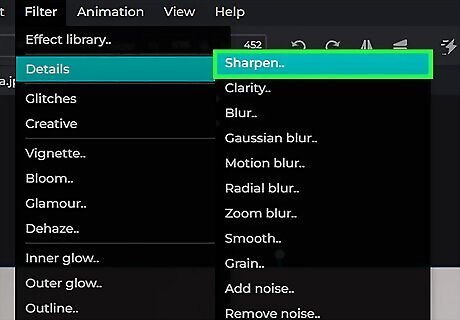
Use the Blur or Sharpen filter. If the Clarity filter isn't enough, you can use the Blur or Sharpen filter to further enhance or blue details. The Sharpen filter can be used to enhance details, and the Blur filter can be used to blur the image details. At the top toolbar, click Filter → Details → Sharpen or Blur. Drag the circle left or right to adjust the settings. Click Apply when finished.
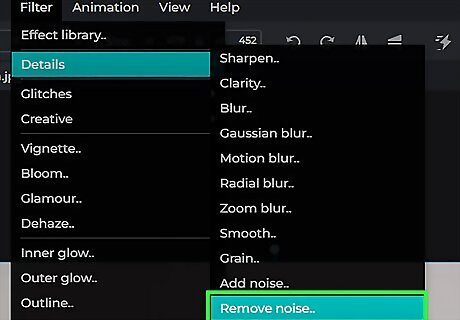
Reduce the image’s noise. The Remove Noise filter can be used to remove or reduce spots, grain, fuzz, and photo imperfections. At the top toolbar, click Filter → Details → Remove Noise... Increase or decrease the slider bars as needed. Radius: This determines the size of the spots that will be reduced. Threshold: This determines the color differences needed to determine the spots that will be reduced. Click Apply when finished.
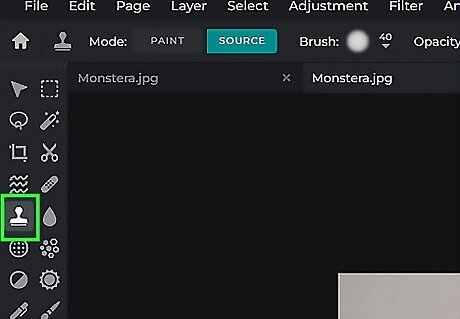
Retouch areas of fine detail with the Clone tool. The Clone tool has an icon that resembles a rubber stamp. It can be used to remove blemishes or spots in a photo by sampling the area next to the blemish or spot and then stamping over it. Depending on the background and your skill with the brush, you can also use the Clone tool to remove large, unsightly objects in a photo. Click the Clone tool in the toolbar to the left. Click an area next to the spot you want to remove to sample the closest texture. Click over the blemish or spot. Repeat for additional blemishes and spots.
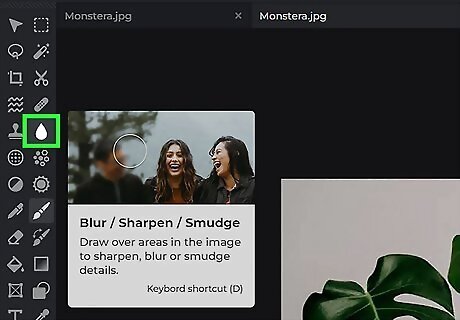
Fine tune the image with various tools. Pixlr is equipped with multiple brush-like tools that are capable of erasing minor flaws or altering the entire picture. Click one of these tools in the toolbar to the left. Then click Brush in the upper-left corner and select a brush type and size. For best results, use one of the circle brushes with the soft edges. These tools include: Sharpen/Blur/Smudge: It has an icon that resembles a drop. Click this tool in the toolbar to the left and select the mode you want next to "Mode" in the panel at the top. The options are as follows: Sharpen:Use this tool to sharpen soft edges. Blur: Use this tool to soften harsh edges. Smudge: Use this tool to blend pixels together. Sponge/Color: It has an icon that resembles a sun. Click this tool in the toolbar to the left. Select Increase or Decrease next to "Mode" in the panel at the top to increase or decrease the effect. Select the specific color correction method next to "Method in the panel at the top the methods are as follows: Vibrance: This method increases or decreases the intensity of muted colors. Saturation: This method increases or decreases the intensity of all colors. Temperature: Increasing this method adds more red or orange. Decreasing this method adds more blue or purple. Dodge/Burn: It has an icon that resembles a half-filled circle. Click this tool in the toolbar to the left. Select Lighten next to "Mode" to brighten parts of an image. Select Darken next to "Mode" to darken parts of an image. You can also select if you want to effect Shadows, Midtones, and Highlights next to "Range". Spot Heal: It has an icon that resembles a band-aide. Use this tool to remove blemishes and scratches in spots.
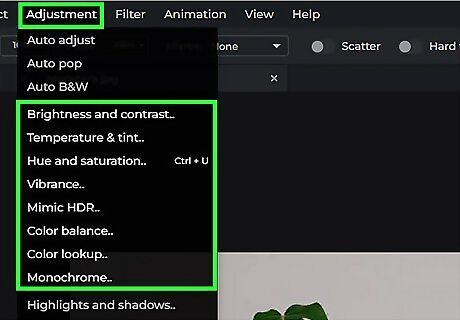
Use adjustments to enhance the image's color and brightness. Pixlr has many adjustments that allow you to enhance an image's color, brightness, hue, and saturation. Brightness affects the overall brightness or darkness of an image's colors. Contrast affects the differences between light and dark colors. Hue changes the colors of an image. Saturation affects the intensity of the colors of an image. Click Adjustment in the top toolbar. Click Brightness & Contrast or Hue & Saturation. Use the slider bars to adjust the image's brightness, contrast, hue, or saturation. Click Apply when finished.
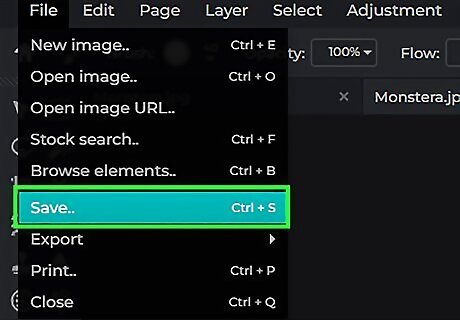
Save the image. Once you have finished editing your image, you'll need to save your image. High-quality images are less compressed, and the pixels retain more data. This results in a large file and a crisp picture. Low-quality images are more compressed, and the pixels contain less data. This creates a small file size and a less crisp, or more pixelated, picture. To save your image, click File in the top-right corner. Click Save, select JPG as the format, then Save as.
Using Photos (Windows)
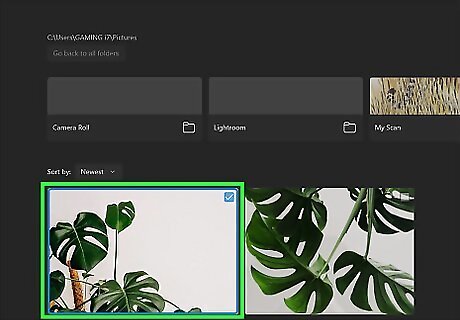
Open an image in the Photos app. The Photos app comes with your Windows PC. If needed, you can install it from the Windows store. If Photos isn't your default image viewer, right-click the image → Open with → Photos.
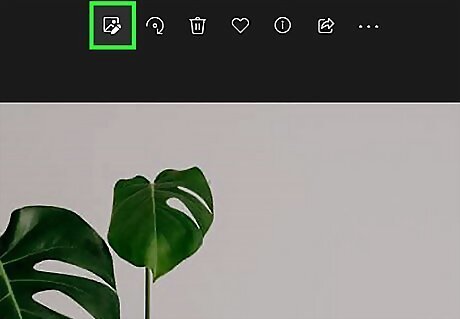
Click the "Edit image" icon. This looks like an eye-dropper tool in front of a picture, located at the top toolbar. You can also press CTRL + E on your keyboard.
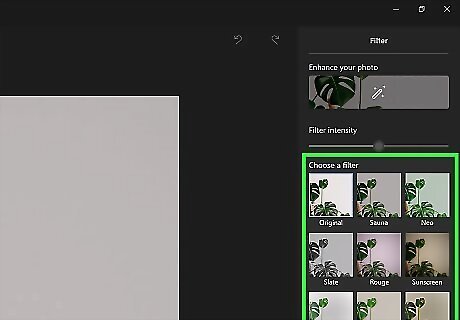
Apply Filters. Click the "Filters" icon. This is the paintbrush icon located next to the crop tool. Click the magic wand underneath Enhance your photo. This will make the colors of your image brighter and more saturated. Drag the line left and right to adjust its intensity.
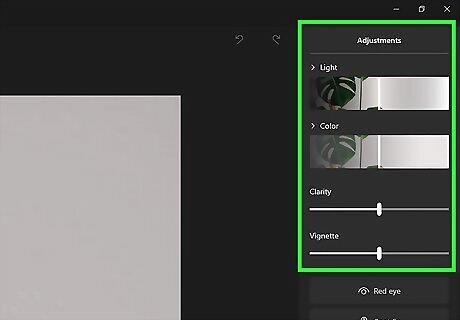
Apply Adjustments. Click the "Adjustments" icon. This looks like a sun with a black and white center. Drag the line underneath Clarity to the right. This will sharpen your image. Drag the line underneath Light or Color to adjust to your preferences.
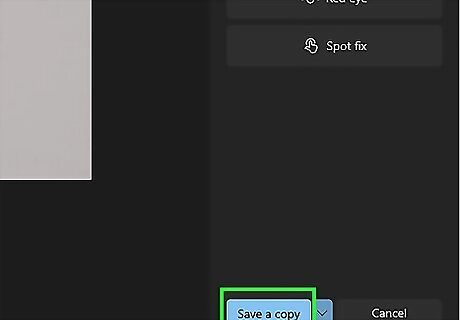
Click Save a copy. If you want to save these changes to your original image, click the down-arrow, then Save.
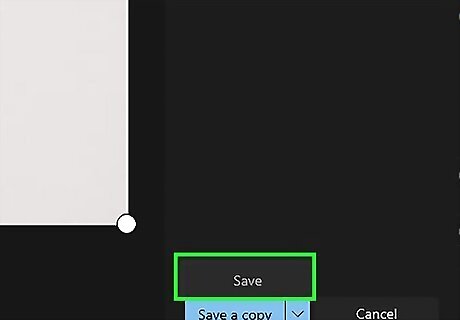
Enter a name for your new file, then click Save. This will save your improved image to your computer.
Using Microsoft Paint (Windows)
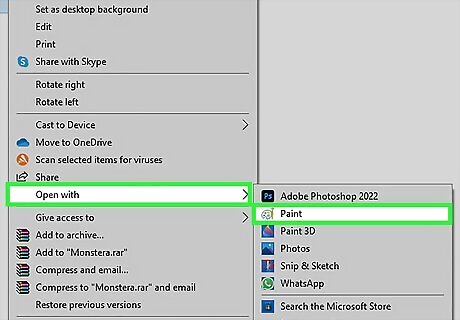
Open an image in the Microsoft Paint app. You can right-click the image and choose Open with > Paint to do so. Paint may be a simple image editing program, but you can use it to crop and resize photos easily.
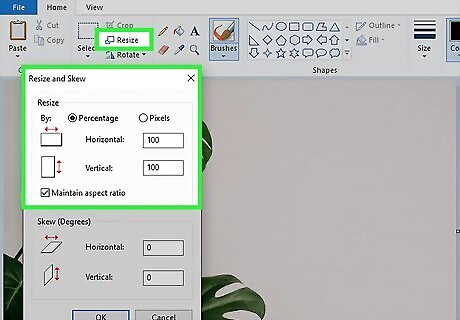
Click Resize. This will be on the Home tab, underneath Crop.
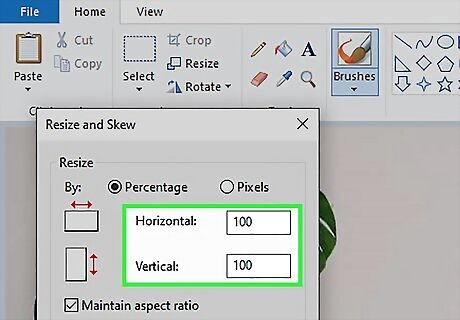
Enter a smaller dimension. You can use the Horizontal or Vertical field. It will be at 100% by default. Be sure to check the box next to Maintain aspect ratio to avoid your image being stretched.
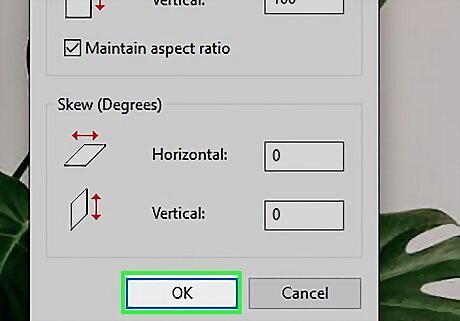
Click OK. This will apply your changes. Because your image is smaller, blurry images will look sharper.
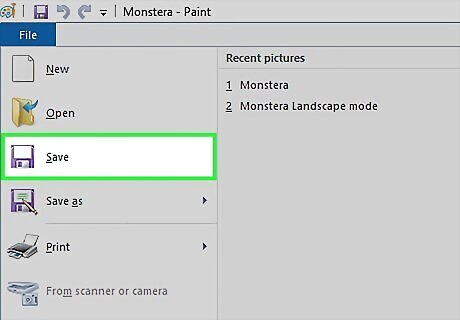
Save your image. Click File, then Save to apply changes to the original image. To save the changes as a new image, click File, then Save as. Enter a name for the new file, then click Save.
Using Adobe Photoshop
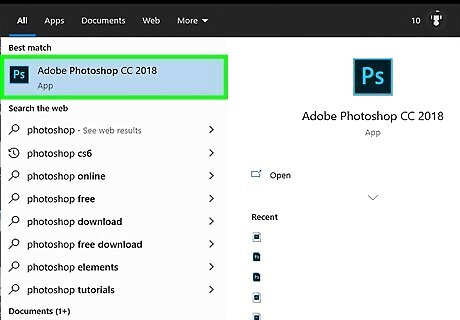
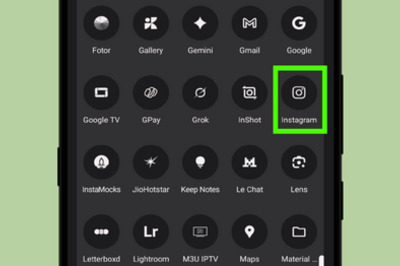
Open an image Adobe Photoshop. Photoshop has a blue icon with "Ps" in the middle. You need a subscription to use Adobe Photoshop. You can purchase a subscription and download Photoshop from https://www.adobe.com/products/photoshop.html. If you want to improve images for use in apps like Facebook or Instagram, this method won’t be as helpful as using an app with filters. Pixlr contains free filters that can disguise imperfect JPEGs. If you want to make your photos pop and don’t care about compression loss, give Pixlr a try. To open an image, click File → Open → select the image → Open.
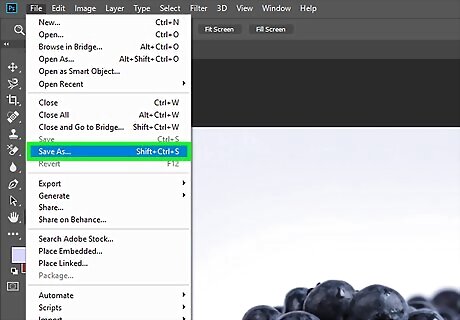
Save a copy of the image. When editing an image in Photoshop, it's a good idea to save a copy of the original image. That way if you make a mistake, you can reload the unedited original. Click File → Save as → enter a new name → select file type → Save.
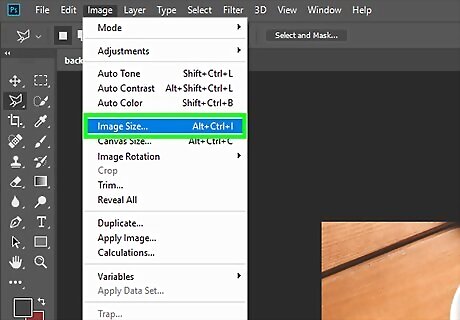
Resize the image (optional). A file’s size is determined by its pixel count. The higher the pixel count, the larger the file. Emailing, uploading, and downloading large JPEGs is a slow process. Resizing your image to a smaller pixel count will allow you to share your pictures faster. Note: Increasing an image size will not increase the quality of how an image looks. However, reducing an image size may result in some loss of detail. Make slight adjustments to the image size when increasing the size of an image. To resize the image, click Image in the top toolbar → Image Size → enter the desired pixel size → OK.
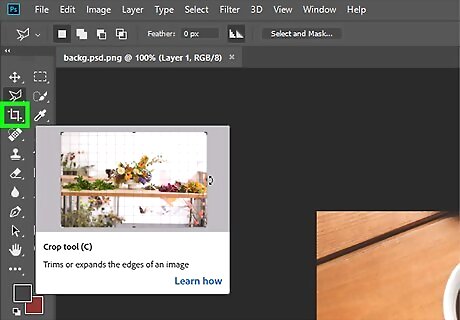
Crop the image. Cropping allows you to easily remove unwanted portions of a photo. Cropping an image will also reduce the file’s size. The Crop Tool has an icon that resembles two right angles overlapping. It's near the top of the toolbar to the left. Use the following steps to crop an image: Click the Crop Tool icon in the toolbar to the left. Click and drag over the area of the photo you want to keep. Click and drag the corners of the cropping areas to manually adjust the cropping area size. Press Enter to crop the image.
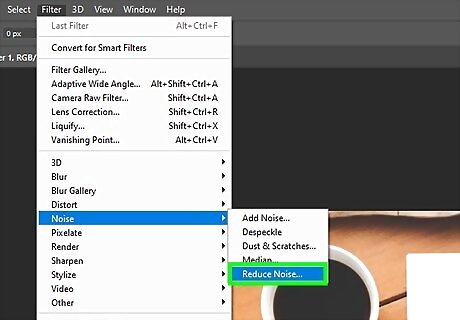
Use the “Reduce Noise” filter. You can find the Reduce Noise filter in the Filter menu. To use the Reduce Noise filter, click Filter → Noise → Reduce Noise.
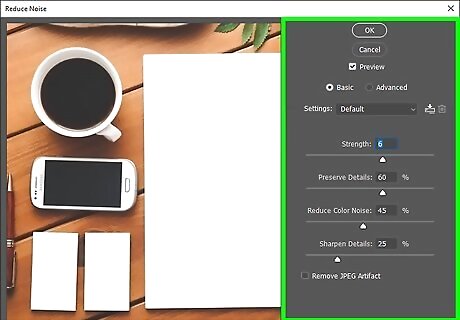
Adjust noise reduction options. Place a check in the box that says Preview on the top left side of the filter window. This is how you can see your changes in real-time. Drag the slider bars to adjust the filter settings. The slider bars are as follows: Strength: This number will reflect the desired degree of noise removal; it should be higher for JPEGs of lesser quality. Drag the slider to the right to see the effect of raising the strength setting. Preserve Details: A lower percentage will make the picture blurrier and softer, but will also reduce more noise. Sharpen Details: You may want to compensate for a low Preserve Details setting with a higher Sharpen Details setting, as that will make the edges of your image clearer. Check the box that says "Remove JPEG artifact". This attempts to remove the mosquito noise and blockiness that occurs when JPEG images are saved in a compressed format. Once you’re satisfied with the preview image, click OK to save the new image.
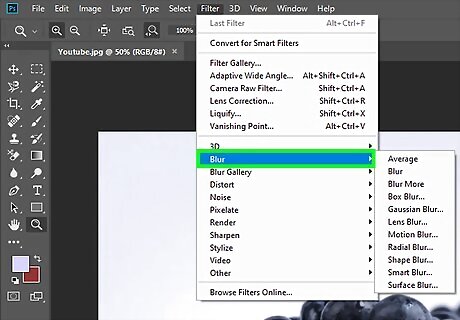
Use the Smart Blur or Smart Sharpen filter. Depending on what the photo needs, you can use the Smart Sharpen filter to enhance details in a photo, or you can use the Smart Blur filter to soften a photo. Use the following steps to use the Smart Sharpen or Smart Blur filter: Click Filter in the menu bar at the top. Hover over Blur or Sharpen Click Smart Blur or Smart Sharpen. Click the checkbox next to "Preview" to see how the effect changes the image. Use the slider bars to adjust the filter as needed. The slider bars are as follows: Radius: This determines the size of the spots that will be reduced. Threshold/Amount: This determines the color differences needed to determine the spots that the filter is applied to. Click OK.
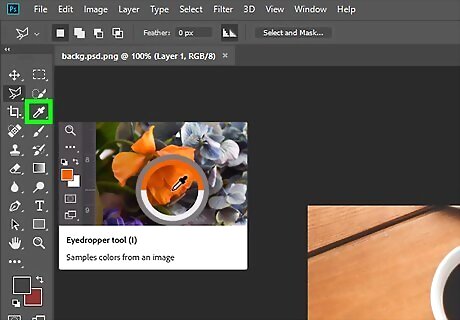
Color over mosquito noise and color-blocking. You may see some color-blocking (tiny colored squares) in large areas without much fine detail (i.e., sky, solid-color backgrounds, and clothing). Your goal is to make the different color transitions in the image to be as smooth as possible. Leave important details in specific objects. Use the following steps to color over mosquito noise and color-blocking. Press "CTRL and +" on Windows or "Command and +" to on Mac to zoom in on the area with color-blocking. Click the icon that resembles an eyedropper in the toolbar to the left to select the Eyedropper Tool. Click the main color of the area you want to color over to sample the color. Click the icon that resembles a paintbrush in the toolbar to the left to select the Paintbrush Tool. Click the icon with a circle (or selected brush type) above the toolbar to the left to open the Brush menu. Set the brush hardness to 10%, opacity to 40%, and flow to 100%. Press "[" and "]" to change the brush size. Use one-click dabs over color-blocks and mosquito noise.
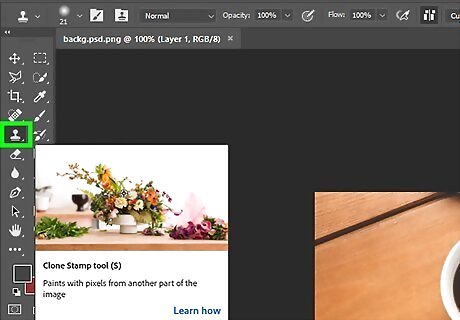
Use the Clone Stamp Tool in areas with greater texture. The Clone Stamp Tool is useful on rough textures like skin, drywall, and pavement. Rather than using a single color, the Clone Stamp tool samples a texture and then stamps the texture over blemishes, spots, and marks. Use the following steps to use the Clone Stamp tool to stamp out any flaws and blemishes in the image: Click the icon that resembles a rubber stamp in the toolbar to the left. Click the icon with a circle (or selected brush type) above the toolbar to the left to open the Brush menu. Set hardness to 50% or less. Set the opacity to 100%. Press "[" and "]" to change the brush size. Hold "Alt" on PC or "Option" on Mac and click the area right next to a spot or blemish to sample the texture. Click once over the spot or blemish. Repeat for all other spots and blemishes (sample a new texture for each click.
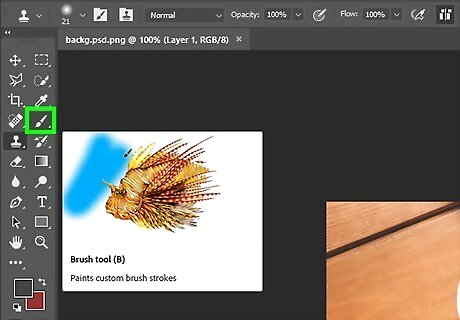
Fine tune the image with various tools. Photoshop is equipped with multiple brush-like tools that are capable of erasing minor flaws or altering the entire picture. Click one of these tools in the toolbar to the left. Photoshop has many tools grouped together under a single icon. Click and hold an icon to view all tools grouped together with that icon and click the tool you want to use. Then click the icon with a circle (or select type) in the upper-left corner and select a brush type and size. You can also press "[" and "]" to change the brush size. For best results, use one of the circle brushes with the soft edges. These tools include: Sharpen: It has an icon that resembles a prism. Use this tool to sharpen soft edges. Sharpen is grouped together with the Blur and Smudge tools. Blur: It has an icon that resembles a drop. Use this tool to soften harsh edges. The Blur tool is grouped together with the Sharpen and Smudge tools. Smudge: It has an icon that resembles a pointing finger. Use this tool to blend pixels together. Smudge is grouped together with the Blur and Sharpen tools. Sponge: It has an icon that resembles a sponge. Use this tool to “soak up” color or “saturate” color in spots. The Sponge tool is grouped together with the Dodge and Burn tools. Dodge: It has an icon that resembles a bulb syringe. Use this tool to increase the image’s brightness in spots. The Dodge tool is grouped together with the Sponge and Burn tools. Burn: It has an icon that resembles a hand pinching. Use this tool to darken or add shadow in spots of an image. The Burn tool is grouped together with the Dodge and Spunge tools. Spot Heal: It has an icon that resembles a double-ended brush. Use this tool to remove blemishes and scratches in spots. The spot heal tool is grouped together with the red-eye tool. Red-Eye Reduction: It has an icon that resembles a red-eye. Use this tool to remove red eyes in a photo by clicking and dragging over the entire eye. The red-eye tool is grouped together with the Spot Heal tool.
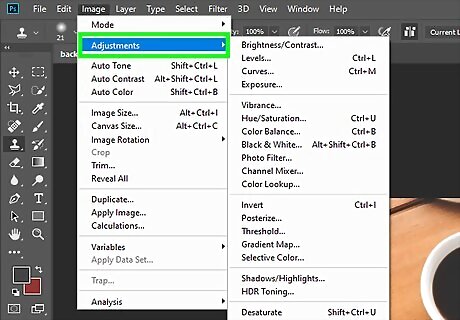
Use adjustments to enhance the image's color and brightness. Photoshop has many adjustments that allow you to enhance an image's color, brightness, hue, and saturation. Brightness affects the overall brightness or darkness of an image's colors. Contrast affects the differences between light and dark colors. Hue changes the colors of an image. Saturation affects the intensity of the colors of an image. Use the following steps to adjust the image's color: Click Image Click Adjustment. Click Brightness & Contrast or Hue & Saturation. Use the slider bars to adjust the image's brightness, contrast, hue, or saturation. Click OK when you are happy with how the image looks.
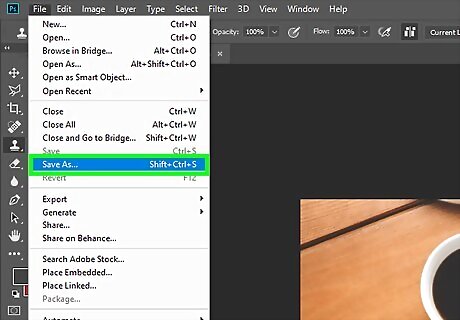
Save the image. Once you are done editing your image use the following steps to save the image. Click File → Save As → enter a name for the image → select file format → Save.






Comments
0 comment