

Planning and Preparing for the Trip

Plan to visit between June and August. Since snow and ice usually cover the cave temple, you won’t be able to access it during the cold winter and spring months. Wait until mid-June or July to plan your trip to the Amarnath Temple. Usually, the cave stays open through the first 1–2 weeks of August before it closes due to the terrain getting too difficult for travel. The actual dates when you can travel to the temple are chosen by the Shri Amarnathji Shrine Board (SASB) and it varies depending on the weather and how clear the trails are. You will not be able to reach the Amarnath Temple at any other time of the year.

Get a Compulsory Health Certificate by a doctor approved by the SASB. Look at the list of approved doctors on the SASB website and schedule an appointment to see one. Bring the Compulsory Health Certificate from the site with you and fill out the self-assessment on top. Allow your doctor to run any tests to check if you’re fit for traveling to the Amarnath Temple. If they approve you for traveling, then you’ll be able to make the journey. The certificate you need changes each year, so make sure you’re using the proper one. Since the Amarnath Temple is 4,000 metres (2.5 mi) above sea level, it’s possible to get altitude sickness if you aren’t fit enough for the trip.Warning: You will not be allowed to go to Amarnath Temple if you are under 13, over 75, or more than 6 weeks pregnant.

Submit a registration form online to the SASB. Select the date you want to travel to the temple on the calendar at the top of the page. Fill out the personal details on the registration form completely, including your name, birthday, phone number, and address. Then, list the clinic and doctor that completed your Compulsory Health Certificate. Upload a photograph of yourself and a scanned copy of the certificate before submitting the registration form. You can find the online registration form here: http://jksasb.nic.in/register.aspx. If you are accepted to travel to the temple, you will receive a text or email message about how to pay the 50 INR ($0.70 USD) fee. When you receive a permit, you must keep a copy on you at all times during your trip.

Start taking 4–5 km (2.5–3.1 mi) walks 1 month prior to your trip. Start building up your endurance at least 1–2 months before your scheduled date of departure. Try to take the walks in the early morning or evening so you can get used to breathing in cool air. Continue taking walks each day up until you leave so you don’t get exhausted while you hike to the temple. You can also practice deep breathing exercises and yoga so you’re able to improve your oxygen efficiency. This will help you breathe easier when you’re at a higher altitude since there isn’t as much oxygen in the air.

Pack warm clothes, waterproof shoes, a water bottle, and a walking stick. Only bring a lightweight, waterproof bag so you don’t get exhausted while you’re trekking to the temple. Opt for wool clothes that are waterproof so you stay warm. Make sure you use waterproof trekking shoes and a walking stick so you’re easily able to traverse more difficult terrain. Since you'll be active, opt for a reusable water bottle as well. Other things you may need for your trip include an umbrella, flashlight, hat, gloves, and a raincoat. The weather can be unpredictable and temperatures may dip below 5 °C (41 °F) during the night. You don’t have to bring tents or sleeping bags since there will be sites where you can spend the night.
Getting to the Temple

Choose the Pahalgam route for an easier trek that lasts 3–5 days total. Select Pahalgam as your starting point if you want to follow the traditional pilgrimage route to the temple. While the trip does take longer to complete, it doesn’t have any steep slopes that are difficult to climb, and you can ride or use ponies during most of the ascent. You will hike about 48 kilometres (30 mi) if you go from Pahalgam to the Amarnath Temple. You don’t have to pay any additional fees to take the Pahalgam route.

Pick the Baltal route for a steep climb that only takes 1–2 days round trip. If you’re an experienced climber or you feel like making the trip within a shorter amount of time, opt to start in Baltal, which is just north of the temple. Though the route from Baltal is much steeper than the path from Pahalgam, you can make the round-trip journey within a day. Plan to hike about 14 kilometres (8.7 mi) using the Baltal route. If you’re too tired to descend back to Baltal, you can opt to stay at a camp at the top overnight before leaving the next day. There are no other fees to take the Baltal route.Warning: Ponies are not allowed on the Baltal route since it’s too steep, so you will have to walk the entire way.

Fly into Srinagar to get the closest to either base camp. Look for flights that come into the Srinagar International Airport, since it’s only 2–3 hours from both Pahalgam and Baltalhead. Try to schedule your flight into the airport 1–2 days before the date you’re scheduled to go to Amarnath Temple so you have time to travel. You can also fly or take a train to Jammu, but you’ll need to drive or take a bus further to to the base camps.

Take a bus or taxi to the base camp you selected. Look for a bus or taxi service that runs from Srinagar to either Pahalgam or Baltal, depending on which route you plan on traveling. Typically, your ride will only last around 2–3 hours, but it may take longer depending on the road conditions. If you have a vehicle, you can also drive yourself to the base camps. Usually, there is some on-site parking, but it may be busy due to the number of travelers for the pilgrimage.

Hire a helicopter tour if you don’t want to hike all the way to the temple. Helicopters fly out from both Pahalgam and Baltal, so you can reserve them for either base camp. Choose the date that you want to travel to the temple and reserve your spot. Arrive at the helicopter port on your scheduled day and take it up toward the temple. The helicopter will be able to take you as close as 6 kilometres (3.7 mi) away, but you will need to hike the rest of the way. Typically, a helicopter tour will cost around 3,600 INR ($50 USD) for a round trip.
Trekking to the Cave

Carry your belongings in a waterproof bag. Store your clothes and everything you’ve brought with you in a waterproof bag or backpack so they don’t get wet. Use a bag that fits tightly on your shoulders and back so it doesn’t cause any strain while you climb up to the temple. Make sure you zip the bag at all times so water doesn’t leak inside or get your things wet. Weather can be unpredictable during your ascent, so it may snow or rain while you’re climbing to the temple.

Stop at tea stalls or small restaurant huts for meals and drinks. Look for small huts or stands along the route to the temple to see what kind of food and drinks they offer. Pay for the rations and enjoy them at one of the camps along the route. Otherwise, save non-perishable food in your bag so you can have it later during your trek. Some stalls may charge for food while others volunteer and provide meals for free.Tip: Always carry some back-up snacks, such as dried fruits or nuts, with you so you can eat as you get hungry.

Protect your skin with sunscreen or petroleum jelly. Keep a bottle of sunscreen or petroleum jelly in your bag so you have access to it whenever you need it. Apply it to your exposed skin and rub it in until it’s clear so it can absorb fully. After 2 hours, put on another layer so you stay protected from the sun. Petroleum jelly can also help keep your skin from drying out due to the cold, dry air.

Rest at the camps set up along the route. Look for tents and huts along the route where you’re able to rest for the night during your trip. Pay for tent rental and take time to relax so you don’t feel too exhausted when you reach the shrine. Make sure your clothes aren’t wet before you fall asleep so you don’t get cold at night. If you’re shivering, slurring speech, experiencing blurry vision, or feeling nauseous, you may be experiencing altitude sickness. Rest as soon as possible and avoid climbing any higher.
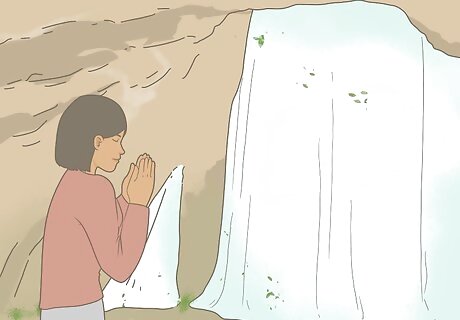
Pray to Shiva at the ice lingam when you reach the holy shrine. When you reach the Amarnath Temple, take off your shoes and enter the cave to see the ice lingam, which is a tall column of ice that’s considered holy. Say a prayer to Shiva while you’re next to the lingam before exiting the shrine.


Comments
0 comment