
- To use a printer with a built-in scanner, you'll need a connected computer.
- When using your iPhone, you'll be able to save your scans as PDFs with the Notes app.
- When using Android, you'll be able to scan documents using the Google Drive app.
Using a Printer
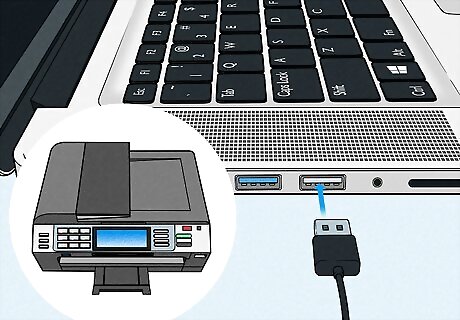
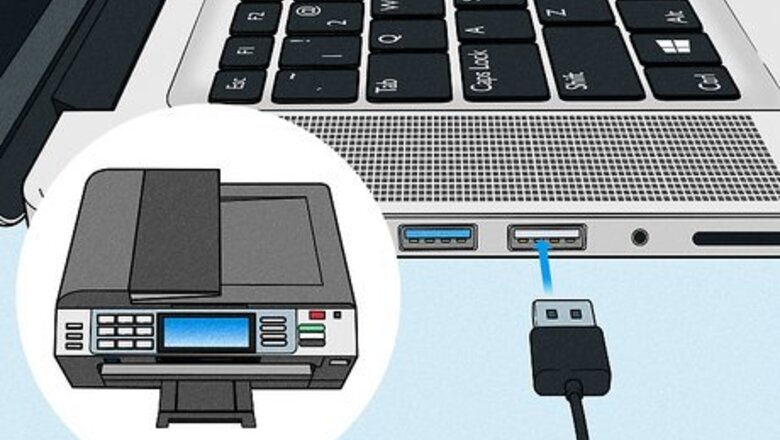
Connect your printer to your computer. Make sure the printer is plugged in. Your printer must have a built-in scanner to scan documents.
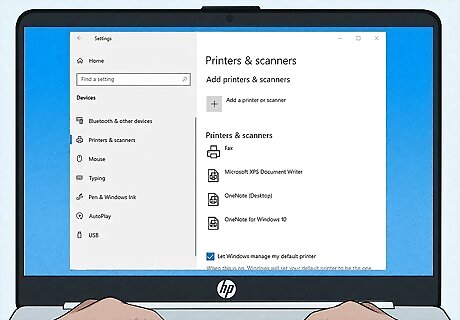
Locate your printer application on your computer. For Windows, navigate to Settings → Devices → Printers & Scanners → Manage. Select Scanner, then Open Scanner. For Mac, navigate to System Preferences → Printers & Scanners → Scan → Open Scanner.
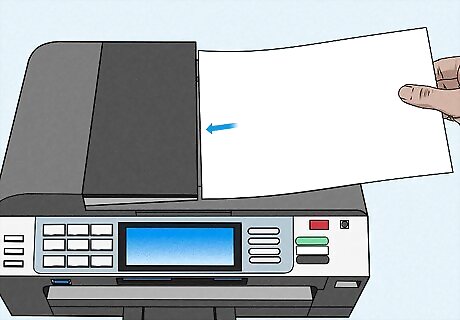
Place your document in the feeder or flatbed. When using the feeder, be sure you have selected the feeder option. This will let you scan multiple pages at once. If you're using the flatbed, be sure to select the flatbed option. This will only let you scan one document at a time.
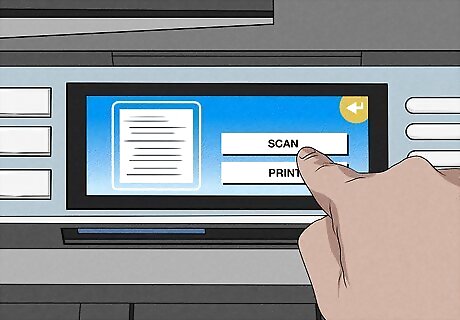
On your printer, press Scan. Your printer will begin scanning the documents. If you have a lot of documents, this may take some time.
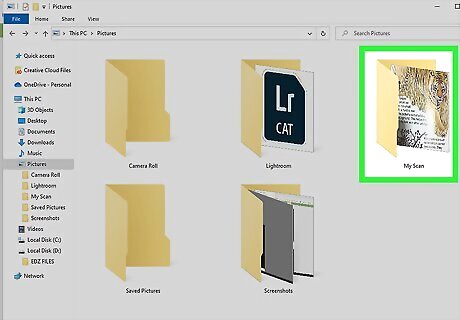
Locate your scanned documents. Their location will vary depending on your device settings. For Windows, they will be located in My Scans or Pictures. For Mac, they will automatically be saved in the Pictures folder. If you can't locate your scans, use your printer application to see your recently scanned files. Click Settings and find Save in to locate the save destination.
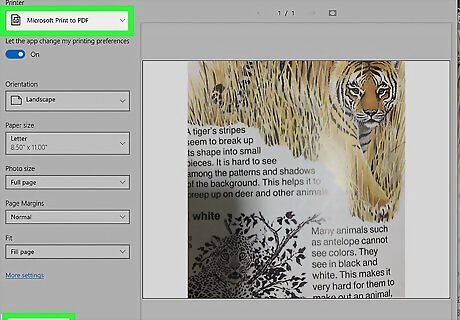
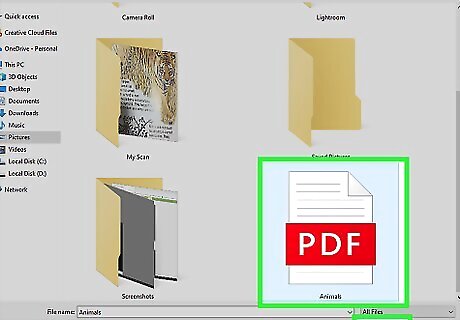
Convert your scans to PDF format. This makes it easier for your recipient to view your scans. For Windows, open your scans and navigate to "File" then "Print". In the drop-down menu for "Printer", select "Microsoft Print to PDF". Click "Print". This will save your scans in PDF format. For Mac, open your scans and navigate to "File" then "Print". In the print menu, check off "PDF", then click "Save as PDF". Be sure to save your PDF scans in a location you will remember.
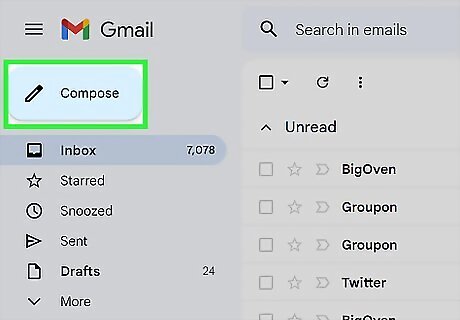
Open your email application or website and click Compose. You'll need to create the email that will hold your scanned documents. Type the recipient’s email address in the "To" field. Be sure to reference the attachments in the body or subject of the email.
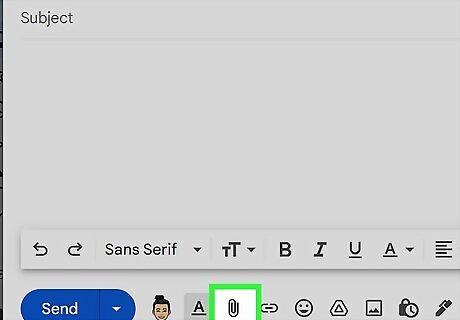
Click the "Attach Files" button and locate your scanned documents. The "Attach Files" button is usually a paper clip icon. Your PDF scans will be in the specified location from the previous steps.
Click Open. Depending on the email app you're using, the button may also be labeled OK or Attach. You can also double-click on the located document. Some applications offer drag-and-drop. To use this, simply drag your scanned documents into the body of the email. It will automatically be added as an attachment.
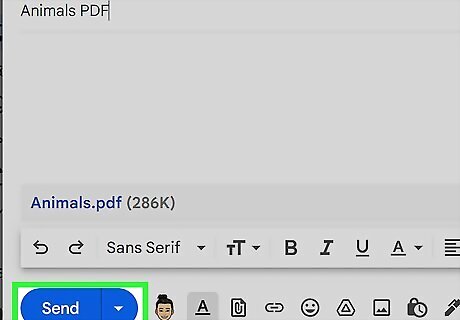
Send the message. When they receive your message, the recipient will need to double-click or tap the attachment to view the scanned document you emailed to them.
Using an iPhone
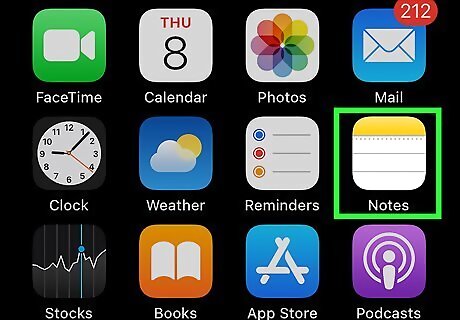
Open the Notes iPhone Notes App app. This is the icon with the yellow notepad. If it's not already installed, you can install it from the App Store.
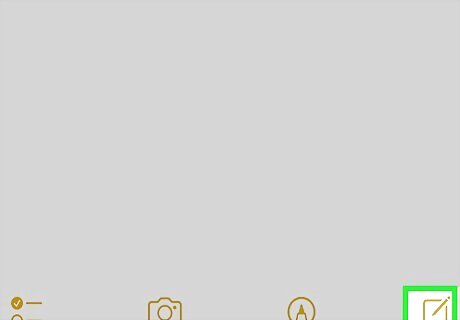
Create a new note. You can do this by clicking the pencil and note icon located at the top right or bottom right corner, depending on your iOS version.
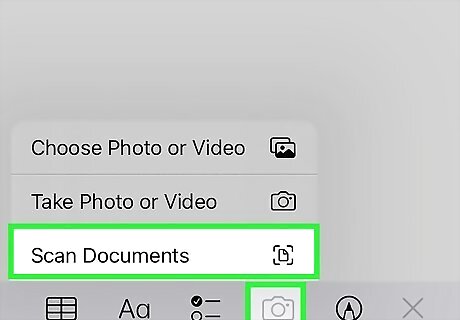
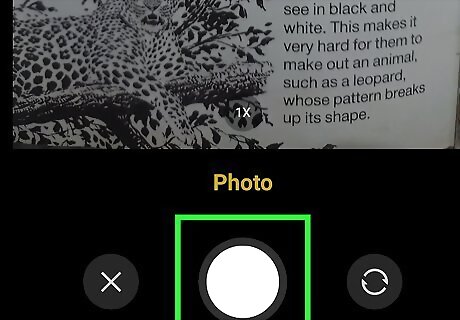
Tap the camera icon and select Scan Documents. This will open your camera.
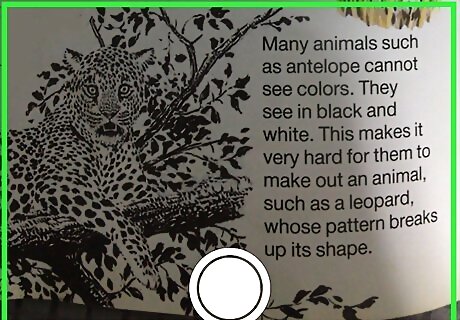
Position your camera over the document you want to scan. You'll be able to compile multiple documents in the same PDF file as long as they are scanned in the same session. For best quality, scan your documents in a well-lit area and with steady hands. The camera will automatically snap a photo when the scan has been detected. You can manually press the white camera button to snap a photo.
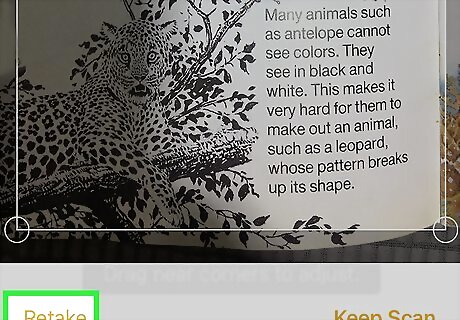
Scan all remaining documents. If you need to retake a scan, click the scanned documents in the bottom left corner. Click Retake on the top right of the scan you want to retake.
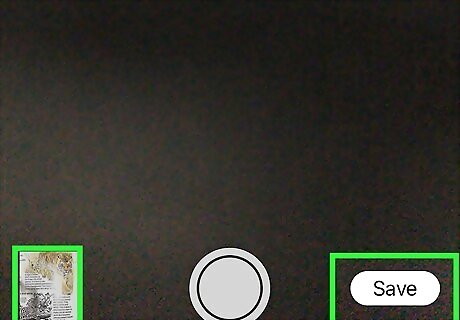
When finished, click Save. There will be a number in parenthesis indicating the number of successful scans. The scans will automatically be in PDF format. If you scanned multiple documents in the same session, they will be compiled together in the same PDF file.

Click the scanned document in the Notes page. This will bring up the document options. Make sure you've selected the scanned document, not the Note. It will say Scanned Document(s) at the top.
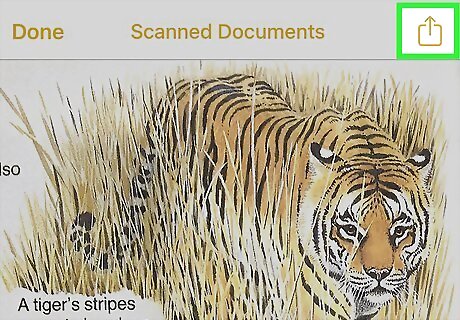
Tap Share iPhone Share.
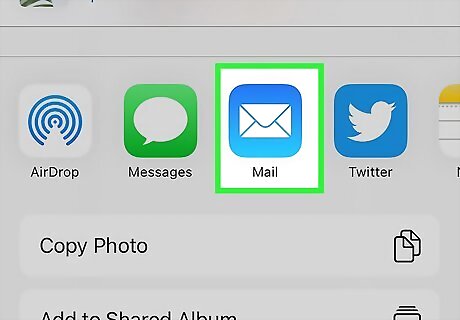
Click the Mail app. This will be a blue icon with a white envelope.
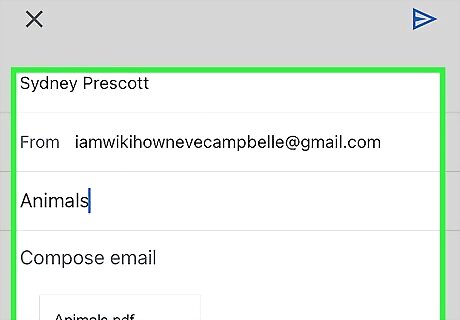
Compose your new message. Add the recipient. Be sure to reference the attachment in the body or subject of the email. By default, iPhones will send Sent from my iPhone as an email tag. Delete this from the bottom of your email draft if you don't want the recipient to see.

Press Send. This will be indicated by the up-arrow within a circle. Some phones will play a sound effect after sending emails. To confirm, check your Sent folder in your mailbox. If you delete it by mistake, you can always retrieve deleted mail.
Using an Android
Download Google Drive from the Google Play Store. You will need to log in to your Google account to use Google Drive.
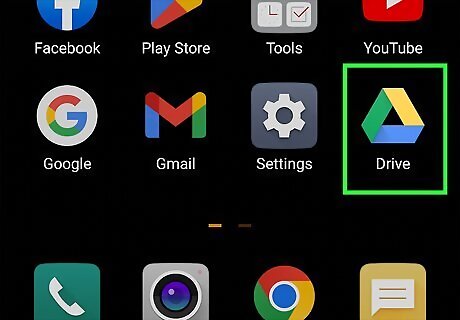
Launch Google Drive. On your homepage, you'll find recently viewed files. This is where you can add files or store pictures.
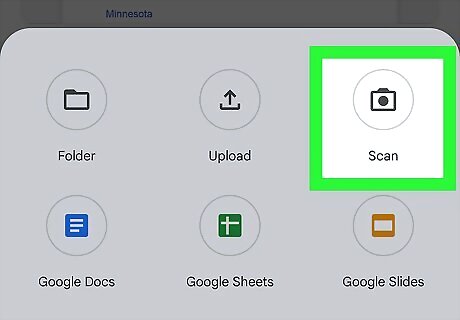
Tap the plus sign and click Scan. This will be indicated by a camera icon.
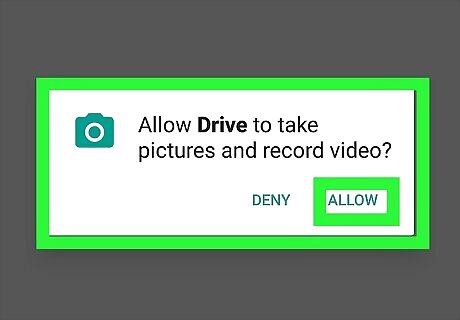
Choose your permissions. Google Drive will ask for camera permissions. Select either While using the app or Only this time. Do not select Don't allow since you need camera permission to scan documents from your phone.

Position your camera over the document you want to scan. For best quality, scan your documents in a well-lit area and with steady hands.
Click the white camera button. This will take a picture of your scan. You can choose to Retry if you want to take the photo again. Otherwise, click OK. Google Drive will automatically convert your picture into a scan. If there is white space, it will automatically locate the borders of your document.
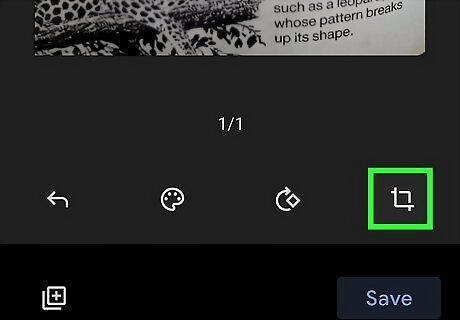
Click Crop Android 7 Crop Rotate to adjust your scan if necessary. You can edit the corners of the scan to make it as precise as you need. When you're finished, click Done. You can also rotate to landscape or portrait mode.
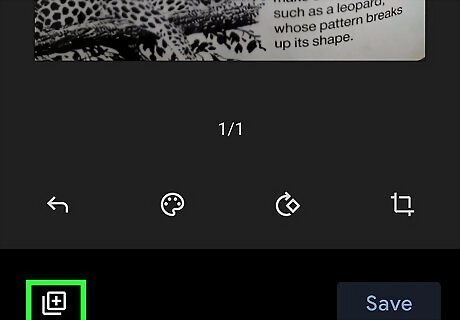
Scan all remaining documents. Click the document icon in the bottom left corner to add more scans.
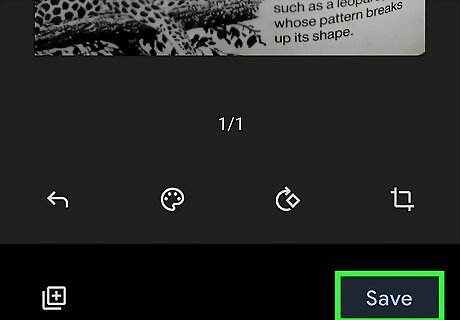
When you're finished, click Save. You can input a document title if you'd like. Google Drive will show you the account and folder you're saving to. Google Drive will automatically save scans in PDF format.
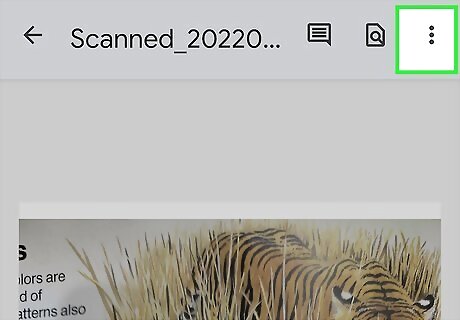
Locate your scans in Google Drive and click its Options ⋮. This will pull up a new window with options for your scanned documents. Scans will be in the destination set during the previous step.
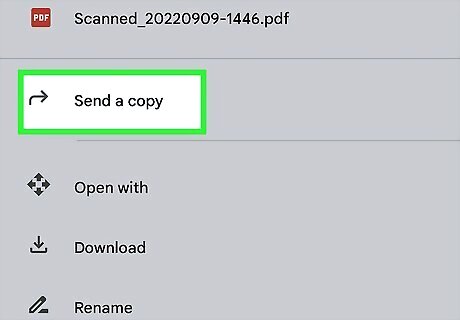
Click Send a copy and choose your preferred email app. You'll have to option to send via Bluetooth, Gmail, Messages, or other apps from your app list.
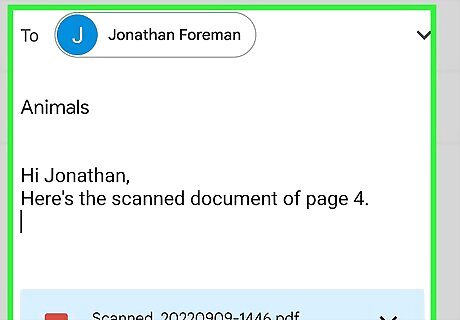
Compose your new message. Add the recipient. Be sure to reference the attachment in the body or subject of the email.
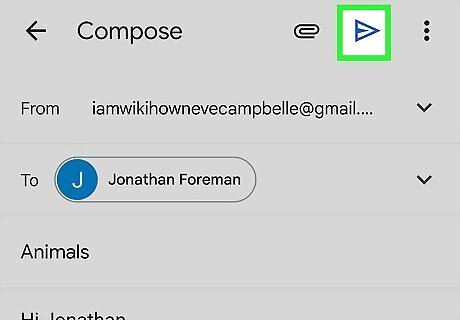
Press Send. This will be indicated by the up-arrow within a circle. To confirm, check your Sent folder in your mailbox.


Comments
0 comment