
Know the difference between a stonemason and other related trades. A stonemason is completely different from a brick layer, block layer, tile setter, and a "phony stonemason"; "phonystone" is exactly what its name implies it to be - a phony or a fake. Phony brickwork will mostly consist of concrete and a fake thin film that's completely worthless and will flake off in a matter of 15 years or slightly longer. Stonemasons actually work with real stone.
Learn how to do wall rock. Wall rock is the type of work stonemasons do the most. Separate the two words "wall" and "rock", meaning you're putting rock together with "mortar" in order to make a wall.
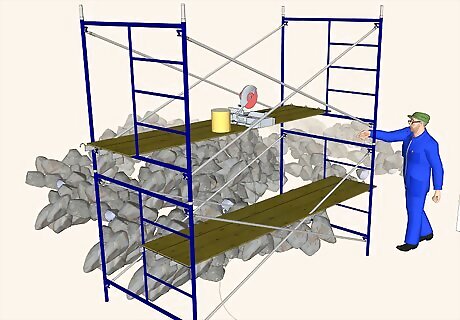
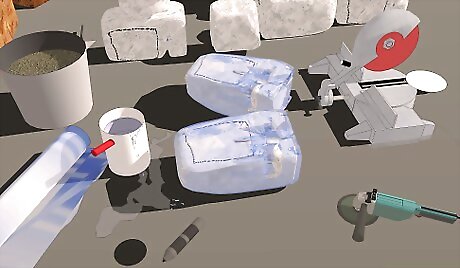
Construct a cutting operation. Usually this is done with two scaffolds and an X-brace and about three planks. Two should be at about hip level and one at the top of the scaffold, so that you can put a bucket full of water up top. This is so that you can create a siphon for your wet saw, should you need it. It's usually safe to assume you'll need it every day.
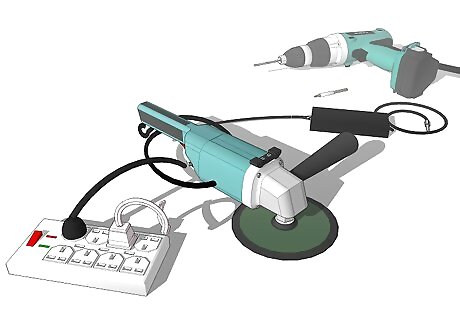
Get your tools and plug them in and place them where you'll need them. Sometimes you won't need all your tools but take out the ones that you'll need with that specific job. If you don't know which tools you'll need, take all of them.
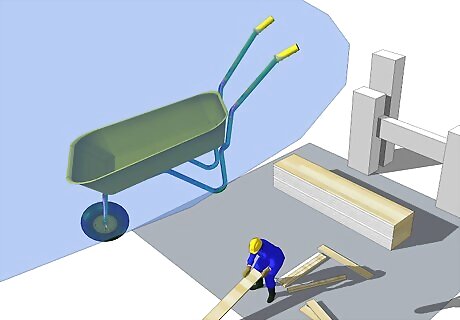
Consider where your cement is going to be coming from. If it's not smart for you to have a wheelbarrow full of cement, get a mud board. A MUD BOARD can usually be found on every job site. It's just any flat board that you wet down and place cement on.
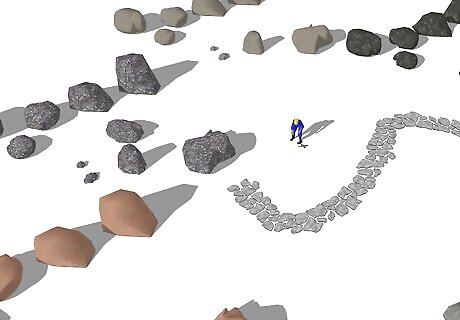
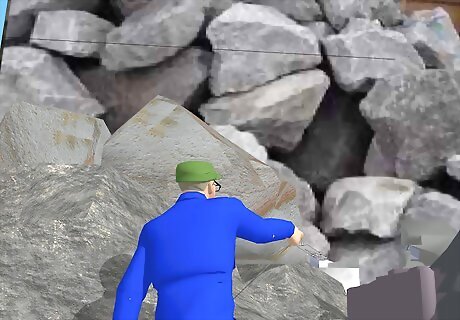
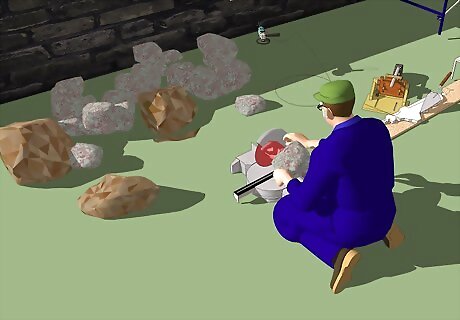
Get a good amount of stone and adorn it all around your cutting operation. You want a good selection to work with, but don't take all the good stones if you have other stonemasons on the job that could use some. Just use those really good ones you might need and leave it at that.

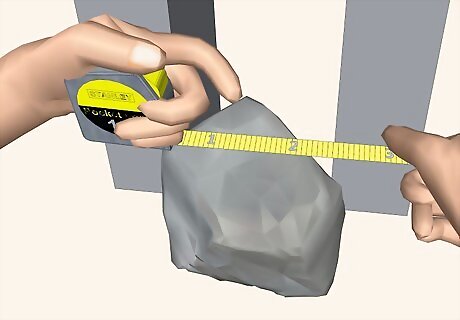
Before you mix any cement, look at your wall and think about what you might need. If it's a pillar or something that has a corner, then you're going to have to string a line or a series of lines. This means you'll need a tightly strung string that is strung from above where you're working and all the way down to the bottom at a specific measurement. So suppose you're wrapping your stone around a pillar and your distance is two and a half inches away from the wall; cut a 2x4 at about a six inch length. Then get some particle board and cut it in a long strip. Drill the six inch long 2x4 to the particle board with two screws so that the tension in the line doesn't cause the 2x4 to pivot. Drill the particle board to the wall. Measure from the two walls two and a half inches and make those measurement marks on the 2x4. Extend those marks with a square to the point to where the measurement marks intersect. Drill a screw into that intersection point, but don't drill it 100% into the wood. Leave some of the screw out a little ways. Now, tie a stiff and durable string to that screw you just drilled. Make sure that the string reaches all the way to the bottom with a little extra remaining.
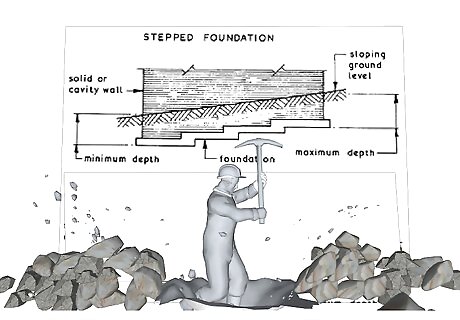
Dig all the way down to the foundation or footing of the structure you're going to be working on. If there's not enough of a footing, then you'll have to dig about a foot deep and pile in some stiff cement into that hole in order to make your own footing.
Lay your first stone at the corner. Make sure it's at two and a half inches out on both ends of both walls. You can do this with a square and a measuring tape to make sure the edge of your stone is at the proper measurement. When working with corners, you'll usually need a natural edge or a chiseled edge. Make sure not to leave a saw cut edge on the rock, unless you're told to do that by your employer... but you're not likely ever to encounter that situation.
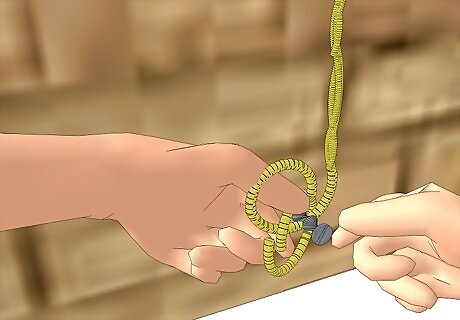
Get another screw and tie it to the bottom end of your string. Make sure it's tight enough so that when you tuck it underneath your first cornerstone you'll have tension on the line, but it won't lift your stone up off the ground because the cement is still wet. If this is the first time you're doing this, you'll get frustrated with this process. You'll learn how to do it right in time.
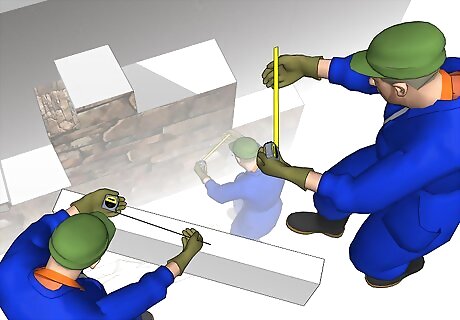
Try to make sure that the line isn't off. Measure, measure, measure, re-measure, and measure again. When working with corners, this is the most vital thing. If it's off, then you might have to tear out two to three days of work - if not more - which sucks if you're paid by the square footage and sucks even more when you're being paid by the hour because then you're in danger of losing your job for pay that wasn't delivered to your employer. So make sure you measure as much of everything that seems important and even some of the things you'd usually not consider. Just measure, measure, and measure some more. It's hard to get to the point to where you're measuring too much.
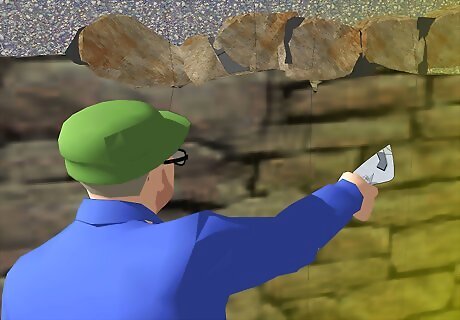
Keep your joints as tight as can be. Sometimes this means you need to undercut some of your stone and not just cut straight down on your rock. Don't undercut at a too dramatic angle but just enough to fit your stones nice and snugly together without having one overlap the other. Make sure every stone is flush - unless your employer wants a Rustic look. (The way to tell if you're a good stonemason is to see if you're organized and that your work meets customers expectations.)
Be aware that there are going to be points in time when you're working with rather tight fits and difficult cuts. For example, you'll be picking up this big heavy stone and moving it around and making marks on the stone and cutting it a little bit, then repeating this process in order to finally lay the stone. The more you play with a stone, the more likely it's going to break. So you can either work with lots and lots of small rock, or you can use a template. This is a trick of the trade! Buy some wire that's not tie wire. (Tie wire is too stiff, you need some wire that you can move and shape easily; usually this means having a thinner caliber of wire. However, if it's too thin it won't hold its shape and it'll sag and waste your time.) Find a brand of wire that you're comfortable with. Get a good length of wire, cut it, then wrap the two ends together. You should have a circular-looking type of wire. Put it in those difficult to cut places and shape it to the shape the outer portions the shone should be. Shape it so that it's not touching any of the already laid stones. Spend an extra minute or two just to make sure it's right. Working a little longer on a light piece of wire is much faster and easier than having to pick up a heavy stone, mark it a little bit, cut, then mark again, and cut, and repeat this process however many times is necessary to get it right. Hopefully you've shaped the wire properly. Place it atop your stone. If you have a pencil or Sharpie marker, place the wire onto the stone and mark it from the inside of the wire. (Make sure you don't invert your template, otherwise your stone will be worthless. Sometimes you can salvage it by flipping the stone, but if you undercut it probably won't be; so there are downsides to undercutting, but it does more good than bad). Once you've marked your stone, put your stone to that shape and it should fit perfectly into place.
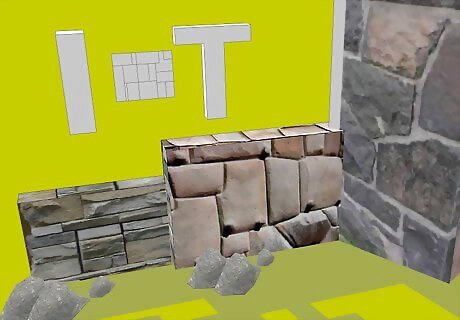
While doing stone masonry, make sure your joints are T's or I's. Try never to make an X joint. Let me explain. You've seen how bricks are stacked, right? Each layer is staggered. Suppose they weren't staggered. You'd wind up with a bundle of X joints. If they were a map they'd be four-way stops rather than T intersections. These are bad. They look ugly and usually cause a running joint. A running joint is a joint that extends more than three feet. Those are bad. Why? Because as the stonemasonry ages sometimes cracks form. The first places cracks form are in X joints and in the running joints.
Keep in mind that there is more to this job. There is always a quirky little thing that you'll have to work around. Hopefully you can work around the problems presented to you with reflection and perseverance.
Proceed to master flat work. Flatwork means working on floors. This is faster, meaning that more gets done in one day and you get paid more for it; but you rarely do it, so worship the employer that gets it.

Set up your cutting operation. I suppose you can use scaffolding, but it's usually smarter to just use a wheelbarrow. With that wheelbarrow, get a particle board that extends the length of the thinner area of the wheelbarrow and lay it down. Get your grinder or wet saw out and place it there. That's your workspace.
Find out what pattern you're doing. Start laying your stones. Obviously there are going to be some complicated cuts involved. Get some plastic transparent tarp that's inexpensive. Sometimes it's stuff that's usually used for masking or stuff that you'll just find around, or you can buy . Buy some Sharpie markers, too. Place the tarp around the place that you're going to cut. Be sure to stretch it out. Mark the shape of the stone you're going to cut. Write TOP in the middle of the plastic template so that you don't invert the stone. Find the appropriate stone that's the right size for the template. Put some water on your stone and place the plastic template on the watery surface so that it doesn't blow away or move. Cut the stone to the shape you need it.


Comments
0 comment