
X
Research source
Additionally, while it is easy to remove if applied properly, Plasti Dip can also stand up to fairly aggressive (and common) cleaning methods.
Washing Dipped Cars
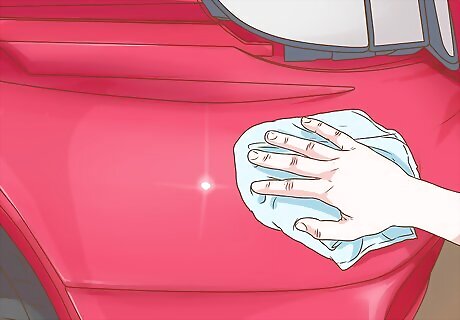
Hand wash your car normally. For all intents and purposes, a “dipped” car (that is, a car coated in Plasti Dip) can be washed in exactly the same way as a traditionally painted vehicle. For the most thorough cleaning, hand washing the car with automotive soap (or even dish soap), clean water, a hose, and lint-free cloths for washing and drying is probably your best bet. Should you so choose, you can purchase soaps and cloths marketed specifically for dipped cars. Since Plasti Dip provides a protective coating against UV rays, salt, etc., applying waxes or similar finishes/protectants after washing is unnecessary.
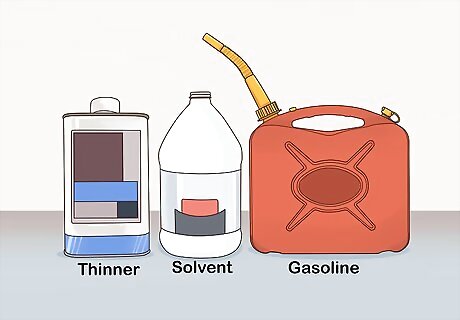
Avoid thinners, solvents, and gasoline. Because of Plasti Dip's composition, solvent-based cleaners could cause bubbling, peeling, or other damage to the applied product. Basically, just stick to common soap-based cleaners. Exercise caution when adding fuel to your car, as spilled or dripped gasoline could harm your Plasti Dip finish. You can order special drip guards if desired.
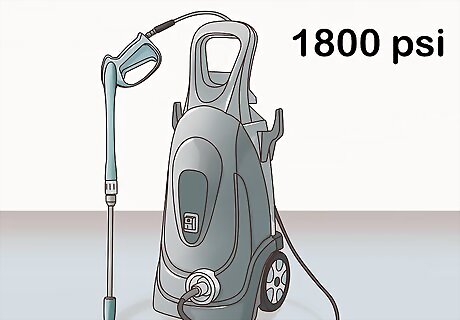
Use a pressure sprayer up to 1800 psi. Because Plasti Dip can be peeled off by hand with relative ease, some people are hesitant to use pressure sprayers to wash their dipped cars. However, if the Plasti Dip has been properly applied, allowed to cure for a few weeks, and is not peeling along edges or other spots, a common water sprayer of up to 1800 psi can be used. This means you can use one of the self-wash bays at your local car wash without incident. If you want to exercise added caution, use only the level of water pressure needed to get the job done.

Go through an automatic car wash. Once again, if the Plasti Dip has been properly applied, has had time to cure, and isn’t peeling, a trip through the average automatic car wash will have no negative impact on it. The various scrubbers, sprays, buffers, and so on should not pose a problem.
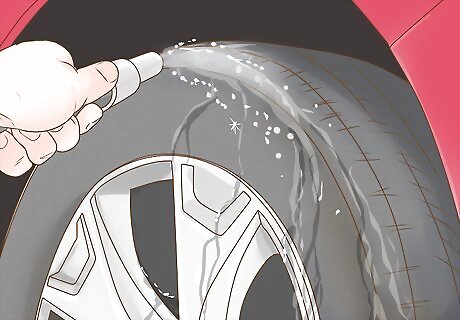
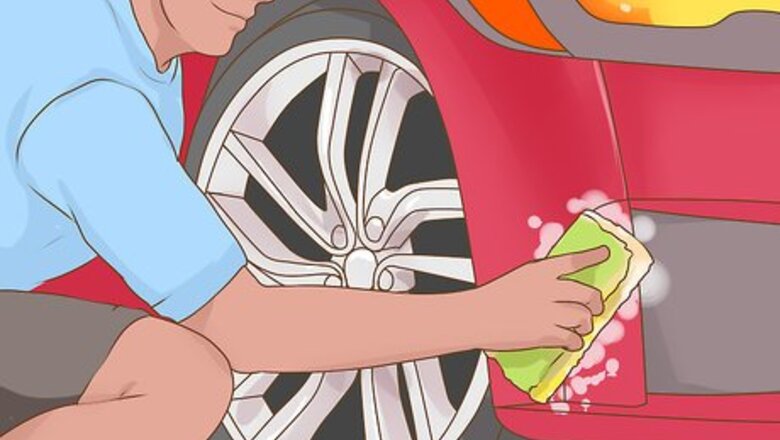
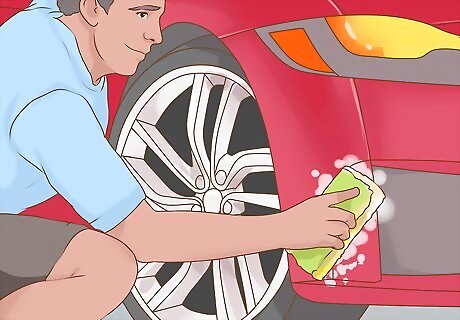
Wash brake dust and grime off your wheels. While some enthusiasts dip their entire cars, others stick to applying Plasti Dip to their hubcaps and wheels. Typical soap-based cleaning methods will work fine in keeping dipped wheels clean. However, newer spray-on, no-scrub, rinse-off cleaners developed for wheels (whether dipped or not) have come on the market as well.
Applying and Removing Plasti Dip
Make sure the surface is completely clean and dry. If you want your applied Plasti Dip to go on evenly, last longer, and peel away more easily when it’s time to remove it, you must make sure the surface is properly prepared. Taking your time now will provide immediate and lasting benefits. Wash and rinse the surface thoroughly; make sure any soap residue is gone. Use microfiber cloths to prevent lint accumulation on the surface. Dry the surface, and also allow it to air dry. Make sure it is absolutely, completely dry before applying Plasti Dip.
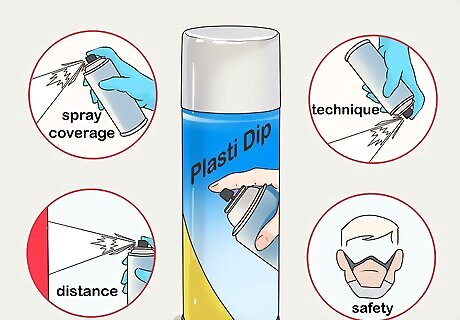
Apply the Plasti Dip according to the package instructions. You can dip, brush, or spray on Plasti Dip, although spraying is utilized for most automotive applications. Follow the provided instructions for spray coverage, distance, technique, and safety. Make sure you are in a well-ventilated area, and wear protective eyewear and breathing protection. You may also want to wear gloves and cover exposed skin. Especially if your car is brand new or has had after-market painting or repairs done to it, you may want to test a small area first. Plasti Dip adheres to (and peels away from) most automotive surfaces with ease, but it is better to be safe than sorry.
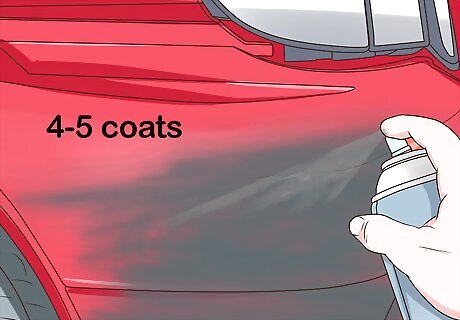
Add more coats for better protection and easier removal. When it comes to applying Plasti Dip coats, the more the better. Four to five thin, even coats should be considered your minimum for the best appearance and protection. However, adding six or more coats will enhance these qualities and make it even easier to remove the product later on.

Let the surface dry and cure properly. Plasti Dip dries to the touch fairly quickly, and a basic cure will usually occur within four to eight hours. After this point, it is safe to touch the surface and use the vehicle. However, the full curing process will take a few weeks, so it is best to wait perhaps a month before using aggressive cleaning methods.
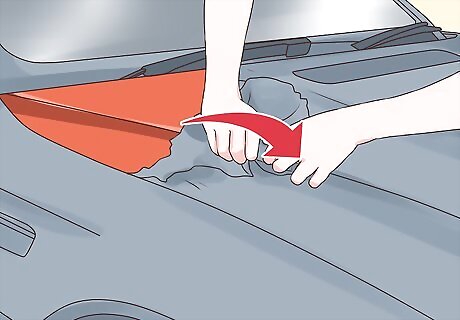
Peel the Plasti Dip off to remove it. Properly applied Plasti Dip will often last for at least three years. When it does wear out or you simply are ready for a change, just peel it off of the surface with your hands. If you applied enough layers of Plasti Dip earlier, it should peel off in large pieces. If, however, not enough layers were applied, meaning the Plasti Dip is peeling off in tiny pieces, try the following: Add additional coats of Plasti Dip, let it cure, then peel the thicker coating away with greater ease. Use a branded Dip Dissolver to re-liquify the Plasti Dip, then rinse and wipe it away. Try various automotive and other cleaning products (Goo Gone, WD-40, etc.), as recommended by various sources. This is a bit of a trial-and-error process in regards to effectiveness. Your best bet is to apply the Plasti Dip properly so that it peels away easily.


Comments
0 comment