views
Assembling a Metal Work Stand
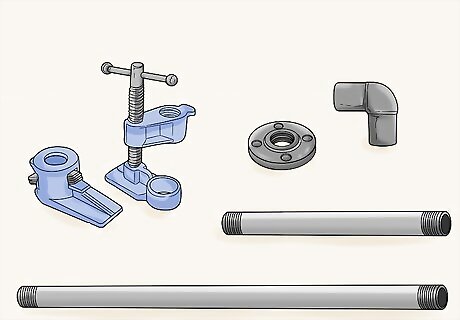
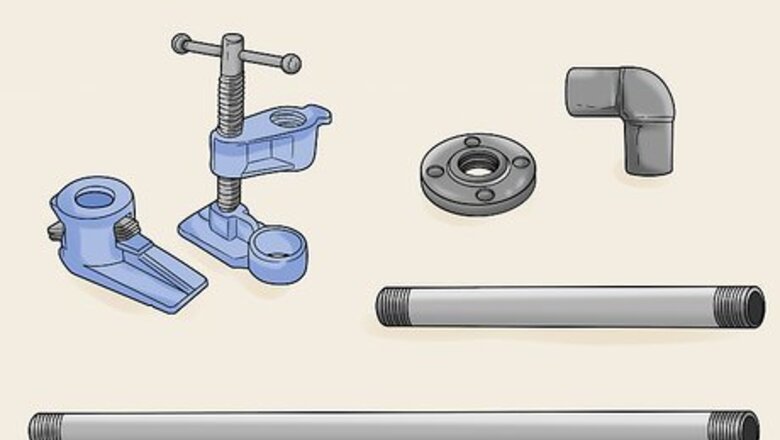
Buy your metal pipes, joint, bracket, and clamp from a hardware store. Drive over to your local home improvement or hardware store and head to the plumbing aisle. Buy a ⁄4 by 48 inches (1.9 by 121.9 cm) metal pipe with threading on both ends. Then, pick up a ⁄4 by 12 inches (1.9 by 30.5 cm) pipe in the same color. Grab a ⁄4 in (1.9 cm) elbow bracket and a ⁄4 in (1.9 cm) base plate with screw slots. Pick up some matching screws if you don’t have any at home. Finish by picking up a ⁄4 in (1.9 cm) pipe clamp.Tip: If you want a freestanding bike stand that you can move around, buy or cut 2 pieces of thick plywood that are at least 16 by 24 inches (41 by 61 cm) to serve as the base. If you’re going to mount your bike rack in the ceiling, you don’t need anything else since the bracket can be drilled directly into a joist. This shouldn’t cost you more than $25-35 depending on the cost of the pipe clamp. The pipe clamp will be the piece that holds your bike in the air by gripping the seat bar. Make sure that you get a clamp with jaws wide enough for your specific bike. You can replace all of these parts with PVC pipes and joints of the same size if you prefer, but metal piping is much stronger and is less likely to break over time.

Screw the elbow joint into either end of the longer pipe. Hold the ⁄4 by 48 in (1.9 by 121.9 cm) pipe in your nondominant hand. Hold the end of the elbow joint over the end of the pipe and turn it clockwise until the threading on the joint catches on the pipe. Keep turning it until you can’t turn it any further to secure it. The threading on both sides of the elbow joint and both ends of the longer pipe are identical. It doesn’t matter which end or which direction you do this in.
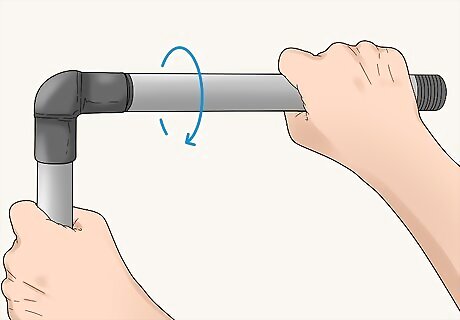
Attach the shorter pipe into the open end of the elbow joint. Hold the longer pipe in your nondominant hand with the elbow joint at the top. Take the 12 in (30 cm) pipe and screw it into the open end of the elbow joint. Turn the pipe clockwise until the threading catches and continue turning it until the pipe won’t turn any further. The bike will hang from this short pipe, so it’s really important that this piece is screwed in tight.

Slide half of the pipe clamp over the end of the shorter pipe. Pipe clamps come in 2 pieces. Grab the smaller piece and squeeze the 2 handles together. While holding the handles down, slide the opening over the shorter pipe. Release the handles when the smaller piece is 6 inches (15 cm) from the end of the pipe. The side with the jaw on it, which is the flat platform that matches an identical platform on the other end, must be facing towards the opening of the pipe with the clamp parallel to the floor.

Attach the other half of the clamp to the pipe and line the jaws up. Take the larger piece of the pipe clamp and slide the opening in the middle over the end of the pipe. Turn it clockwise to attach it to the end of the pipe. Line up the jaw on the larger piece with the jaw on the other half of the clamp that you already attached.
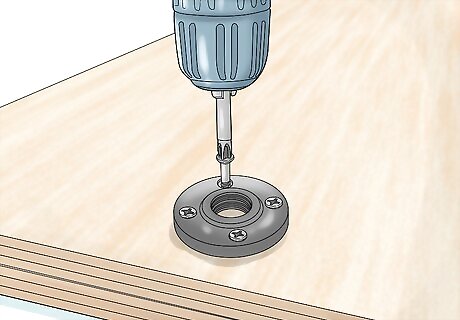
Drill the bracket into 2 sheets of plywood for a movable stand. Take your bracket and hold it 1 in (2.5 cm) from the edge of any side of the board in the middle. Drill the bracket into the board using wood screws that are long enough to go through the board. Cap the screws on the other side with nuts to brace them. Then, cut out a small section of the second board with a jigsaw to make space for the screws. Use wood glue to secure the boards together before screwing the open end of the long pipe into the bracket. You can use smaller screws and single sheet of ply wood if you’d like, but the bike will be more likely to tip over if you do this. The 12 in (30 cm) pipe must be oriented with the clamp hanging on the other side of the plywood, not away from it. The natural weight of the bike combined with the shape of the plywood will keep the bike from falling over.
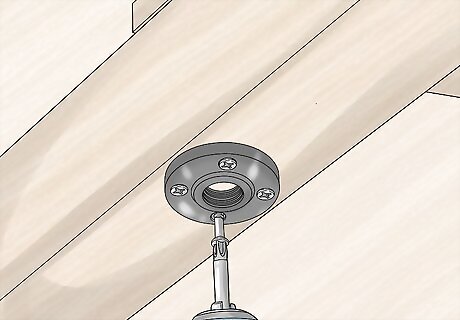
Install the bracket in a ceiling joist for a hanging work stand. If you want to install the bracket in the ceiling, make sure that you either find a stud in the ceiling with a stud finder or hang it in the garage or basement on an exposed joist. Hold the bracket over the joist and use 3 ⁄2 in (8.9 cm) wood screws to drill it into the ceiling. Then, screw the empty end of the long pipe into the bracket by turning it clockwise until it won’t turn any further.
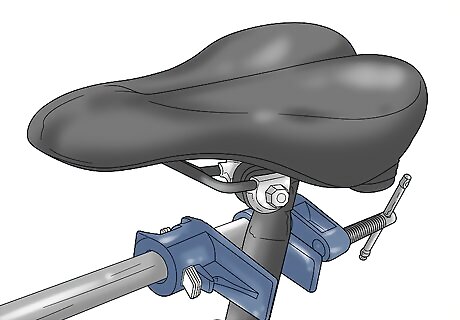
Hang the seat on top of the pipe clamp to secure it to the stand. To put the bike on the stand, lift it up by the frame and slide the bar under the seat between the jaws of the pipe clamp. Rest the seat on top of the clamp and turn the adjustable bar on the pipe clamp clockwise to tighten the jaws against the seat. Don’t turn the clamp so hard that you damage your bike! Your frame will be fine so long as the jaws are resting against the bar.
Making a Wooden Storage Rack
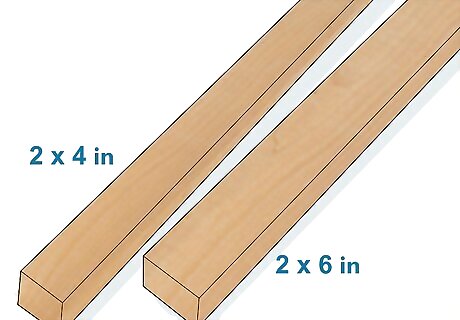
Pick up 2 wood boards from a construction supply store. Head to your local construction supply store and pick up a 2 by 4 in (5.1 by 10.2 cm) wood board that is at least 3 feet (0.91 m) in length. Also, grab a 2 by 6 in (5.1 by 15.2 cm) board that is equally long. You can create a simple freestanding bike rack just from these pieces. This is a really simple DIY project that doesn’t really require a ton of woodworking knowledge. You do need to make a few simple cuts with a saw, though. You can’t purchase the boards pre-cut since you need to build the stand based on the size of your specific tire and wheel. All bike tires are not the same size, so you’ll need to cut them yourself after measuring them with the boards in place.
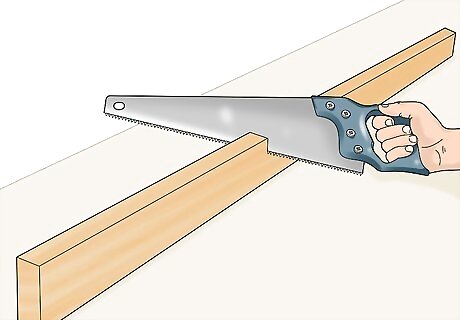
Cut the 2 by 4 in (5.1 by 10.2 cm) board into two 16 in (41 cm) lengths. Use a measuring tape to measure off 16 inches (41 cm) from the edge of the board. Mark this distance off with a carpentry pencil. Then, use a miter saw, circular saw, or handsaw to cut the board to size. Repeat this process again to create 2 16 inches (41 cm) boards.Warning: Wear a dust mask, thick gloves, and protective eyewear when working with power tools. Keep your hands at least 6 inches (15 cm) away from the blade while you’re operating the saw. You can cut the boards to be 18 inches (46 cm) in length if you own a heavier bike or want a slightly bigger stand.
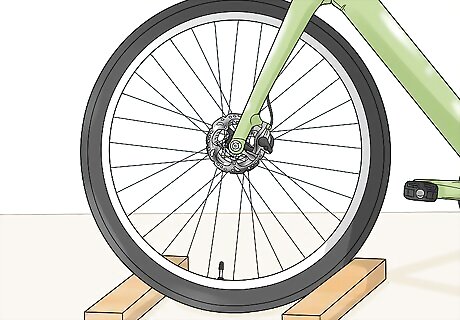
Place the two 16 in (41 cm) lengths under your front tire. Set the kickstand down on your bike or lean it against a wall. Adjust the handlebars so that your front tire is straight. Place the 2 boards you cut underneath the end of each tire so that they’re resting perpendicular to the rubber on either side. The boards must be resting directly against the rubber of the tire without lifting your bike up off of the ground. Make sure that the boards are roughly parallel with one another. They don’t need to be perfect, but they should be relatively straight.
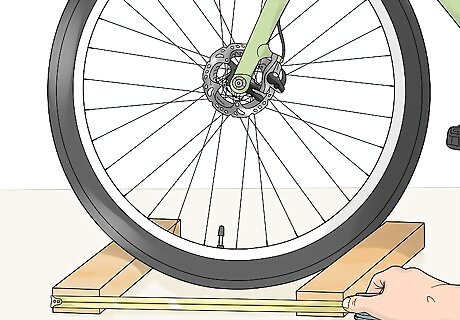
Measure the distance between the boards from end to end. Grab a measuring tape and measure the distance from the exterior edge of 1 board to the exterior edge of the board on the other side. Note this measurement. Then, repeat this process on the opposite side to make sure that they match. If you get 2 different measurements on both sides, adjust the angle of each board to straighten them out and measure again to make sure that you get the same length on each side. For most bikes, this measurement should be roughly 20–30 inches (51–76 cm).

Create 2 boards out of the 2 by 6 in (5.1 by 15.2 cm) piece to match your measurement. Take your 2 by 6 in (5.1 by 15.2 cm) board and mark off your first cut based on the measurement between the 2 by 4 in (5.1 by 10.2 cm) boards on the ground. Cut this board the same way you cut the first set. Repeat this process again to create 2 boards of equal size. For example, if the distance between the 2 boards on the floor was 24 inches (61 cm), cut your 2 by 6 in (5.1 by 15.2 cm) board into two 24 in (61 cm) pieces. You can trim a triangular piece out of the top of each board on each side if you’d like the stand to have a more aesthetically pleasing look.
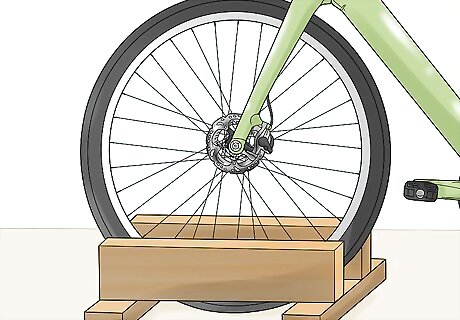
Place the 2 by 6 in (5.1 by 15.2 cm) boards on the open sides of the tire. Take your boards to the bike and set them on top of the 2 by 4 in (5.1 by 10.2 cm) boards vertically so that they’re bracing the wheel on either side. Line the exterior edges of the 2 by 6 in (5.1 by 15.2 cm) boards up with the wood planks on the floor so their sides are flush. This should look like you’re making a rectangle with 2 taller sides holding the tire in place.
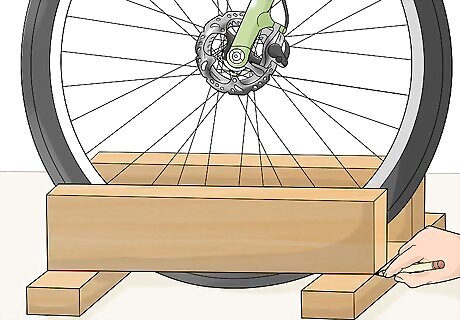
Mark the edge where the boards meet with a pencil. Grab a carpentry pencil and trace the edges of the 2 by 6 in (5.1 by 15.2 cm) boards on each of the 4 ends where they’re meeting the longer boards underneath. You will assemble the stand upside down, so extend your markings along the side of the longer boards so that you can see them when the pieces are upside down. The more references you can add for yourself, the better. Attaching the boards isn’t particularly hard but it can be kind of tricky to line the pieces up with one another.

Turn the pieces upside down and line the boards up with your marks. Set the entire set of boards upside down on the ground. Line the edges of the thinner boards up with the edges of the 2 by 4 in (5.1 by 10.2 cm) boards. Check the marks you made on the sides of the boards to ensure that the entire assembly matches the shape you set up on the ground.

Drill the boards together with 4 in (10 cm) wood screws. Grab a set of with 4 in (10 cm) wood screws. Hold the first screw over the center of a junction where 2 boards meet. Carefully and slowly drive the drill through the 2 by 4 in (5.1 by 10.2 cm) board and into the middle of the 2 by 6 in (5.1 by 15.2 cm) piece. Continue drilling until the screw is flush with the wood. Repeat this process with the other 3 junctions where the boards meet. If you’re struggling to brace the boards while drilling, drill a pilot hole through both sets of boards before attaching the screws. Use a pilot bit slightly smaller than the screws you’re using. You can use wood glue to reinforce the seams between the boards if you’d like some extra support. Alternatively, you can buy a new bike. Think about the purpose for which you will use it. Consider whether you will use it for transportation, recreational rides, or fitness. Find a bike that suits your budget and meets your needs.





Comments
0 comment