
Planting Garlic
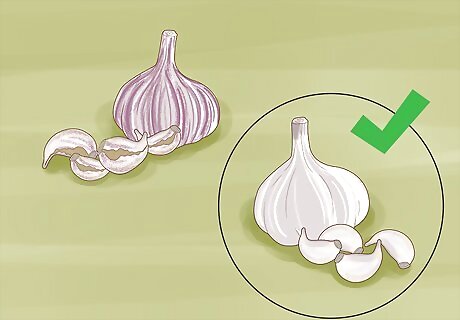
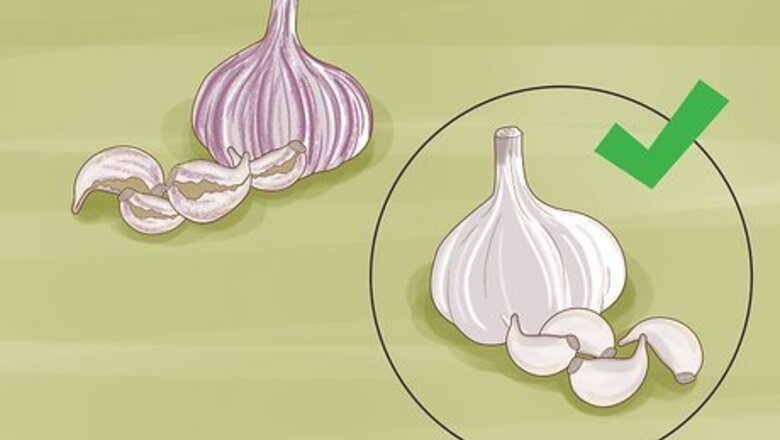
Choose a soft-neck garlic variety instead of a hard-neck. The difference between soft-neck and hard-neck garlic is that hard-necks have thicker, more brittle skin than the latter. That's because hard-neck thrives in colder climates. In contrast, soft-neck garlic adapts better to Southern climates, requiring less involved care. When growing garlic in Florida, buy a soft-neck variety to give your plant every chance to thrive. Some soft-neck varieties that grow well in Florida include Thermadrone, Lorz Italian, Georgian Crystal, Creole, and Romanian Red garlic plants. You can buy softneck garlic heads at most plant nurseries. Buy 1 clove for every garlic plant you want in your garden, as each will produce a single head. Garlic sold in stores is most likely of the soft-neck variety. They can be planted as long as they're grown locally or organically and not imported.
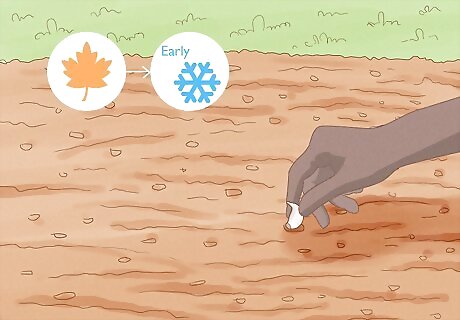
Plant your garlic between fall and early winter for the best harvest. Because of the warm climate with minimal frost, you can plant your garlic anytime through early winter (November or December). If you plant your garlic during this time, you can expect a harvest around May or June. When planted in the fall, garlic plants stay dormant in the winter but will resume growing in spring. It will form roots but little to no top growth until around February. If you prefer, plant your garlic in February or March for a late summer or autumn harvest. Garlic grown in the South, however, produces fuller harvests when planted in fall. Some hardneck varieties of garlic need to be chilled for 10-12 weeks before planting them in the spring. Softneck varieties of garlic do not need to be chilled and are better suited to warm, humid climates.
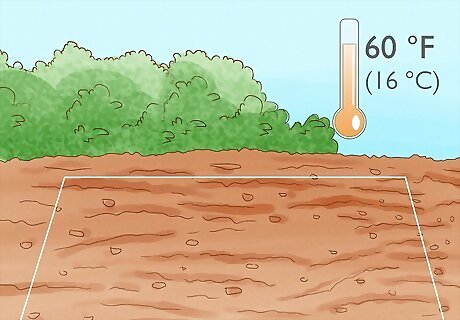
Choose a partially shaded spot in your garden to grow garlic. Garlic plants grow best in cooler soil temperatures around 60 °F (16 °C). To keep your soil chilled, find a spot in your garden with shade during the hottest part of the day. Growing garlic in temperatures hotter than 90 °F (32 °C) can stunt your plant's bulb growth, which makes using shade to chill the soil essential. If you can't find a spot with natural shade, purchase a shade cloth to drape over the garlic and protect it from the sun.
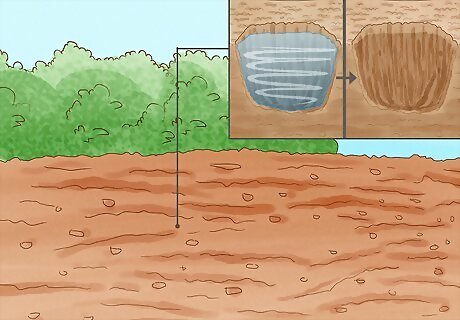
Combine well-draining soil with plenty of organic matter. Garlic needs soil that drains well and contains organic nutrients to present rot and produce a strong harvest. Opt for a well-draining nitrogen-rich soil mix with a pH between 6-8 and mix it into your garden's soil. Top 1 to 2 inches (2.5 to 5.1 cm) of organic matter over the soil, then mix both thoroughly before planting the garlic. To test whether your soil is well-draining, dig a 12 in (30 cm) deep hole in your garden and fill it with water. If the hole takes 5-15 minutes to empty, you've found well-draining soil. If you don't have well-draining soil, add equal parts mulch, well-draining soil mix, or organic matter to the hole and repeat the draining test. If you’re growing your garlic in a pot, fill a container that’s at least 8 in (20 cm) deep with a soil-less potting mix. Ensure the pot has holes for drainage.
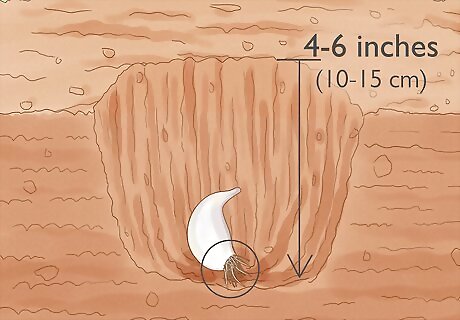
Place a clove 1 to 2 inches (2.5 to 5.1 cm) deep with the roots downward. Since garlic doesn't produce seeds, planting a single clove in the ground at a depth of 1 to 2 inches (2.5 to 5.1 cm) is the best way to grow it. One clove will make one bulb. Fill the hole with well-drained soil and sprinkle the soil with water until moist. Separate the cloves just before planting by peeling the outer papery layer of skin and removing the cloves from the bulb's base. Keep the individual wrapper and scab end intact. If you're planting multiple garlic cloves, place them about 4 to 6 inches (10 to 15 cm) apart in rows and 9 to 24 inches (23 to 61 cm) between rows. If you're growing garlic cloves in a pot, make the holes 2 to 3 inches (5.1 to 7.6 cm) deep and 5 inches (13 cm) inches apart. Place 1 inch (2.5 cm) of potting soil on top.
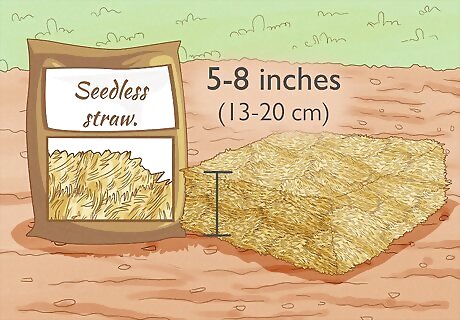
Add mulch to cover and protect the cloves from cold weather. Cover the soil surrounding your garlic with 5 to 8 inches (13 to 20 cm) of seedless straw or pesticide-free grass clippings. This will keep the soil cool, give your plants extra nutrients, and prevent weeds from growing as your garlic grows. Avoid adding mulch if your soil is damp or you live in a wet, humid climate. Too much moisture in the soil will cause the bulbs to rot.
Caring for Your Garlic

Water your garlic plants about once a week. Garlic needs about 1 in (2.5 cm) of water a week to thrive in cool or warm temperatures. During summer months with very little rainfall, check your garlic plant's soil several times weekly for dryness. Stick your finger in the soil—if it is dry instead of moist, water it until the soil is damp but not waterlogged.
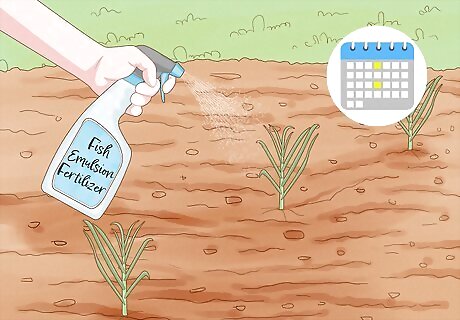
Spray a liquid fertilizer on your plant twice a month. Garlic needs plenty of nitrogen to produce a strong harvest. From the time the garlic shoots emerge to harvest, give your plants a fish emulsion fertilizer every other week or if your plant develops yellow leaves (a sign of nitrogen deficiency). You can buy fish emulsion fertilizer at many garden centers or nurseries. If you can't find a fish emulsion fertilizer, use another nitrogen-rich fertilizer.
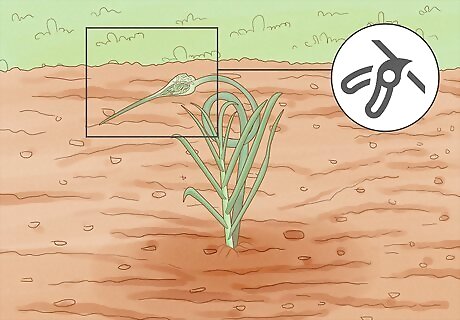
Cut back your plants' scape for fuller hard-neck bulbs, if needed. If you're planting a hard-neck garlic variety, it will produce a scape. Scapes are large, curled stalks that grow on the top of garlic plants. Remove the scape with pruners or snap them with your hand. This helps redirect your plant's energy towards growing large, healthy bulbs. Cook with the scape to keep it from going to waste. You can find scape recipes online, from using scape in stir-fry to making a scape salad. Scapes can be stored in the refrigerator for around 3 months and can be used as an alternative to chives or green onions.
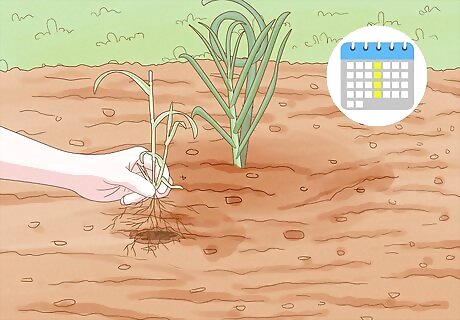
Weed the area around your garlic at least once a week. Excessive weeds can reduce your plant's yield by over half. To prevent weeds from taking your garlic's nutrients, pull weeds regularly before they get out of hand. Tug them straight up out of the ground by hand, or use a specialized weed removal tool.
Harvesting Garlic
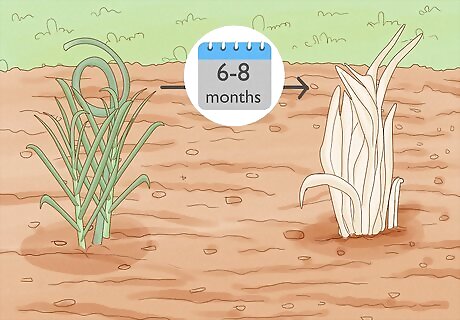
Wait until your garlic's leaves have dried and bent at an angle. In Southern states, garlic should take 6-8 months to mature. When you've reached about 6 months since planting, watch for half of your garlic's leaves to dry and bend towards the ground. If you planted your garlic in the late fall or early winter, expect to harvest in May, June, or July. If you planted in spring, you may need to wait until August, September, or October.
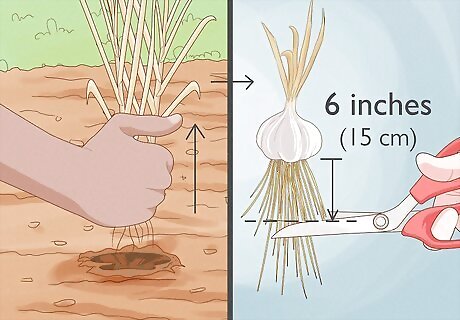
Pull your garlic from the ground and trim the roots. Brush off any loose soil from the roots and trim them with pruning shears until they're at a length of about 6 inches (15 cm). Trimming the roots is essential to prevent the bulb from rotting or molding when you store it. Leave the stalks attached during the harvesting process.
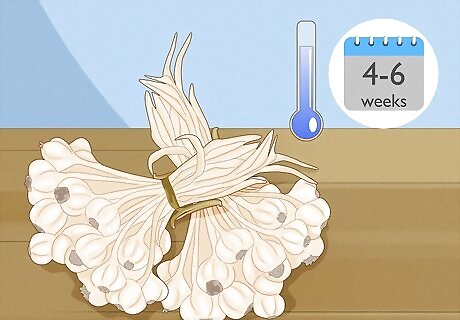
Cure your garlic in a dry, cool place for 4-6 weeks. Hang your garlic by their stalks on a ceiling or spread them on a rack in a cool, dark, dry place. Leave them hanging for about 4-6 weeks to dry them out completely and prepare them for storage. Place a rotating fan near the garlic bulbs to dry them out quickly and prevent bulb rot. Garages or garden sheds are ideal for curing garlic.
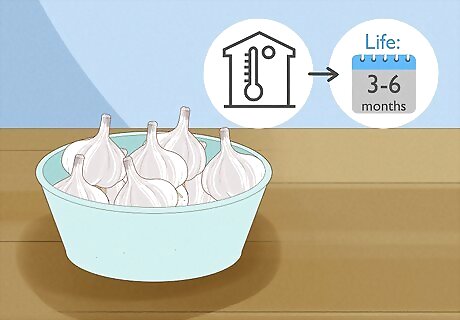
Store your garlic for 3-6 months in a cool, dry place. After you've dried your garlic, remove the stalks and place the bulbs in a refrigerator drawer or on the counter. Whole garlic lasts for 3-6 months when stored at room temperature. Don't put garlic in an airtight container. Moisture can get trapped inside and cause the garlic bulbs to rot.


Comments
0 comment