views
- Use Movavi Video Editor's Quick Video mode to make video projects in five simple steps.
- Movavi's manual video mode is simple even for beginners to use, thanks to the drag-and-drop functionality of video elements.
- Advanced users can further edit their projects with advanced video and audio editing tools.
Using Quick Video Mode
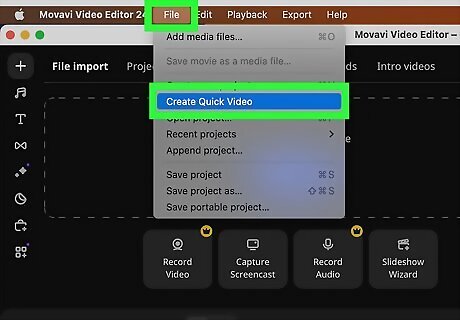
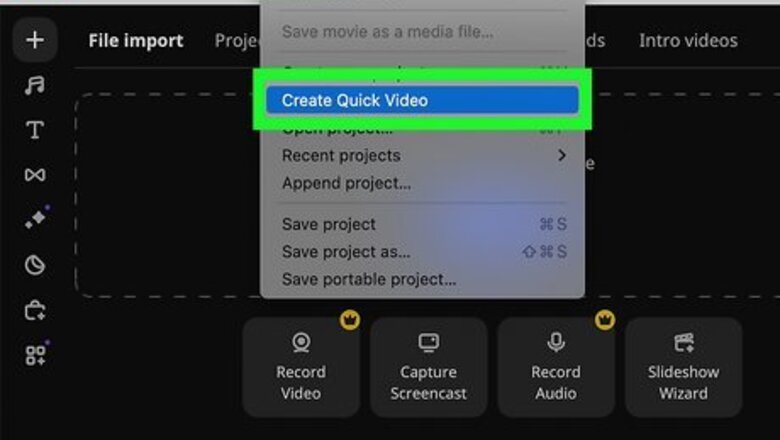
Click File > Create Quick Video. If you're trying to make a quick and simple video project, or you don't have much experience making videos, the Quick Video mode will create a video for you in five steps. If you haven't already installed Movavi Video Editor, you can download it for your PC or Mac from movavi.com.
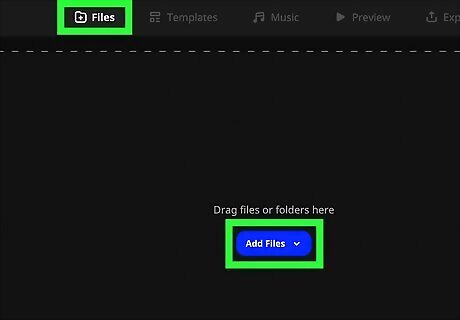
Click Add Files to add your photos or videos. The first tab is the Files tab, where you can upload your photos or videos to the project. You can also add a combination of photos and videos to your project. You must have your videos and photos on your computer to add them to Movavi. If you haven't already done so, transfer the videos from your Android, iPhone, or iPad now. Click the Next button when you're ready to proceed.
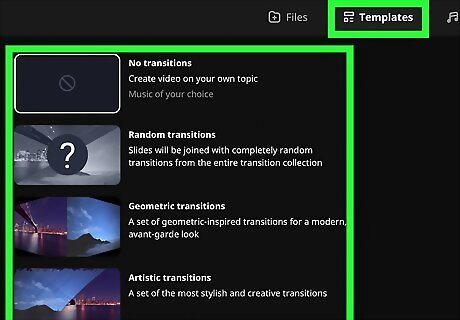
Select a template if desired. Movavi Video Editor has several templates that will dictate your project's transitions, title cards, and music. You can also select a simple transition template with no music, or add no transitions at all. Click each template to preview it. Once you've decided, click the Next button when you're ready to proceed.
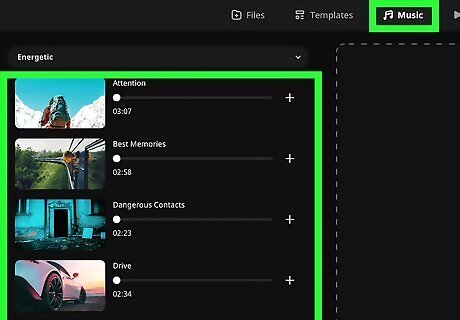
Select a music track, or upload your own by clicking Add Files. Movavi Video Editor has a library of music tracks you can add to your project. You can pick from tracks that sound energetic, calm, romantic, or upbeat. Click the "+" button next to a track to add it. If you want to use your own music, click Add Files and select your audio file. If you selected a template with music, you can replace the audio track by clicking the "X" button next to the track. You can also add multiple tracks to your project by clicking the "+" button under the track on your video. Click on each track to preview it. Click the Next button when you're ready to proceed.
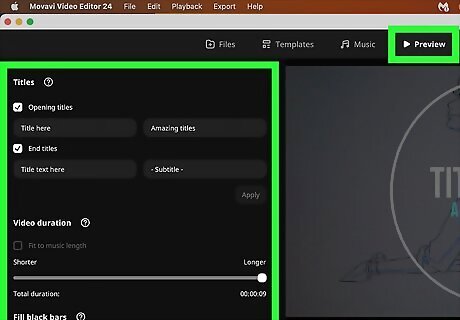
Edit the video titles, duration, volume, and more. The Preview tab has some settings to go through before your video is completed. Click next when you're ready to export your video. Set the video opening title and ending title. If you selected a template with a main title and a subtitle, there will be two input boxes for each title type. Select a video duration. If you check the box next to "Fit to music length" but don't have enough media files to fill, Movavi Video Editor will play your files in the initial order, then repeat them randomly until the video ends. There is also a slider that allows you to control how long or short the video is, but if your project includes video files, the videos may be shortened to fit in the time you selected. Choose how to fill in the black bars around any photos. If the photos have different aspect ratios, they will have black backgrounds by default. You can stretch the images to fit the frame, add different backgrounds, or not fill them at all. Adjust the volume balance. If you have videos with sound and a music track in your project, both will play by default. You can adjust the volume of the video's audio with the top slider (the speaker icon) and the volume of the music track with the bottom slider (the music note icon). Drag either slider all the way to the left to completely mute that track.
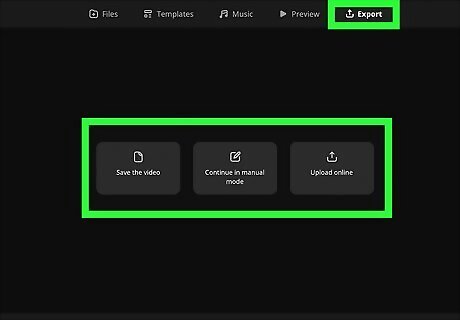
Export your video or open it in Movavi Video Editor's manual video mode. You can save your video to your computer or upload it directly to YouTube, Google Drive, Vimeo, or TikTok (you must sign in to these services to continue). If you want to edit your video a bit more, you can also do so by clicking the middle button, which will open your project in the manual video editor. From here, you can adjust the duration of each photo or video, fine-tune the audio balance, change transitions, and more.
Using Manual Video Mode
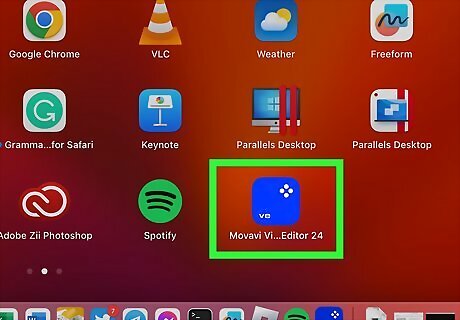
Open Movavi Video Editor. By default, the program opens in manual video editor mode. You can also access manual video mode after using the Quick Video mode or by going to File > New Project. If you start in Quick Video mode and move to manual video mode, you will see all elements (photos, videos, music, and transitions) already added to the timeline. If you're new to this type of video editor, starting in Quick Video mode and moving into manual video mode is a great way to see how the timeline works and where each element goes.
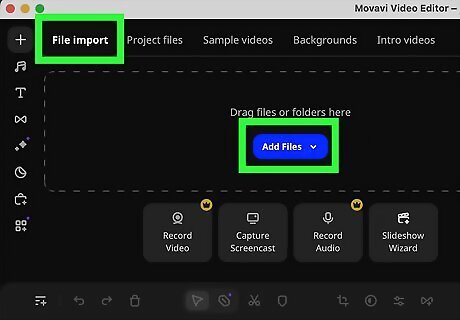
Add files via the Import tab. The first tab in the upper-left sidebar is the Import tab. This is where you will add photos, videos, audio, and more to use in your project. You can import files on either the File import tab or the Project files tab. However, on the File import tab, you can also directly record video or audio or capture your screen. The Slideshow Wizard button will close your current project and start the Quick Video editor. Use the Sample videos, Backgrounds, and Intro videos tabs to download premade assets to use in your video project. Note that some of these assets may require additional purchases from the Movavi Effects Store.
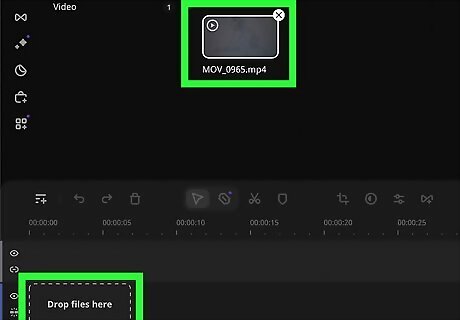
Drag and drop your files to the timeline. The timeline is the multitrack section, which takes up the bottom half of the screen. You can add up to 99 tracks of video (or photo), audio, and titles to your project. If your files don't match the aspect ratio of your project, the software will ask if you want to change it. The gray (top) track is for titles, the blue (middle) track is for video/photos, and the green (bottom) track is for audio. You can add additional tracks by clicking the Add an extra track button in the top-left corner of the timeline or by right-clicking on the timeline and selecting Add an extra track. Tracks can be deleted by right-clicking it on the left-hand side of the screen, where the Hide button is located.
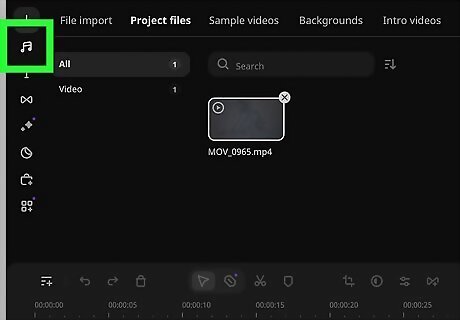
Browse Movavi Video Editor's music and sounds library in the Audio tab. The Audio tab is the second icon in the upper-left sidebar. If you're using your own audio files, you may not need this tab. If you need background tracks or sound effects, you can grab them from this audio library (though note that some songs or sound effects may require a purchase). Just like with files from the Import tab, drag and drop the audio files you want to use down to the timeline.
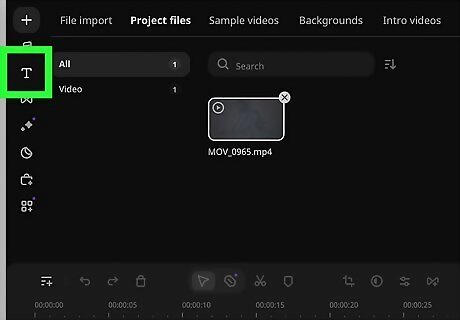
Add titles from the Titles tab. The Titles tab is the third option in the upper-left sidebar. You can preview a title by clicking on it. Note that some titles may require an extra purchase from the Movavi Effects Store. Just like with your audio and video, drag the title you want to use into your project to the title track.
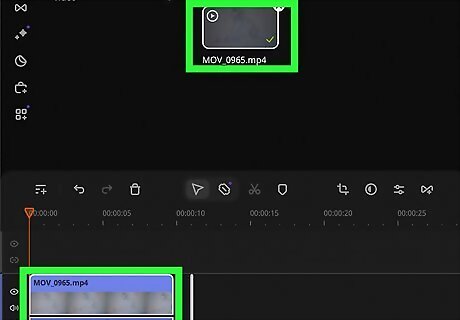
Drag and drop your video elements to rearrange them in the timeline. You can arrange the titles, videos, photos, and audio in any order. Elements that overlap in the timeline view will overlap in the video. This might be desired if you want background music playing for the duration of the video, but it may not be desired if your title text pops up over your video and blocks what's going on.
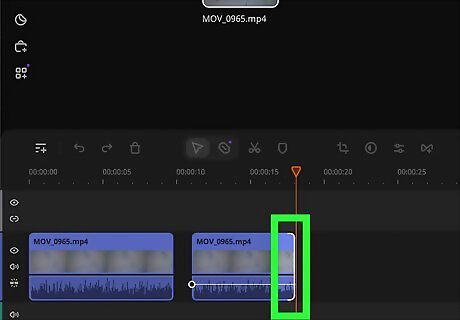
Change the duration of your elements. Edit the duration of each element by dragging either side of the element to make it longer or shorter. If your element is a video or audio, you can't make it longer, and shortening will trim it. You can shorten and lengthen titles and photos, though. You can instead clip out a particular section of a video by dragging the orange marker to a specific spot in a video clip, right-clicking the video element, and clicking Split. Then, drag the orange marker to the end of the section you want to clip and split it. You can then delete the extra video elements before and after your new clipped section.
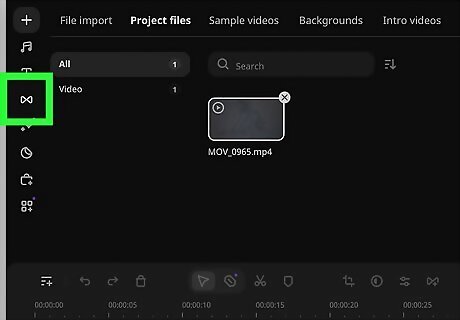
Add transitions on the Transitions tab. Transitions will ease each visual element of your video project into the next. You can preview a transition by clicking on it. Note that some transitions may require an extra purchase from the Movavi Effects Store. Add a transition by dragging it between two video or photo elements. To remove a transition, right-click it and select Remove transition.
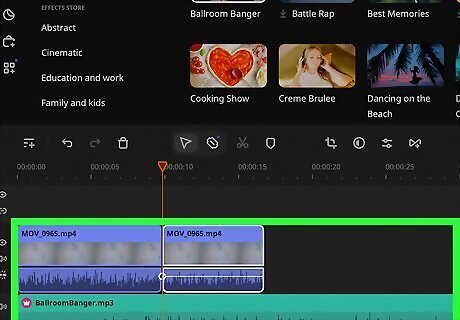
Adjust video audio and background music levels. If you've added videos with audio to your project, you will notice an audio track added beneath those video elements. Click the audio element (either your video audio or background music) and drag the white line to make it louder or quieter. If you want to have both video audio and background music, make the background music quieter than the video audio so the viewers can clearly hear the audio. You can remove any video element's audio by right-clicking the audio track and selecting Delete.
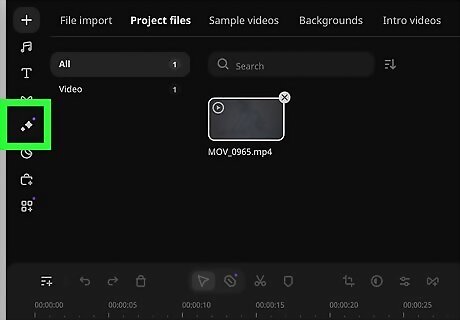
Add effects, elements, and more. You can go to the Effects, Elements, and More Tools tabs in the upper-left sidebar to edit your video further. Go to the Effects tab to add filters, overlays, and LUTs to your video clips. If you want to add the effect to your entire video, you'll need to drag and drop the filter, overlay, or LUT to every video or photo in the timeline. Alternatively, you can right-click the effect and select Apply > To all clips. Go to the Elements tab to add stickers, callouts, and frames to your project. You can drag and drop these elements into the title track, then resize and move them to the correct spot in the video preview in the upper-right part of the window. You can change the element's duration by dragging either side of the element to make it shorter or longer. Go to the More Tools tab to fine-tune your video's elements. First, click a video or audio element in your project. Then, go to the appropriate tab under the More Tools section and select a tool. You can learn more about a tool by clicking the ? icon next to the tool's name after you select it.
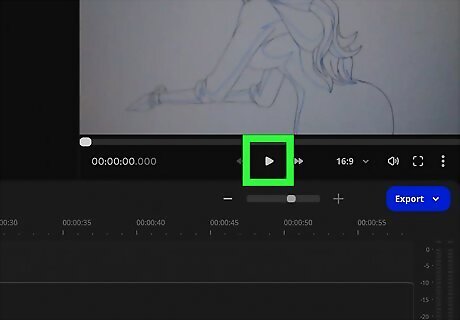
Click the play button to preview your video. It's a good practice to watch your video back multiple times through the video creation process. After you have added all your video and audio files, titles, transitions, and anything else, preview the video to make sure everything looks how you want.
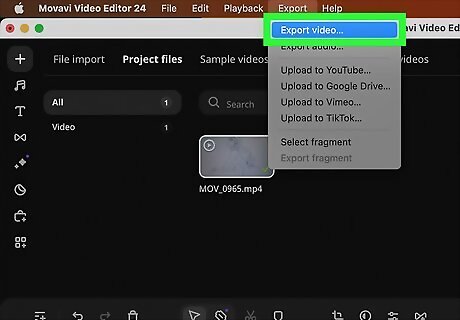
Export your video. While saving your video project in Movavi Video Editor is important, simply doing it will save it as a project file that you can edit later. You can't upload the project file to YouTube, Facebook, Vimeo, or other sites that allow video sharing. To do this, you must export the video. Click Export > Export video. You can also upload the video directly to YouTube, Google Drive, Vimeo, or TikTok by selecting Upload to [website]. Name the video and select a save location. You can also choose your video quality. If you want to upload the video somewhere, select Good or High quality. Select a file type. Most websites allow you to upload MP4 videos, but you can select from many video file types, such as AVI, MPEG, and GIF. Click Advanced for advanced video export tools. This is where you can select your video codec and change the aspect ratio, frame rate, bitrate, and audio sample rate. If you're new to editing videos, you can leave this section alone and allow Movavi to select the best options for your project. To save the video as an audio file or for viewing on a mobile phone or TV, select either the music icon, phone icon, or TV icon. Then, pick the particular file type or device you plan to watch the video on.
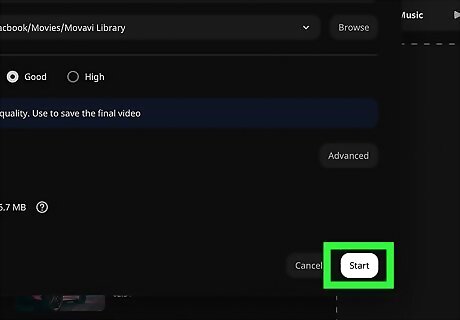
Click Start to begin the video export process. The export process can take quite some time, depending on how long your video is, what file type you selected, and how high the video quality is. Movavi Video Editor will give you an estimated remaining time until the video is done exporting.
Movavi Video Editor Features & Pricing
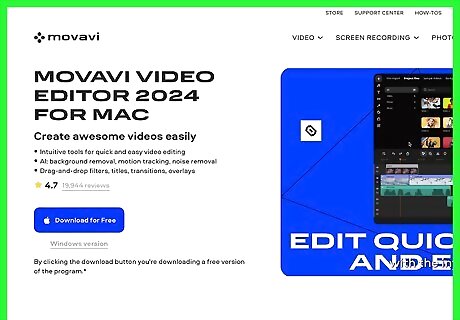
Movavi Video Editor offers tools fit for beginners. Complete beginners can create videos with the Quick Video creator in five simple steps. Once you feel comfortable with it, you can dip your toes into the manual mode to fine-tune your video projects. Because Movavi Video Editor allows you to drag and drop elements into and around the timeline, editing video projects is easy. You can only drag certain elements to specific places (e.g., transitions, which can only be placed between video elements), making it easy for beginners to know where to place each element.
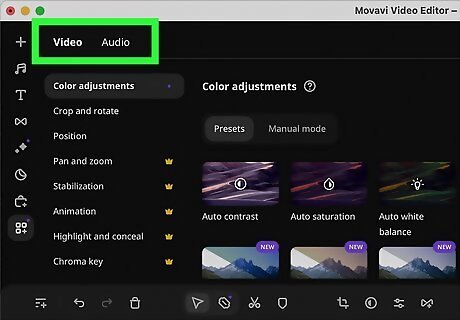
There are many tools for advanced users. While Movavi Video Editor is great for beginners, advanced users can use several tools to further edit their video projects. Video editing tools: Color adjustment (via filters, LUTs, or manual adjustments), stabilization, AI-powered motion tracking, chroma key, and more. Audio editing tools: Synchronization, beat detection, sound autocorrect, noise gate, sound compressor, and more.
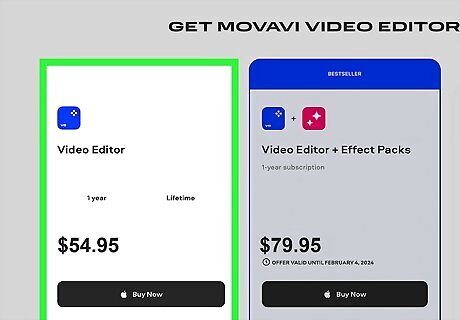
Movavi Video Editor is available as a one-year subscription or lifetime license. Currently, a one-year subscription to Movavi Video Editor is $54.95, and a lifetime license is $79.95. You can try Movavi Video Editor for free for 7 days. Any video project saved during the trial period has a watermark, and when saving a project as an audio file, only half the audio length will be saved. Movavi Video Editor is available for Windows and macOS.




Comments
0 comment