

Setting up Google Firebase

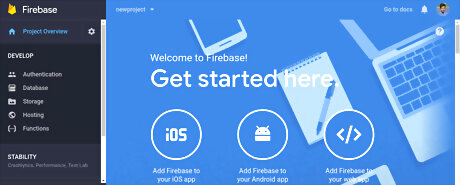
Set up a Firebase account. Create a firebase account if you haven’t created one already. Head over to the console and add a new project. Fill in a good name and create a project.
Add Firebase to your web app. Alternatively, you can add Firebase to an Android app/ iOS app. If you’re using a javaScript framework to build your application, the steps should be fairly similar. Copy the configuration data into your HTML code and then you can use AJAX to push data into your Firebase storage.
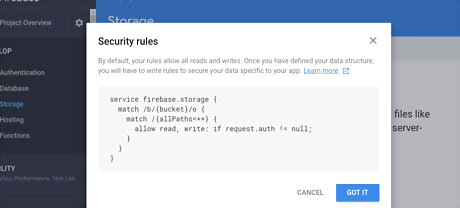
Select the storage options. Firebase lets you define rules on how you want to store your files and set access controls on them. The files get stored in Google Cloud Storage. Alternatively, you can store the references to files in Firebase and then use another cloud storage infrastructure for actually storing the files. For instance, you can integrate Firebase with Amazon S3 for file storage or Cloudinary for storing javascript images.
Creating a Front-End for File Upload
Set up the environment. Most of the major front-end JavaScript libraries like React, Angular and Vue have popular libraries that integrate them with Firebase. If your frontend library has a Firebase module, like AngularFire for Angular, you should consider using that. In this article, we're going to write an AJAX file uploader script to push files to Firebase storage .
Create a Firebase storage reference inside your web app. This is important if you need to access the firebase storage. const ref = firebase.storage().ref();
Create an input field. Once done, access the file that is to be uploaded from the input [type=”file”]. If you’re using jQuery, the code will look like this. const file = $('#photo').get(0).files[0];
Prepare the files. Prior to uploaded the file, you will need to prepare the filename as well as the metadata for the file you upload. It’s not recommended to have the file name as the only identifier. A time stamp is a field that can be appended to the file name: const name = (+new Date()) + '-' + file.name;
Create an upload task. In order to generate the upload task for the file, you can accomplish this using the .put () method. Essentially, this task is a promise and, therefore, can be operated later with equal ease. The command here would be const task = ref.child(name).put(file, metadata); The file upload task also supports a number of different methods including task.resume(), task.cancel() and task. pause().
Retrieve the response from the URL. You can use a Promise to get resolve when a response is received.
task.then((snapshot) => {
console.log(snapshot.downloadURL);
});
Catch the errors. It is possible to encounter cases of errors which would be need some troubleshooting. This can be taken care of in the upload task using the .catch() method as indicated below: task .then((snapshot) => { document.querySelector('#someImageTagID').src = snapshot.downloadURL; }) .catch((error) => { // A list of errors can be found at // https://firebase.google.com/docs/storage/web/handle-errors switch (error.code) { case 'storage/unauthorized': // User doesn't have permission to access the object break; case 'storage/canceled': // User canceled the upload break; ... case 'storage/unknown': // Unknown error occurred break; } })


Comments
0 comment