views
Reprogramming the Opener
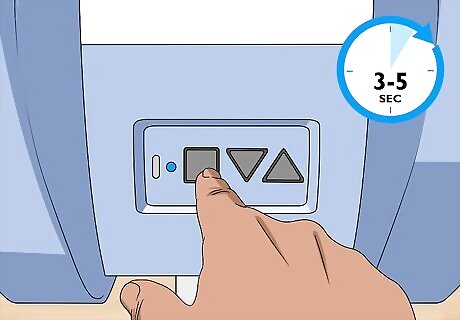
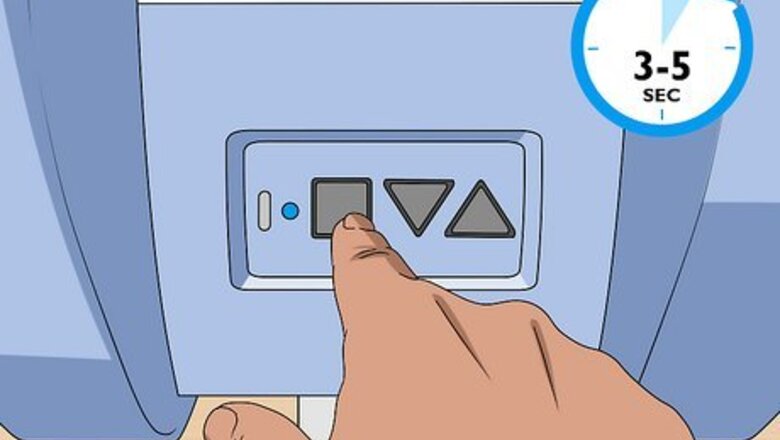
Press down the square button for 3-5 seconds. Push and hold the square “Program Set” button for at least 3 seconds. Keep holding the button until the circular LED is lit up. The oblong LED adjacent to the circular LED will then flash purple. This puts your opener into Programming Mode, which allows you to reset the device. The positions of your buttons may differ in certain Genie models. Some models have all of the LEDs and buttons in a single line, while others have their buttons clustered in 1 spot with the LEDs underneath. In this case, the buttons will look a little different, but will still be marked with the same shapes. Keep in mind that the opener is the boxed device attached to your garage ceiling, while the remote refers to the smaller, pocket-sized device with 1-2 buttons.
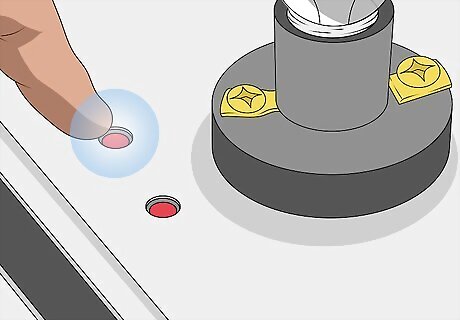
Select the round “Learn Code” button on any openers made between 1995 and 2011. Find the small circular LED and button labeled “Radio Signal” and “Learn Code” on older opener models. If your opener is paired with a receiver, then 1 of the buttons will indicate a radio signal of some type. Reset this style of opener by pressing and holding the “Learn Code” button until the “Radio Signal” LED begins flashing. If you’re uncertain about how to reset an older opener model, check Genie’s website to find the owner manual and instructional guide for your specific model: https://store.geniecompany.com/pages/shop-by-model-number.
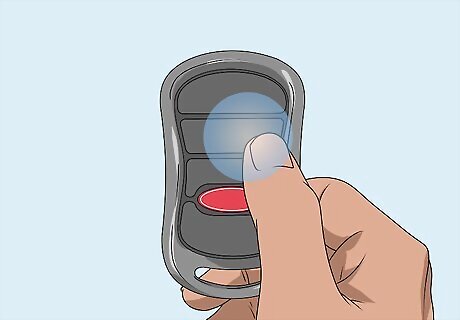
Push the remote button quickly. Choose 1 of the unlabeled rectangular buttons on your remote and press it one time. Once you’ve done this, the oblong purple LED light on the opener will light up as a solid purple and stop blinking. For this part, it doesn’t matter which button you push. Just make sure you remember the button you pressed, as this will be the button that opens and closes your garage door. If your device was made between 1995 and 1997, then the remote button format will look a little different. Use the 2 curved, rectangular buttons on the top half of the remote to reset and reprogram the opener.
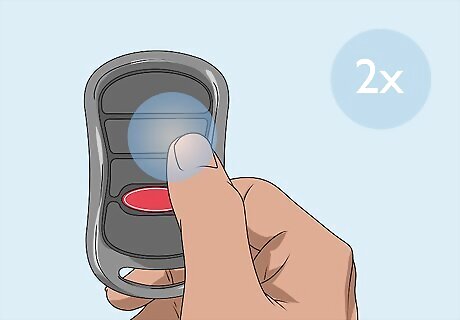
Press the remote button 2 more times to reset the opener. Push down the same button on your garage door remote. Wait for both the oblong and circular LED to light up blue before they switch off altogether. This calibrates the opener and syncs it with your remote control. Once both LEDs switch color and turn off, push the same button on your remote to close or open your garage door. At this point, the opener will be fully reset and synced with your new remote!
Resetting the Wireless Keypad
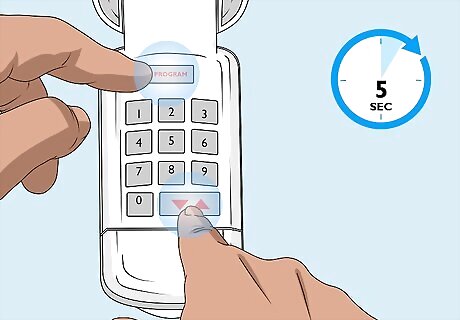
Find the up/down and program keys and press them down for 5 seconds. Locate the button labeled “Program” on the top of the wireless keypad, along with the up/down button on the bottom. Press down both of these buttons simultaneously for about 5 seconds. When it has been reset successfully, the LED on the keypad will blink twice, and the entire device will go dark. After you do this, any pre-existing keypad code won’t be able to open up the garage door.
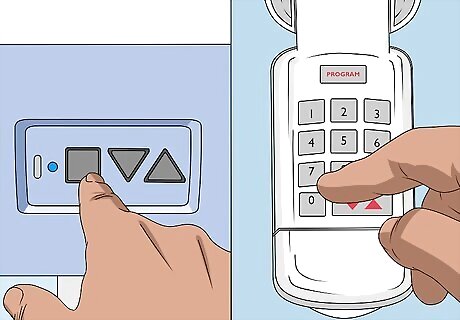
Press 3, 5, and 7 in succession after the opener is in programming mode. Push down the square “Program Set” button on the opener for at least 3 seconds to get it into programming mode. Push down the “3,” “5,” and “7” buttons in sequential order on the wireless keypad to start the programming process. This is the default code for all Genie garage keypads that are still using their factory settings.
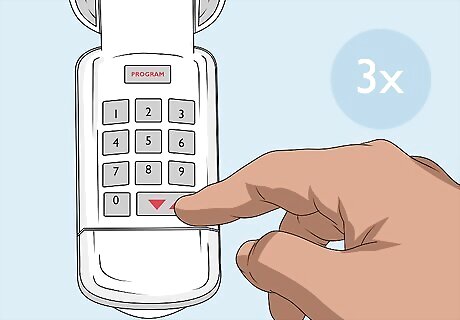
Push the up/down button 3 times to open the garage door. Find the up/down button on the keypad, located toward the bottom of the device. After you’ve pressed “357” into the keypad, slowly push the up/down button until the garage door moves. To double check and see if the keypad has synced correctly, input “357” into the device again and hit the up/down button. If the garage door opens or shuts, then you’re good to go! Consider changing your passcode once you’ve synced the keypad to your opener. Check the owner’s manual for further instructions: http://overheaddoor.custhelp.com/ci/fattach/get/208328/0/filename/Genie_WKP_Keypad_Revised.pdf.





Comments
0 comment