
Sanding off the Old Finish
Pick an easy-to-clean area to work in or put down a drop sheet. You will be making a mess as you refinish the coffee table. Work outside or somewhere like a garage if you can, or put down a drop sheet, tarp, or plastic sheet to catch the dust from sanding and protect the floor from spills. If you don’t have a good work area or some kind of drop sheet to use, you could put down 2-3 overlapping layers of newspaper or even create a drop sheet by taping some plastic garbage bags together.

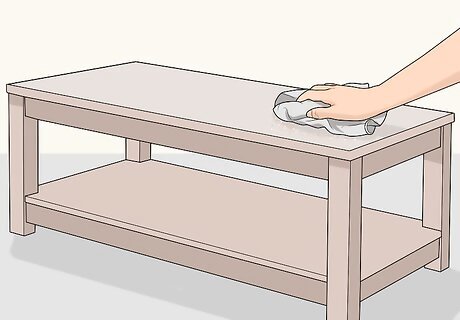
Clean the surface of the table with a mild soap and water solution. Mix 2-3 drops of gentle soap, such as a mild liquid dish detergent, into a cup or bowl of water. Soak a clean cloth in the soap solution and wring out excess water until it’s not dripping. Rub down the entire coffee table with the damp cloth to clean off dust and grime. You could also use a special soap made for cleaning wood, such as Murphy’s oil soap. If you do so, follow the instructions on the bottle for mixing it with water to make a cleaning solution. It’s important to clean off the surface very well so there are no grains of dirt that you might end up grinding into the wood as you sand.
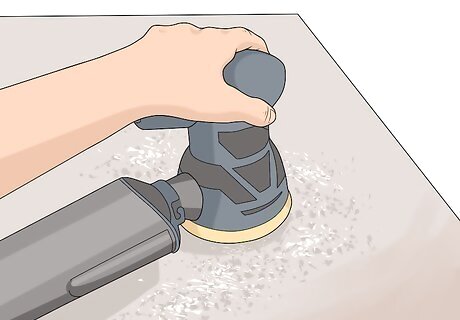
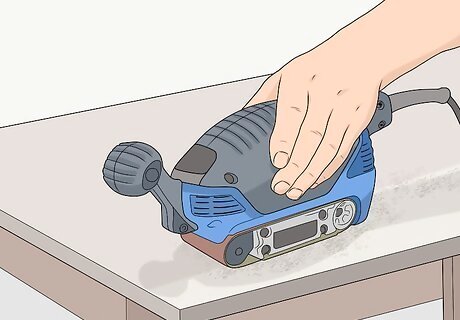
Remove the finish by sanding the coffee table with a coarse-grit sandpaper. Attach a sheet of coarse-grit sandpaper, like 40- or 60-grit sandpaper, to a sanding block or electric sander. Start sanding, going with the grain of the wood, until you remove all the finish and expose all the bare wood. Wear a face mask and goggles whenever you're sanding to keep wood dust out of your mouth, nose, and eyes. If there are any hard-to-reach areas, such as engraved legs or sides of the coffee table, fold up a piece of sandpaper into a small square and sand those areas by hand. If your sandpaper stops removing the finish at any point, stop sanding and feel the sandpaper with your fingers. If it is smooth, it has worn out and you need to replace it with a fresh sheet.
Wipe down the entire coffee table with a clean cloth to remove the wood dust. Use a tack cloth or other clean, soft cloth to wipe away all the dust from sanding. This will allow you to better see the exposed wood and continue with sanding and preparing the surface for a new finish. A tack cloth is a cloth specifically made for cleaning up wood dust. You can purchase one at a home improvement center, a woodworking supply shop, or online. If you don’t have one, something like a microfiber cloth or an old cut-up T-shirt will work. You could also use a vacuum with a hose attachment to suck up the dust. If you notice any spots where there is still paint, varnish, or stain showing after you wipe away the dust, go back over them with the coarse-grit sandpaper until the wood is bare.
Smooth the bare wood surface by sanding it again with fine-grit sandpaper. Put a sheet of fine-grit sandpaper, like 120- or 240-grit sandpaper, on your sanding block or electric sander. Sand down the entire coffee table, going with the grain, until it is completely smooth. Stop sanding periodically and run a hand over the whole coffee table to feel for rough spots. Keep sanding and feeling the table until it feels like it has a uniform smoothness.
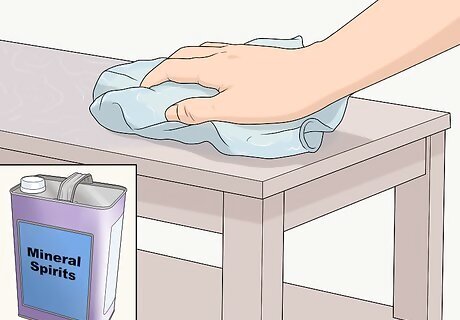
Clean off the coffee table with mineral spirits to get rid of fine wood dust. Wipe off the loose dust with your tack cloth or other soft cloth. Dampen a rag with mineral spirits and wipe down the entire coffee table to clean it and prepare it for finishing. Wear a face mask when you apply mineral spirits so you don’t inhale the fumes. If you are working inside, open up any doors and windows you can to ventilate the space. Mineral spirits are also known as mineral turps or mineral turpentine. The liquid is very similar to paint thinner, which you can use as a substitute if that’s all you have.
Applying a New Finish
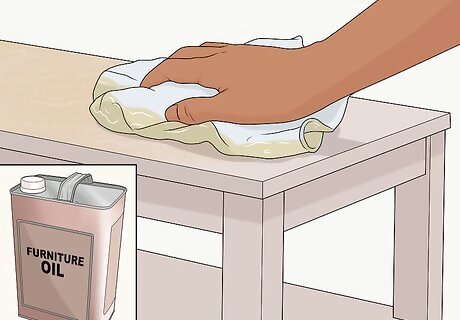
Finish the coffee table with furniture oil if you like the natural look of the wood. Apply a natural furniture oil, like tung oil, teak oil, or Danish oil, to a clean cloth. Rub the oil into the coffee table with the cloth, going with the grain, until you have applied oil to all the bare wood. Let the coffee table dry overnight, then apply another coat of oil if you want to bring out the colors of the wood more. Teak oil works well for denser woods like mahogany, maple, or oak. Tung oil and Danish oil work well for all types of woods, including soft woods like pine and cedar. Furniture oil will soak into the wood to protect it. You can apply it as often as you want to enrich the finish of the coffee table and keep the wood protected. Furniture oil enhances the natural colors of the wood without drastically altering the color. Depending on how much oil you apply, it can slightly darken the wood.
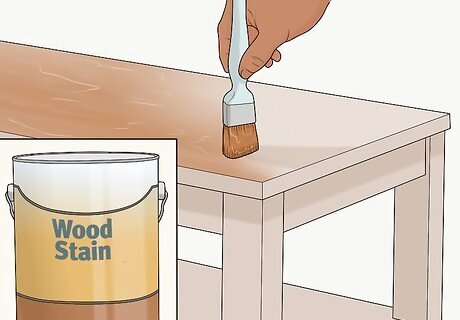
Stain the coffee table if you want a darker or different-colored wood finish. Apply a coat of the wood stain of your choice with a 4 in (10 cm) paintbrush using long, smooth strokes and going with the grain. Wipe off any excess stain with a clean cloth, then let the stain dry for as long as the instructions on the packaging recommend. Since you are applying stain to bare wood, the wood will absorb it very easily. If you don’t want the finish to be too dark, wipe off excess stain right away. If you want the finish to be darker, you can apply 1-2 additional coats of stain after the first coat dries, wiping off excess stain after each coat. Make sure to let the second coat dry before you apply a third.
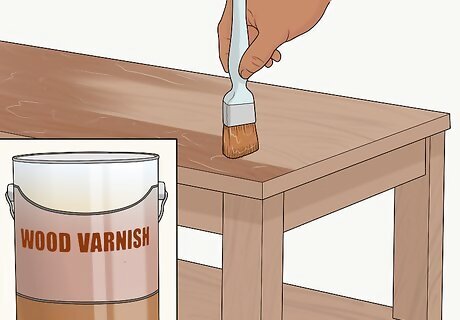
Varnish the coffee table if you want a clear protective finish. Use a 4 in (10 cm) paintbrush to apply a polyurethane or polycrylic wood varnish of your choice. Go with the grain and use long, straight strokes to apply an even coat all over the coffee table. Let the stain dry for as long as the manufacturer’s instructions recommend, then apply another coat if you want added protection or more shine. Varnish is a transparent protective finish for wood. It comes in matte, semi-gloss, and glossy varieties, so you can choose whether you want the coffee table to look more natural or shiny. You can also apply a coat of varnish on top of a wood stain if you want to make the table glossier and give it an extra protective layer.
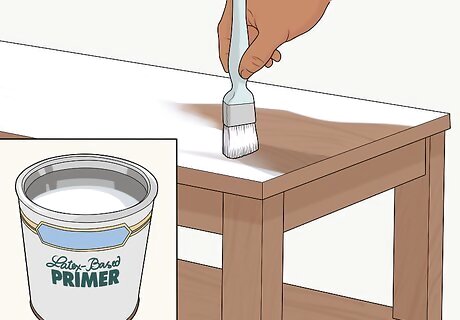
Paint the coffee table if you want it to be a totally different color. Apply a layer of primer to the wood using a 4 in (10 cm) paintbrush and let it dry for 1 hour. Paint over the primer using a paint of your choice, working with the grain and using long, even strokes. Let the paint dry for 4-8 hours, then add a second coat if you can still see any of the primer through the paint. Flip your coffee table upside-down when you paint it to ensure you paint the insides of the legs. You can use either oil-based or latex-based paint for the coffee table. Keep in mind that oil-based paints take up to 8 hours to dry, while latex-based paints only take about 4. Latex-based paint is easier to clean up after, as you can just rinse out your paintbrush with water. Oil-based paint requires paint thinner to clean up. You could use 2 different shades of paint to give the coffee table a 2-tone finish. For example, you could paint the top of the table a dark blue color and paint the legs and sides a slightly lighter shade of blue.


Comments
0 comment