
Designing Your Bokken
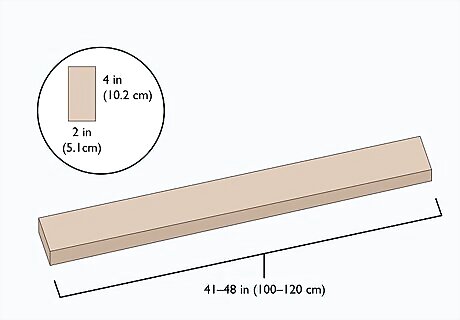
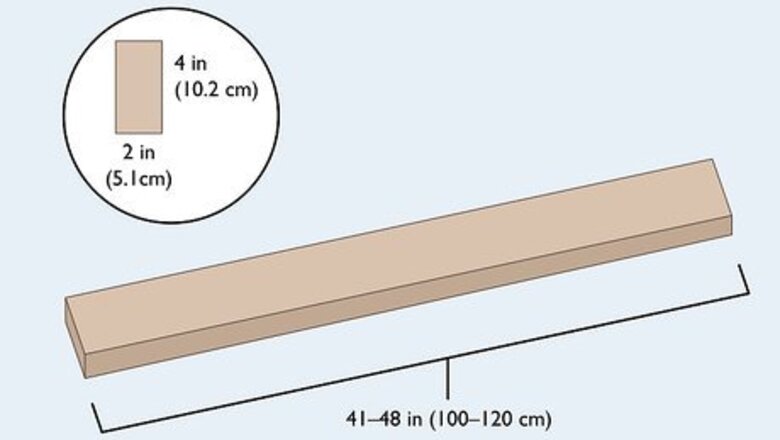
Purchase a 41–48 in (100–120 cm) long hardwood board for your bokken. Swing by the construction supply store or lumber yard and purchase a 2 by 4 in (5.1 by 10.2 cm) board that’s 41–48 in (100–120 cm) long depending on big you want the bokken to be. Have the lumber department or lumber yard cut the board to size, or trim it down yourself after paying for the wood. Ask to inspect the grain before you order your wood to ensure you don’t end up with a knotty length of wood with an ugly grain. If you plan on using the bokken, maple and oak are solid, durable choices. Hickory and ash are great lightweight options, although hickory can be difficult to find. If you are making a decorative bokken, you can use any wood you’d like. Exotic woods, like purpleheart, ebony, and cocobolo are great options.
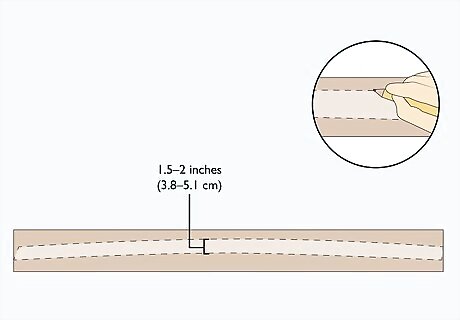
Sketch out the shape of the blade on your wood using a carpentry pencil. Set your board on top of your work table with the widest side flat. Grab a carpentry pencil and sketch out a symmetrical blade that starts on the bottom left of your board, curves up to the center, and slopes down to the corner on the opposite side. Make the blade roughly 1.5–2 inches (3.8–5.1 cm) wide. Take your time and start out with a soft outline before drawing the harder outline out once you’re happy with the shape. You can use a template or cut out the shape out on paper and trace it on the wood if you want a more exact shape. You’re going to trim and shape the wood as you work, so the outline doesn’t need to be absolutely perfect. Still, it’s easier if you get a good outline down. Your handle will be part of this outline. Bokkens are typically constructed out of a single length of wood. Keep in mind you’re going to add a line on one end to separate your handle from the blade. You don’t need to cut the handle out of the board differently than the blade, though.
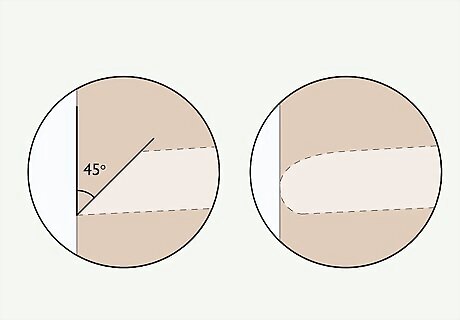
Draw a sharp tip for a decorative sword and a blunt tip for a training tool. Pick one end to be the handle. On the other end, draw the shape of the tip you want. If you plan on training with the sword, round the tip off so that you don’t accidentally cut someone while you’re practicing. If it’s a decorative bokken, draw a 45-degree angle at the end of the top arc to give it a distinct, sharp point. You can also draw a tapered tip that curves into a sharp point at the end if you don’t like the angular look. Most bokkens have these sharp, straight tips, though.
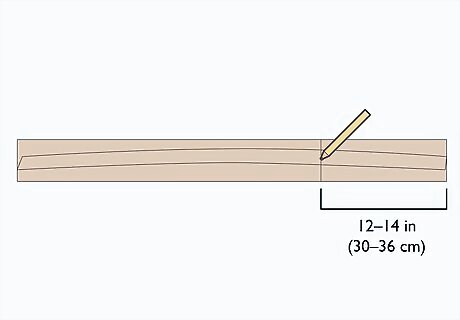
Mark the line where you want the handle to start on the other end. Add a perpendicular line inside of your outline on the opposite end of the wood to make the dividing line for the handle. Most bokkens have a 12–14 in (30–36 cm) handle, but you can make it any size you’d like. Use your carpentry pencil to draw the handle. The handle is shaped and cut a little differently than the rest of the bokken. Keep track of the handle while you work to avoid accidentally sanding it or cutting it when you’re working on the blade!
Cutting the Wood to Size
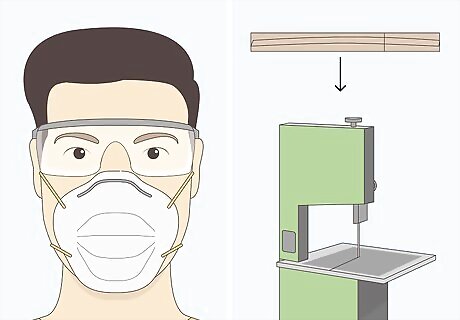
Put on your protective gear and take the board to a band saw. Put on a dust mask and protective eyewear. Take your lumber to a band saw. Lay it down under the saw with the long sides pointing at the blade. and hold your lumber by the edge furthest from the blade. You can use another power saw if you prefer, but it’s easier to get a clean, round cut with a band saw. Still, a table saw or circular saw may work if you have a steady hand. Band saws are dangerous and you should not use one if you aren’t an experienced woodworker. Always keep your hands away from the blade and work slowly to stay safe.
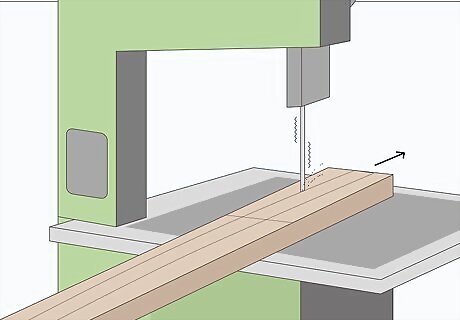
Run the board under your band saw to cut the outline out. Carefully and slowly drag the lumber through the blade to trim around the first side of your outline. Pull the wood all the way through and flip it over. Then, slowly move the other side of the outline through the blade. Trim the tip and base of the handle the same way.

Smooth all 4 sides of the board down with a wood rasp or plane. Grab a wood rasp or plane tool and set it down on top of the wood. Gently drag the edge of the tool back and forth along the side to trim off any loose shards of wood and compress it down. Do this for 20-30 seconds and repeat the process on the 3 other sides of the wood. You can also use a spokeshave if you prefer. Just drag the edge at a 45- to 55-degree angle to the wood to avoid carving too much wood off. You can also run each side along a fixed belt sander, but you likely don’t have one of these in your shop.
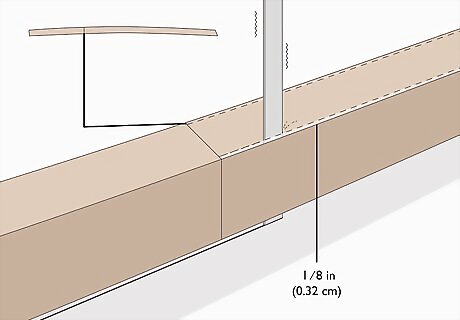
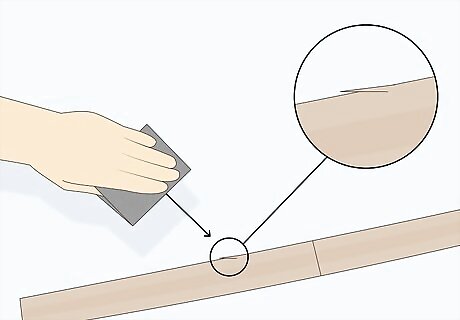
Trim ⁄8 in (0.32 cm) off of the blade and stop at the handle. Use a file or the tip of a utility knife to score a line around the mark you made for the handle on each side of the wood. Then, take the wood back to the band saw and carefully trim off a thin length of wood from each side of the blade, but not the handle. This will give your bokken’s blade a slightly thinner width and keep your bokken from looking like a single piece of wood. Give the blade another 1-2 strokes with the wood rasp or plane to remove any loose pieces of wood. Just to clarify, you aren’t doing anything with the handle here. From here on out, you will work on the handle and the blade separately.
Shaping the Blade
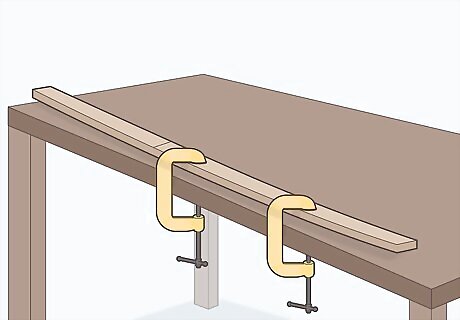
Clamp the wood to your table so it lays flat on its side. Grab a C clamp and slide the handle of your bokken in between the jaws. Tighten the clamp or release the handles to secure the wood horizontally next your table. This will keep the wood from sliding around while you work on it.
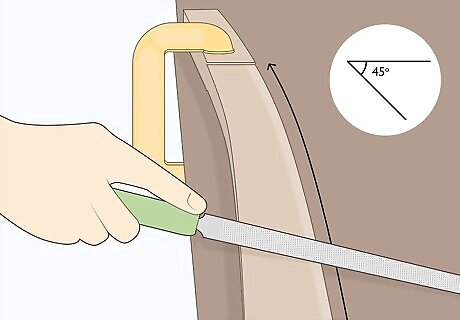
Use your rasp or plane to shave the first corner down at a 45-degree angle. On the corner furthest from the table, take the edge of your rasp or plane and hold it against the junction where your handle starts. Then, drag the edge along the corner at a 45-degree angle to shave it down. Do this 15-30 times depending on how round you want to make the blade. Count the number of strokes you use to shave the first side down. This way, you can use the same number of strokes to clean each edge up. Most bokkens are not perfectly round. The blades are often a geometric and symmetrical set of sides to give it some definition.
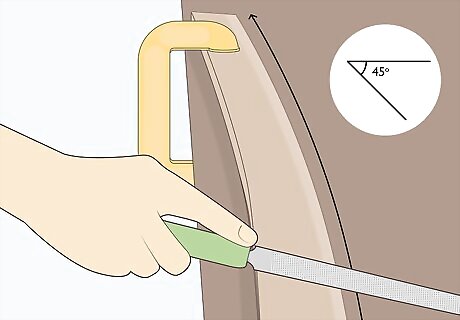
Rotate the wood in your clamp and shave the next side down. Once you’re happy with the first corner, release the handle and rotate the wood in the clamp to expose a new corner of the blade. Repeat the process with your rasp or plane tool and use the same number of strokes as you used on the first corner. You should now have two symmetrical edges that blend into one another.
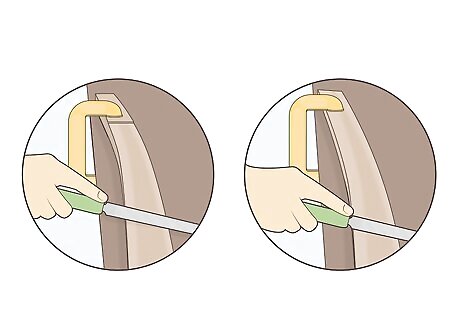
Continue this process to shave down the two remaining edges. Rotate the handle in the clamp again and repeat the process. Then, do the same thing on the remaining edge. Inspect the blade carefully to make sure your sides are mostly symmetrical. Your handle should still be a rectangular block of wood with sharply defined edges. Your edges don’t need to be absolutely perfect, but they should be mostly symmetrical and even.
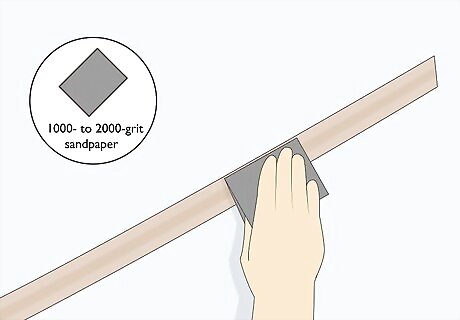
Sand the blade down using 1000- to 2000-grit sandpaper to smooth it out. Take your bokken out of the clamp and set it down on your work table. Put on a pair of gloves and fold your sandpaper up in your hand to stay comfortable. Gently sand down each side of the blade to remove any remaining imperfections and soften up some of the harsh edges. Continue sanding until you’re happy with the shape of the blade. You have a lot of freedom here. You can sand all of the edges down for 5-10 minutes each until the corners and edges are gone, or you can only sand each side 4-5 times to get rid of any splinters while maintaining the edges. It’s entirely up to you.
Forming the Handle

Sand the handle down with a fixed belt sander if you have one. The best way to shape the handle is with a fixed belt sander. Turn the sander on, let the sandpaper get up to speed, and gently shave the corners down. Once the corners are gone, rotate the entire handle around the belt while sliding it back and forth to round the handle out. Continue shaping the handle until you’re happy with how it looks. Bokken handles are typically perfectly round. This may take some patience on your part since you have to work kind of slowly. If you don’t have a fixed belt sander, don’t worry about it. You can use your rasp or plane tool. However, it’s much faster to do this with a fixed belt sander.
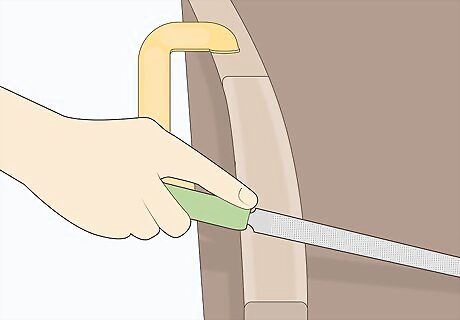
Shape the handle by hand if you don’t have a fixed belt sander. If you don’t have a sander, clamp your blade to the table and grab your rasp or plane tool. Trim the edges of the handle down the same you trimmed the blade—by dragging the edge at a 45-degree angle along the sharp corners. However, unlike the blade, spend some extra time shaping each corner after you carve the 90-degree angles down. Repeat this process on each edge until you have a mostly-round handle. This may take you up to 45 minutes to get it right. After you remove each corner, you’ll have two softer corners remaining. Each of these corners must be worked down the same way. This process requires a lot of patience and a careful eye. You need to be careful about taking too much wood off of the handle. The handle must be thicker than the blade so you can’t put too much pressure on the tool.
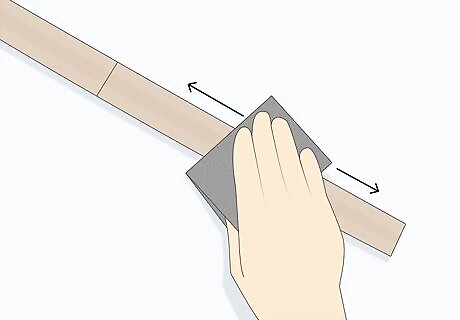
Smooth the handle down with 2000-grit sandpaper to remove any splinters. Grab some ultra-fine sandpaper and fold it up in your gloved hand. Quickly and softly drag the sandpaper back and forth on each side of the handle to smooth it down. Continue doing this until you’re happy with the texture, shape, and feel of the handle. Always sand in the direction of the wood grain to preserve the wood.
Finishing the Sword
Make minor adjustments and fix any mistakes with a file or sanding block. Set the bokken down and carefully inspect each portion of the handle and blade. If there are any small issues or pieces of splintered wood sticking out, remove them carefully with an ultra-fine sanding block or the tip of a file. Take your time to carefully clean your bokken up. Give it a quick wipe with a clean, dry cloth to remove any wood dust.
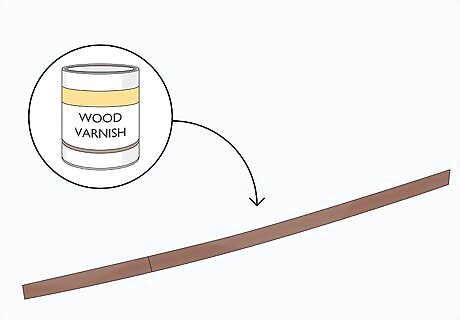
Stain the blade with a varnish or wood oil to protect it. Pick up a wood varnish, clear coat, or wood oil in a color you like. Read the instructions carefully and mix it in the can with a mixing stick. Then, dip the bristles of a small nylon brush into the finish and apply it to the blade. Move the brush in the direction of the wood grain and cover each side in a smooth, even coat to protect it from damage and humidity. Let the blade dry for 24 hours before moving on. If you’re using exotic wood, use a clear polyurethane finish to preserve the color and grain of the wood. You can use the same finish on the handle if you’re making a decorative bokken.
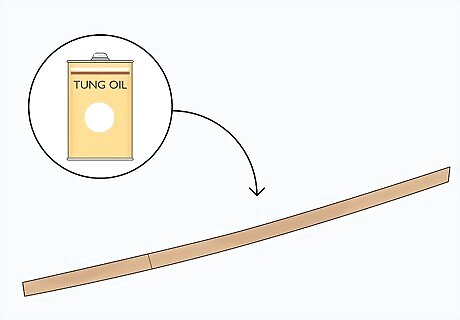
Use a natural oil finish to protect the handle from sweat and moisture. If you’re going to practice with the bokken, use a natural wood oil finish, like linseed oil or tung oil, to cover the handle the same way you applied the finish to the blade. You must use an oil-based natural finish to ensure that the sweat from your hands doesn’t soak into the handle and rot away the wood from inside. Let the blade dry for at least 24 hours. If you don’t use a natural oil finish, you’ll end up with a sticky handle that’s hard to grip comfortably. You must use a finish even if you intend on wrapping the handle. If you don’t, your wrap will absorb any sweat from your hands and it’ll soak into the wood underneath.
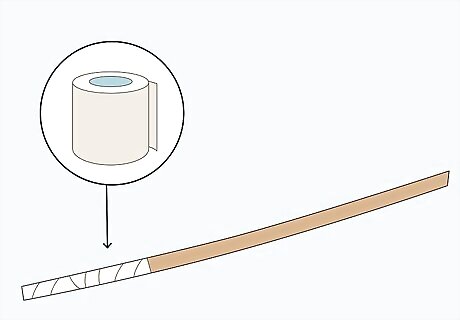
Wrap the handle in cloth tape, leather, or an Irish linen wrap if you’d like. Most bokkens do not have wrapped handles, but you can cover the handle if you’d like. You can wrap the handle in cloth tape for a simple, durable finish, or use a wood glue to cover the handle before wrapping it in Irish linen wrap or twine. Alternatively, you can cut 2 leather sheets to wrap around opposite sides of the handle and hold them in place with wood glue. You can even paint the handle if you prefer. It’s really entirely up to you. Irish linen wrap is the stuff you find on pool cues with fabric handles.


Comments
0 comment