

X
Research source
Enrolling in E-Verify

Visit the USCIS enrollment website. From the USCIS home page, click on the E-Verify link to learn about the system and download resources that will guide you through the enrollment process. The USCIS offers a PDF version of its guide to enrollment. You may want to download this and read through it before you begin so you're familiar with the process. The website also includes other information that you can read through to better understand the E-Verify system and how it's used. Keep in mind that it may take 20-30 minutes or longer to complete the enrollment process. Make sure you start when you have enough time to do it in one sitting.
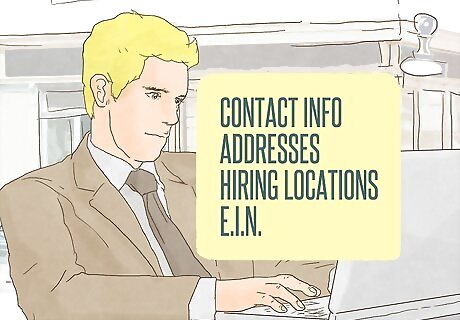
Gather information about your business. The USCIS provides an enrollment checklist. Use it as a guide to make sure you have all the information you'll need to complete your enrollment before you begin. You will need contact information for your business, including information about the business name, particularly if you've registered your business name as a DBA. You'll need addresses of the hiring locations that will participate in E-Verify, as well as the address of the verification location, if it differs from the hiring location. For example, if you own three restaurants, you'll need addresses for all three restaurants as hiring locations. The place where you verify employment authorization for your employees, which may be one of those restaurants, will be the verification location. You'll have to provide your business's employer identification number (EIN), as well as names and contact information for all users who will input information on behalf of your business.

Answer questions to determine your access method. The enrollment process begins with a series of yes/no questions. Your answers to these questions determines what method your business will use to access the E-Verify system. The enrollment guide breaks down the different reasons you might need to use the E-Verify system and the answers you must provide to activate the method that matches your reasons for using the system. For example, if you want to use the system to verify the employment eligibility of your employees, you'll be accessing the system as an employer. You need to answer "yes" to the first question and "no" to the following three questions. Keep in mind that if you answer one of the questions incorrectly, it could delay the processing of your enrollment.

Read and sign the Memorandum of Understanding. Use of the E-Verify system is governed by rules and responsibilities outlined in the user manual and the Memorandum of Understanding (MOU). You can access a PDF of the MOU on the USCIS website. The MOU explains your company's obligations in using the E-Verify system. The agreement binds not only you, but any other user you register to input information for your company. Make sure that the MOU and the accompanying rules also are read by any other users who will be verifying employee information on the part of your company as well. An authorized representative of your company must electronically sign the MOU as part of the enrollment process. Typically this is the business owner or company president, although it also may be your human resources director. The person who signs the MOU typically is the administrator of your company's E-Verify account, so it should be the person who will be responsible for employee records and employment verification.

Set up your E-Verify account. The rest of the enrollment process involves providing information about yourself and your business, including an identification of the type of business you have along with the hiring and verification locations. After you've electronically signed the MOU, you'll get to a page that requires you to enter information about your company, including the company name, address, and other contact information. You must include your company's EIN. If you don't have one, you'll have to get one before you continue the E-Verify enrollment process – you can't use a personal Social Security number. You can get an EIN for your business by providing information about your business on the IRS website. The online process is free of charge and you'll get your number immediately. During enrollment, you also must register at least one program administrator. The program administrator has the ability to add other users or additional administrators. You'll need the names and contact information for all administrators or users that you want to register as part of your enrollment process. Once you've finished entering all the information, you'll have the opportunity to review the information you've entered before you certify and submit it. Take the time to check your information carefully and make sure everything is correct before continuing.

Complete the online tutorial. Each enrolled business must have at least one administrator. To become an administrator, you must complete the online tutorial and pass a basic knowledge test. After enrollment is complete, the program administrator will receive a confirmation email with a temporary user ID and password. Your administrator must log on and create a new, secure password. After this, they will have access to the E-Verify online tutorial. An administrator cannot add new users or other administrators until they complete the tutorial and submit a passing score on the test. The test includes questions on the MOU as well as the rules and responsibilities of companies enrolled in the E-Verify program that are outlined in the E-Verify user manual.
Using E-Verify
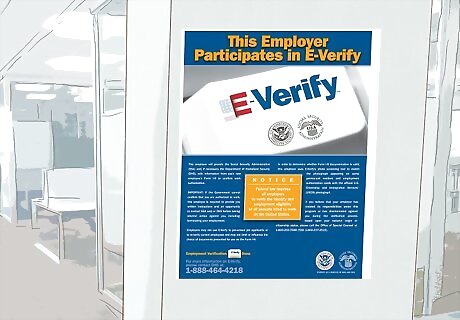
Display the required notices. If you're using E-Verify, you must adequately notify current and potential employees that you're using the service by prominently displaying USCIS approved signs in an employee area, such as the break room or next to the time clock. The two posters are called the "Notice of E-Verify Participation" and the "Right to Work" notices. You can download the required posters from the USCIS website. These posters must be displayed both in English and in Spanish in an area that can clearly be viewed both by current and prospective employees. You also may provide copies of these notices when you hand out job applications to prospective employees. Keep in mind that E-Verify monitors enrolled businesses for compliance, so make sure the required notices are displayed at all times.

Have all employees complete Form I-9. The USCIS I-9 form is required to verify your employees' identity and confirm their authorization for employment, and must be completed by everyone who works for you, regardless of their citizenship status. On the form, the employee must provide their name and address, then state and attest to their employment authorization. The form includes a list of documents that you can check to verify the employee's identity. The employee must provide you with appropriate documentation. The information provided on Form I-9 is the information you will input into E-Verify to confirm that employee's eligibility to work.

Create a case in E-Verify. The E-Verify process begins when you create a case, which you must do for every employee or potential employee you want to verify. The case must be created within the first three days of employment. When you hire a new employee, input the information contained on that employee's I-9 to start a case for that individual. If the employee gave you a Form I-551 Permanent Resident Card or a Form I-766 Employment Authorization Document, you will be prompted to compare the photograph on the employee's document to a photo displayed through the E-Verify system.

Retrieve your case results. Once you've entered the information from the employee's I-9, click to submit that information and the E-Verify system will provide a verification result for that employee. Results may be categorized as initial, interim, or final. If you receive a tentative non-confirmation, this means the information you provided did not match the records of the Department of Homeland Security (DHS) or the Social Security Administration (SSA). Review the information you provided and make sure you typed it correctly and accurately. If you did, follow the instructions regarding the next steps. If you receive a message that DHS verification is in process, this means the case has been referred to the DHS for further investigation, but no further action from you is required. None of these interim results are final. You cannot close a case until you've received a final result.
Checking the Social Security Number Verification Service
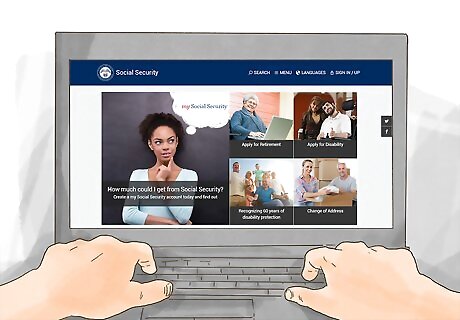
Register to use the service. You can use the Social Security Number Verification Service (SSNVS) to verify the Social Security numbers and names provided by all current or former employees, including new hires. Go to the Social Security Administration (SSA) website and click on the Business Services link, which will take you to the Business Services Online Welcome Page. Choose the "register" link to complete the registration form. You'll have to create your own password. Social Security will verify your identity based on the information you provided, and create a User ID for you.
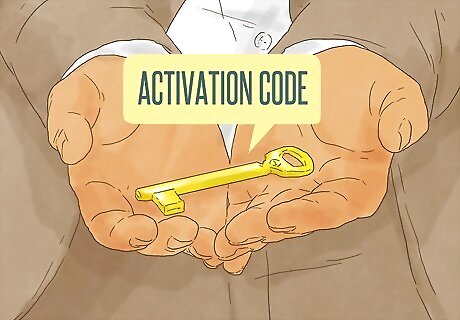
Request an activation code. Once you've completed the initial registration process, you must return to the Business Services Online Welcome page and log in to your account using the User ID and passcode you created for your business. Once you log in, you'll be given a menu of options. Click on "Request Access and Activation Code" and provide the required information. The SSA will mail your activation code to the address you provided for your business. Your User ID will expire if you don't activate your account by the expiration date provided when you initially registered.

Log in to the service. When you receive your activation code in the mail, return to the Business Services Online Welcome page to log in to your account, then enter the activation code so you can access SSNVS. After you provide the correct activation code, you'll be ready to use the SSVN system. For subsequent log-ins, you only need the User ID provided by the SSA and the password you created when you initially registered.

Enter the information you want to verify. Once you have access, you can enter up to 10 names and Social Security numbers at a time for instant verification. If you have more than 10 employees who need to be verified, you can upload the information overnight and receive the results the next day. The SSNVS will tell you whether the names and Social Security numbers you've entered are accurate by comparing the information you entered with the Social Security Administration's database. If the information you provided matches the SSA's records, you can be confident that your employees are who they say they are. On the other hand, if the SSNVS tells you there is no match, it is likely the employee is trying to get a job using fraudulent documents.


Comments
0 comment