
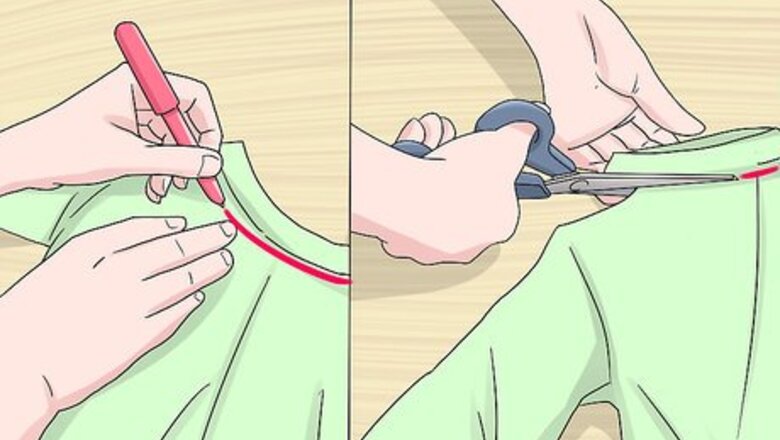
Cut off the collar if it’s too tight.
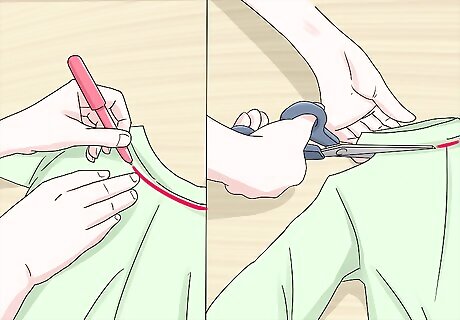
Grab some scissors and make a new neckline. If you love the way your sweatshirt fits except it’s too tight in the collar, you can easily change the neckline. Just turn your sweatshirt inside-out and draw a line where you want your new neckline to be, then cut along the line. Cut across the collar at 2 sharp angles to create a V-neck. Cut a wide line across the collar to create a boat-neck. Cut slightly into the top of one sleeve to create an off-the-shoulder look.
Dye your sweatshirt to change the color.
Dyeing a sweatshirt is an easy way to give it a new look. Prepare the dye according to the packaging instructions, then soak the sweatshirt in the dye for 10-30 minutes. Wash it thoroughly and enjoy the new look! Make sure to protect your work area with towels and wear gloves so you don’t dye your hands! If your sweatshirt is a dark color, you can use dye remover or bleach to lighten it. To tie-dye your sweatshirt, twist the garment into knots and secure it with rubber bands. Then, dip the sweatshirt into the dye just as you normally would.
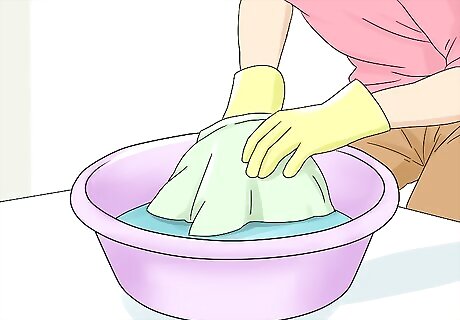
Shrink your sweatshirt if it's too big.
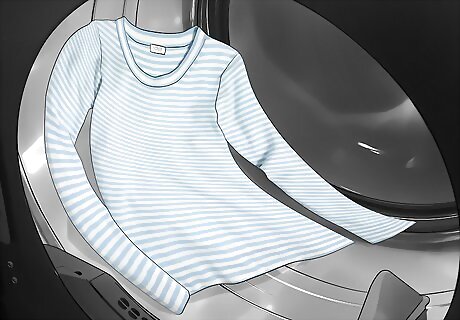
Love the style, color and design but not the size? Keep the sweatshirt but make it a bit smaller and more fitted by shrinking it. A better fitting sweatshirt can feel like a brand new garment in your wardrobe!
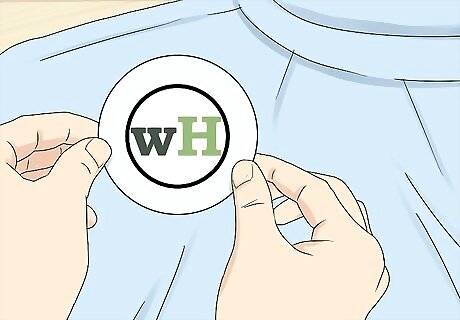
Iron on a patch for a cool custom graphic.
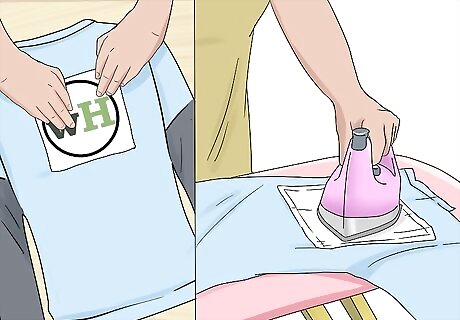
Iron-on patches are a great way to show off your personality. Lay your sweatshirt on an ironing board and position the patch where you want it, then lay a thin towel over the patch and place your iron on the towel for about 15 seconds. You can buy iron-on patches at craft stores, fabric stores, and even novelty stores. Try finding a patch featuring your favorite band’s logo to show your love for music. Patches are a great way to cover up a hole in a sweatshirt.
Add pins that show off your style.
Pins let you change the look as often as you'd like. Whether you want to show off your love for all of your favorite bands or you add just a few pins with sarcastic sayings, this is a great no-sew way to customize your sweatshirt.
Draw your own designs on the shirt.
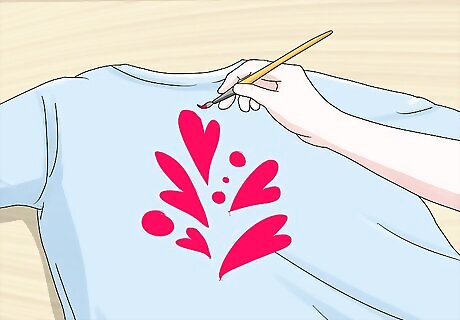
Use fabric paint or markers to bring your vision to life. Sketch out a few ideas on a piece of paper to see what you like, then trace the outline of your design onto the sweatshirt with a piece of chalk. Go over the design with fabric paint or permanent markers designed for fabric when you're happy with your drawing. Try drawing small skulls on your sweatshirt to show off your punk or emo vibe. Decorate your sweatshirt with abstract graphic design to give it a modern look. Have all of your friends sign your sweatshirt for a one-of-a-kind memory you can treasure forever.
Sew on an applique to elevatea plain sweatshirt.
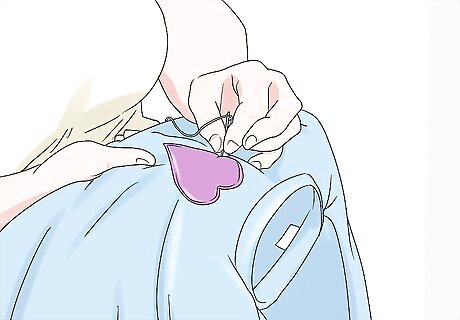
A few simple stitches can totally transform a sweatshirt. Adding an applique to a sweatshirt is one of the easiest ways to customize it. Just sew around the border of the applique to attach it to your sweatshirt. You can find pre-made appliques at any craft or fabric store, or you can make your own by tracing out a design you like onto fabric! Experiment with different designs that show your personality, like chevrons, a flower, or even your name! If you make your own applique, adhere a fusible web onto the back. This is a heat-activated, sticky substance that will help the applique stay in place while you sew it onto your sweatshirt. You can buy fusible web at any craft store for about $5-$10.
Use scraps of fabric to add pockets or patches.
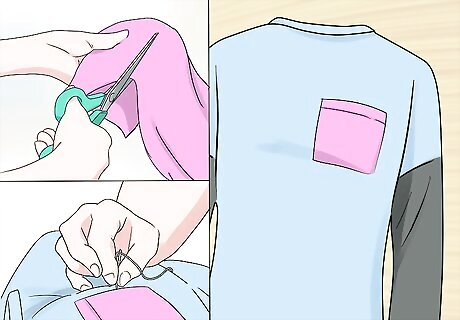
Nearly any fabric will work. Cut a square from any fabric you have laying around, like a lace tablecloth or a small scrap leftover from another project. Use the scraps to create cool patches or pockets anywhere you like on the sweatshirt! If you’re creating a pocket, only sew 3 sides of the fabric. If you’re sewing on a patch, attach all 4 sides. Try adding elbow patches to your sweatshirt for a trendy look! Lace pockets add a pretty, feminine touch to a boxy sweatshirt.
Add a lace hem for a pretty, dressy sweatshirt.
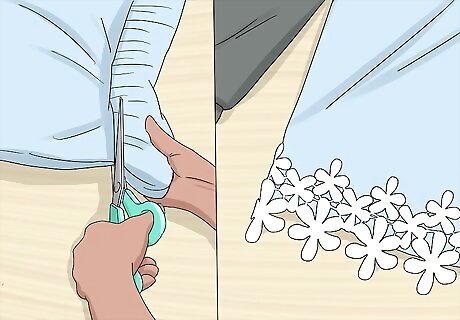
Instantly make an old sweatshirt more feminine and romantic. Cut off the bottom hem of your sweatshirt, then sew a band of lace all the way around the bottom to create a new hem. Experiment with different widths of lace to find the hem length you prefer. A small ribbon of lace will create a dainty hem, for instance, while a wider piece of lace could be used to create a bold look.
Decorate your sweatshirt with gems to add sparkle.

Sparkly studs and gems are a great way to customize a sweatshirt. Most of these attach with a simple loop of thread, much like sewing on a button. Create a rocker-chic look by adding metal studs to the shoulders of your sweatshirt. Create a pretty neckline on your sweatshirt by attaching sparkly gems around the collar.
Make your sweatshirt into a jacket for a bold look.
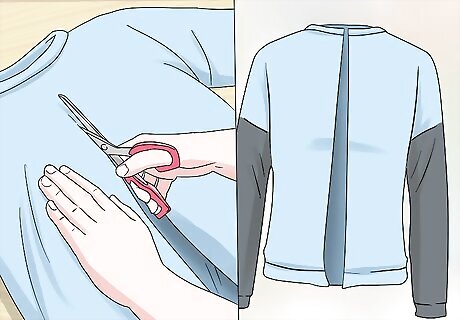
Create a one-of-a-kind layering piece. Totally transform your sweatshirt by cutting it straight down the middle on the front. Sew along both sides of the cut. If you like, you can add closures like buttons or a zipper.
Order a custom sweatshirt to create your own design.
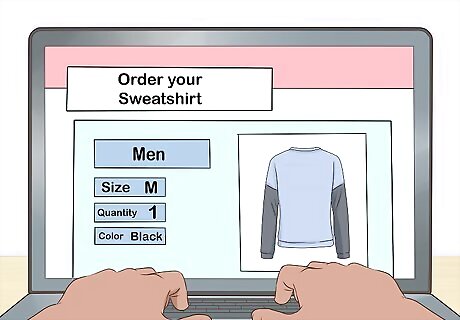
There are a number of websites where you can customize a sweatshirt. Choose the style and color of sweatshirt you want to order. Then, select your logo and text. You can either browse through the company's available designs or upload your own images. Just be sure not to use anything that's trademarked, like a sports team or brand logo. When you're deciding where to order your sweatshirt from, read customer reviews or ask your friends and family for recommendations.


Comments
0 comment