
Using Plastic Insulation Film

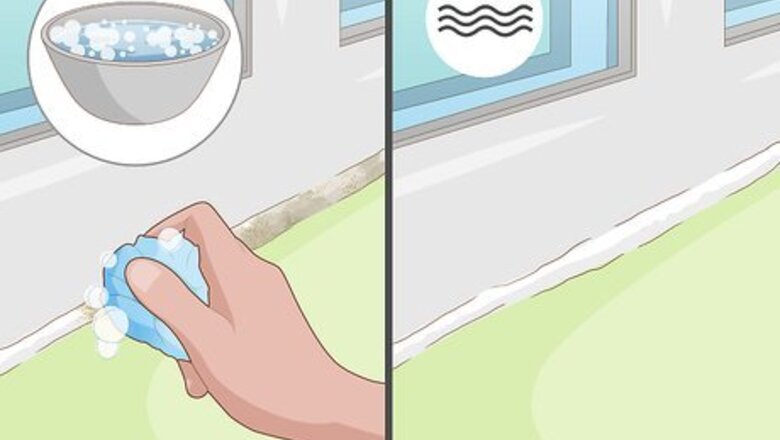
Clean the molding around your window with soapy water and let it dry. Add a few drops of liquid dish soap to a bowl filled with warm water and wet a cleaning rag in it. Wipe around the edges of the interior window molding so you have a clean surface to apply the film to. Allow the molding to air-dry completely to ensure you get the best adhesion. You may also use dusting spray and a dusting rag if there’s only a thin layer of dust on the molding.
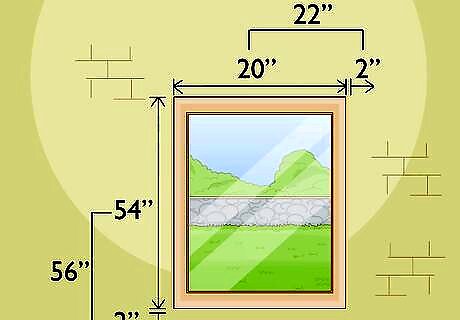
Measure the height and width of the window and add 2 in (5.1 cm). Start the height measurement from the top of the molding. Pull a tape measure to the bottom of the window on the lower edge of the molding. Then take the width measurement from the left edge of the molding to the rightmost edge. Add 2 inches (5.1 cm) to each of your measurements to ensure you’ll have enough plastic film. Write down your adjusted measurements so you don’t forget them. If your window doesn’t have molding, then measure from the edges of the window well before adding 2 inches (5.1 cm). For example, if your original measurements were 54 by 20 inches (137 cm × 51 cm), then your final adjusted measurements would be 56 by 22 inches (142 cm × 56 cm).
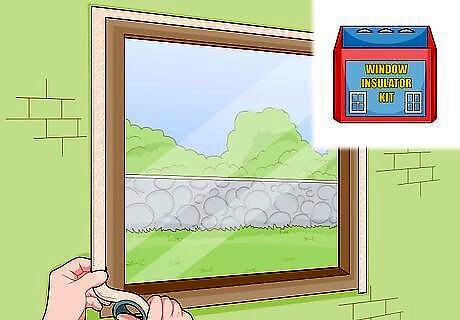
Apply double-sided tape from a window film kit around the molding. Get a window film kit that contains enough plastic insulation film to cover the entire window. Cut strips of double-sided tape for each side of your window so they’re the same length as the molding. Peel off the backing adhesive and press the tape against the molding so it sticks firmly. Continue applying the tape around the perimeter of the molding. You can buy window film kits from your local hardware store or online. Plastic insulation film is similar to plastic wrap for food but it’s thicker and contains heat better. The double-sided tape could cause slight damage to the front of wood molding. Apply the tape on the sides of the molding instead. You can also use plastic film on the exterior side of your windows, but it’s more likely to get damaged from wind or weather.
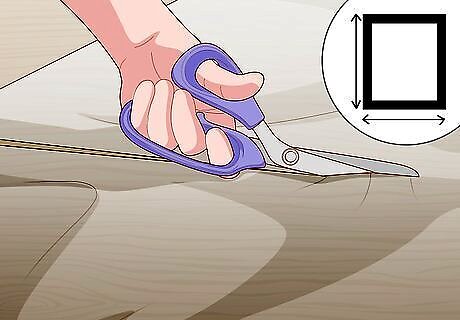
Cut the plastic film to match your measurements. Spread the plastic film on a flat surface and smooth it out as much as you can. Mark your measurement on the plastic with a marker so you know where to make your cuts. Use a pair of scissors to make straight cuts until you have a piece of plastic that’s the same size as your adjusted measurements. Many times, window insulation kits come with enough plastic film to cover 2–3 windows.Variation: If you want a cheaper alternative, you can use a roll of bubble wrap instead of the plastic film. Put double-sided tape around the window frame and press the edges of the bubble wrap tightly against it so the bubbles face inside. Cover any seams with packing tape. You do not have to heat the bubble wrap.
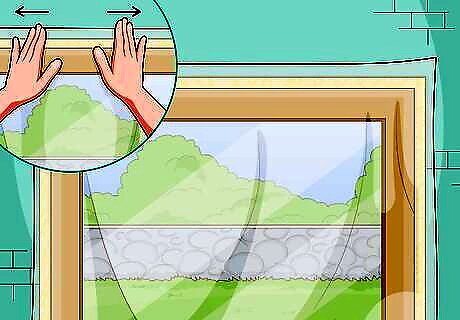
Press the film onto the top piece of tape. Tear off the backing on the piece of tape on the top piece of molding to reveal the adhesive. Stretch the plastic film tight and make sure it’s centered on the piece of tape before pressing it on. Rub the plastic film to ensure the adhesive sticks to the plastic, and make sure there are no wrinkles, or else cold air may still get through the window. If you notice large wrinkles, carefully peel the plastic off of the tape and try reapplying it. If you pull some of the tape off of the molding, start over from the beginning.

Secure the film to the sides and bottom of the window with the tape. Work on one side of the window at a time so it’s easier to apply the film. Remove the backing on the tape on the left side of the window first and pull the plastic tight so it doesn’t have any wrinkles. Press the plastic against the exposed tape and rub the tape with your hand to ensure it forms a tight seal. Repeat the process on the right side of the window. Then remove the backing on the bottom piece of tape and pull the plastic tight so it doesn’t have any wrinkles. It’s normal for the film to have some small wrinkles in the middle of the window since you won’t be able to get it perfectly tight.
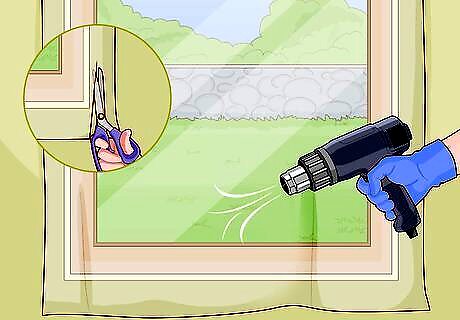
Heat the film with a hair dryer to remove wrinkles. Turn the hair dryer onto the lowest setting and start in one of the top corners of the window. Hold the hair dryer about 6 inches (15 cm) away from the film and work back and forth in a diagonal motion across the window. Continue heating the film until it stretches tight and removes all of the wrinkles on the surface. Avoid holding the hair dryer in one place for too long, or else you could make a hole in the film and have to start over.

Add film to the rest of your windows. Get additional window insulation kits for each of the windows you want to insulate in your home. Make sure to pull the film tightly so it creates the best seal and stops cold air from coming inside or heat from escaping. You will not be able to open your windows once you install the plastic film.
Blocking Cold Air with Shades

Mount roller or Roman shades to help increase heat gain. Opt for interior-mounted shades you can place them as close to the window glass as possible. Fit the roller bar at the top of the window frame and secure it to the molding with the included hardware. Keep the shades pulled down when it gets cold or when the sun doesn’t shine through the windows to prevent cold air from coming in. Roller and Roman shades are made from single pieces of material that pull or fold down to block the window. If possible, get shades that are a light color on one side and a dark color on the other. Mount the shades so the dark side faces the glass so the sun warms it up and helps heat your home.Tip: Avoid using vertical or horizontal blinds since they allow cold air to come through the gaps even when they’re closed.

Opt for cellular shades for added layers of insulation. You can cellular shades that open horizontally or vertically, so choose whatever fits best in your window. Attach the mounting hardware inside the window frame so the shade presses against the glass so it creates the most effective insulation. Pull the shades closed when it gets cold so you don’t lose any hot air in your home. Insulated cellular shades are double-layered and have an interior honeycomb shape that traps warm air and helps reduce heat loss by about 40%. Horizontal cellular shades create the most effective insulation, but vertical varieties allow you to better control how much sunlight enters your home.

Hang thermal drapes in front of your windows when it’s not sunny. Install a curtain rod above your window frame, and get thermal drapes that are long enough to cover the entire window. Look for drapes that have a dark color since they will help insulate more heat. Close the drapes whenever you feel cold air coming through the window. Keep the drapes open when the sun shines through the window since it can help warm up your home naturally. Drapes can help reduce heat loss by up to 25%. Keep shades and drapes both closed to create multiple layers that stop cold air from coming into your home.

Install cornices above windows with drapes to keep hot air circulating. Measure the width of your drapes, and look for a cornice that’s long enough to cover them. Look for a style that matches the interior design in your home so it doesn’t clash with your furniture or drapes. Mount the hardware for the cornice on your wall just above the drapes, making sure that it forms a tight seal against the wall so air can’t get through it. You can buy cornices from your local hardware or home goods store. Cornices are decorative pieces of molding that wrap around the tops of drapery to prevent air from going between them and the window so you don’t lose any heat.
Sealing Drafty Windows

Apply a bead of caulk around the window’s edges if they’re cracked. Load a canister of caulk into a caulk gun and look for any cracks along the edges of your windows on the interior and exterior. Hold the caulk gun at a 45-degree angle against the seams around your windows, and pull the trigger to apply a continuous bead over the cracked areas. Push the caulk into the crack with a putty knife and allow it to cure overnight. If you’re applying caulk outside, check the weather to ensure it won’t rain or snow in the next 24 hours and that temperatures stay above 45 °F (7 °C).Tip: If you don’t know if you have drafty windows, hold a lit match or candle around the edges of the window frame to see if the flame bends or flickers. Mark any spots you notice with a sticky note so you know where you need to seal the window.
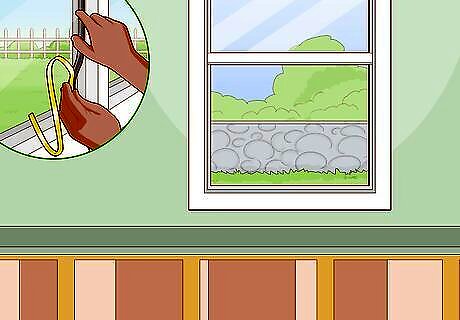
Install weatherstripping if you have a double-hung window. Cut V-channel weatherstripping so it’s 2 inches (5.1 cm) longer than the window sash, which is the channel that the window slides in to open and close. Open your window completely and press the adhesive side of the weatherstripping into the bottom of the sash. Fold the weatherstripping in half so it lies flat along the bottom of the sash. Secure the weatherstripping every 6 inches (15 cm) using 1 in (2.5 cm) finishing nails. Locate the sash at the top of the window and put another piece of weatherstripping inside of it. You can buy weatherstripping from your local hardware store.
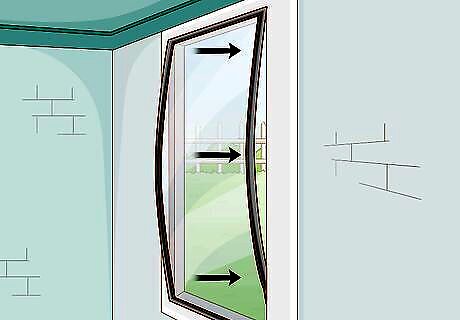
Add interior storm windows to create a tight seal and prevent drafts. Get an interior storm window that doesn’t require any hardware to install so you can easily pop it in and out of your window. Make sure the storm window is the same size as the inside of your window well so it fits properly. Rest the bottom of the storm window on the window well and tilt it up. Push the top of the storm window tightly so it presses against the window glass. When you want to remove the storm window, bend the flexible top of the window down and pull it out. Interior storm windows come in many standard window sizes, or you can get them custom made for oddly-shaped windows.


Comments
0 comment