
- Replace your dryer belt if your drum won’t spin or the machine makes a ton of noise when you turn the dryer on.
- Disassembling your dryer is slightly different from model to model, but look for fasteners and screws around the seams where the top and front panels of your dryer meet.
- Slide the new belt around the two pulleys at the bottom of the machine in a zigzag pattern.
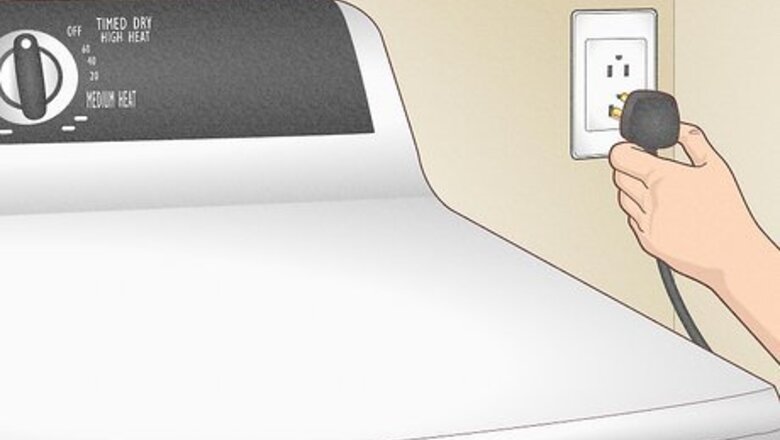
Unplug your machine.
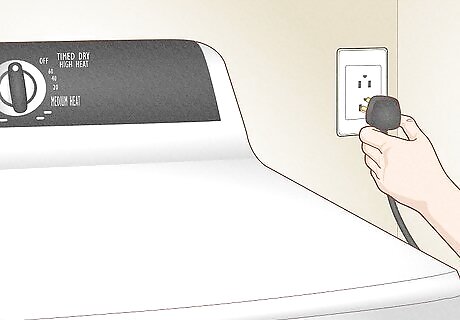
If you have a gas dryer, close the valve and disconnect that, too. You don’t want to shock yourself, so pull the plug on your dryer. Disconnect the aluminum hose from the dryer. If your dryer runs on gas, close the valve on top of the pipe that feeds into the wall. Then, use a wrench or channel locks to loosen the nut connecting the gas line to open it. You might smell some faint gas from the residue in your gas line. So long as the valve is off, you’re okay. Stuff a rag in the pipe and the opening of the gas line to block the smell if it’s bothering you.
Slide the dryer out.
You’ll need room to work, so pull the dryer away from the wall. Hold the dryer by the sides and gently slide it out from the wall. Continue working it out until you’ve got plenty of room to maneuver around the dryer. Now is a convenient time to clean any lint stuck in your duct!
Remove the lint filter and unscrew it.
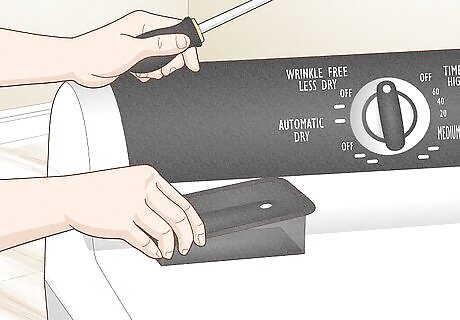
Remove the screws inside of the filter slot and set them aside. You’re going to disassemble your dryer, but there are typically screws inside the filter slot that lock the top panel in place. Use a screwdriver to remove the 2 screws on the inside of the lint filter. Place them elsewhere for now. Skip this step if your lint filter isn’t on top of the machine. Use a magnetic screwdriver if you can. If those screws fall down the filter, there’s no real way to get them back. You’re going to remove a lot of screws here. To keep track of everything, it may help to label your screws by setting them in labeled sandwich bags.
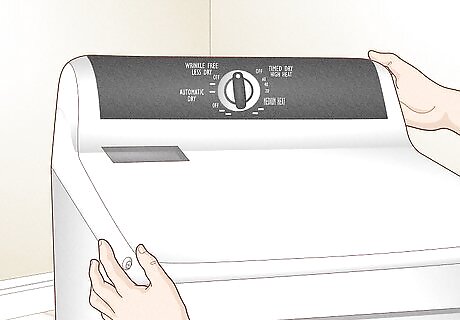
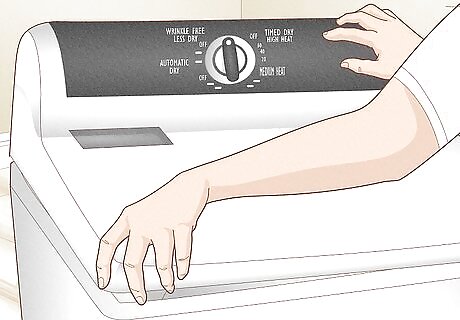
Look for fasteners around the seams.
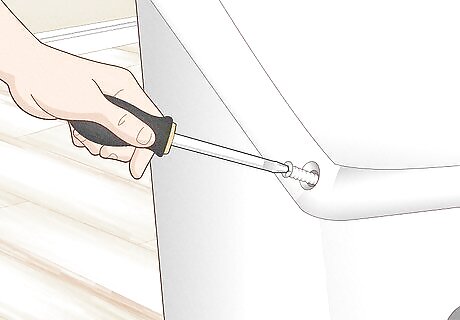
This is a little different on every model, but look for screws and clips. There is no universal configuration for dryer assembly. Look around the front, back, and sides of the washer to see if any screws, clips, or buttons are visible where the individual panels meet. If there are, remove the screws, unfasten the clips, and/or press the buttons to try and remove any of the panels. If you don’t see any fasteners anywhere, you likely have to pop the top panel out first to reveal the fasteners. You may be able to search your dryer model online to find instructions on removing the panels.
Pop the top panel out.
Slide a putty knife in the seam at the front to pop the clips out. Facing the dryer from the front, insert a putty knife or metal file under the seam at the top. Move it left and right along the seam until you find the 2 clips holding the top panel in place. Pry the panel up with one hand while pressing on the clips with your knife or file until they unlock. Once you’ve unlocked the top panel of the dryer, lift it up off of the dryer. You may need to pull the panel out a bit before you can slide it up. If the panel can’t be completely removed, prop the panel up and tie it to a rafter or fixture using wire. Once that top panel is up, you should be able to see the belt if it’s still attached. It’s the black band running around the middle of the drum. If you don’t see the belt, it probably broke and is sitting at the bottom.
Disconnect any electrical harnesses.
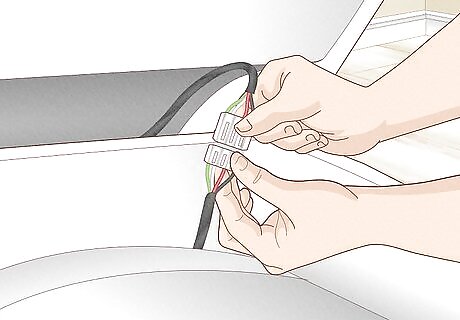
Look on the interior rim of the dryer and disconnect any wire hookups. Press the tab on top of any wire harnesses you find and disconnect the wires. This way, you won’t accidentally tear or damage any essential electrical cables when you remove the front panel. Don’t cut anything. Only remove harnesses. If the wiring looks uniquely complicated or it isn’t color-coded, take photographs of the connections to ensure you can put it back together when you’re done.
Disassemble the front panel.
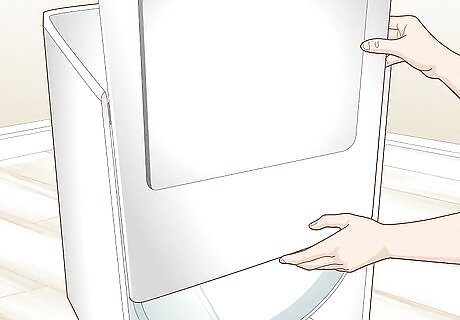
Unscrew any fasteners and lift the front panel out. Look along the seams on the inside of the machine for screws, clips, or other fasteners. Remove them to unlock the front panel. Brace the drum with one hand and gently try to slide the panel out. Once the panel is free, gently lower the drum and place the panel to the side. You may need to slide the front panel up before you can pull it out. If there’s something holding the panel in place at the bottom, look at the bottom of the machine and remove any fasteners down there. You may need to use a nut driver attachment to remove any hex nuts if they don’t have the divots for a screwdriver on them. There may be a bulkhead supporting the drum at the bottom. If there is, remove the brackets and screws underneath to remove it.
Purchase a replacement belt.
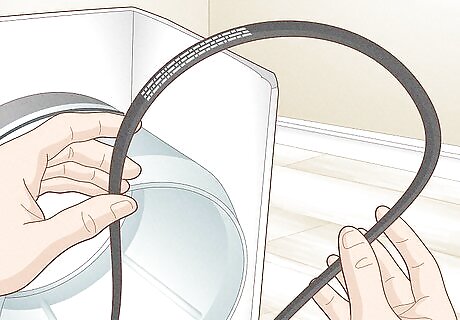
The model number you need is printed directly on the old belt. With the drum fully exposed, you should see the belt on a groove in the middle of the drum. If it isn’t there, look underneath the drum for the broken belt. Scan each part of the belt for a serial number and then order an identical belt online for the model. Add the brand of your dryer to the serial number to find the exact belt you need. A replacement belt shouldn’t cost more than $5-15. If the belt isn’t broken, take a photo of the assembly where it wraps around the motor. The belt wraps around two pulleys—an idler pulley that connects to the bottom frame, and the motor pulley. The idler pull might be loose and free if your old belt broke.
Wrap the new belt around the drum.
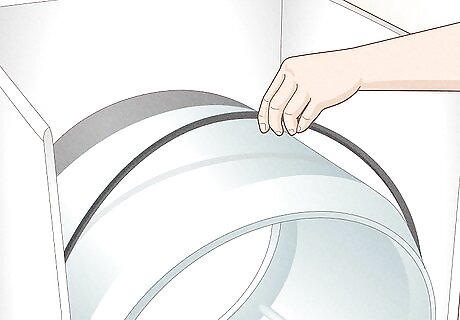
Once your belt arrives, hang it around the drum. There should be plenty of slack in the belt, so don’t worry about the excess slack. Prop the drum up with a small box so that it sits the same way it was in the machine. Slide the belt over the small groove in the drum where the previous belt sat. The sticky, grooved sides normally point down at the drum. Installation will be easiest here if the drum sits and inch or two below the
Attach the belt to the motor pulley.
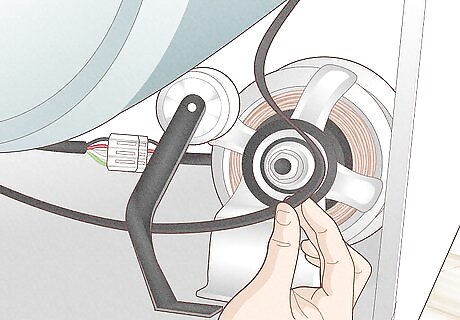
Wrap the new belt around the groove in the spinning part of the motor. The motor is the large metal assembly in the bottom corner of the machine. Locate the spinning pulley on the front end of the motor and wrap the belt around the groove in the center. The belt should still be fairly loose. It won’t be tight until you attach the idler pulley and raise the drum up to fit in the front panel.
Connect the belt to the idler pulley.
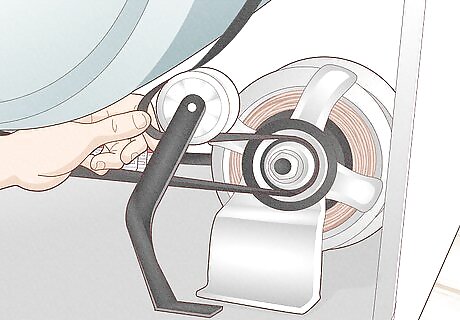
Wrap the belt tight around the pulley on the opposite side. The belt wraps around the motor on the side furthest from the drum and around the idler pulley on the side closest to the drum. Pull the belt gently around the inside of the idler pulley track. Then, spin drum gently by hand to ensure that the belt is on the right track and everything fits. If the idler pulley isn’t attached to anything, look on the ground right in front of the motor. Insert the clips at the bottom of the idler pulley into the openings. The round part of the pulley should be on the left of the motor.
Reassemble your dryer.
Put the panels back the same way you took them off. Since the front panel holds the drum in place, start there. Slide the front panel into the frame and rest the drum in the slot for it (you may need to push it into place from the inside). Hook up any electrical harnesses you disconnected and reinstall any fasteners you removed to secure the front panel. Then, reinstall the top panel the same way you removed it. Slide the clips at the front of the top panel into the openings on the front panel if you removed them with a putty knife. Reinstall the screws inside of the lint filter last. This will lock your top panel in place. Give your front and top panels a gentle shake with your hands. If you feel any wiggling, reinspect all of the seams to find loose connections.
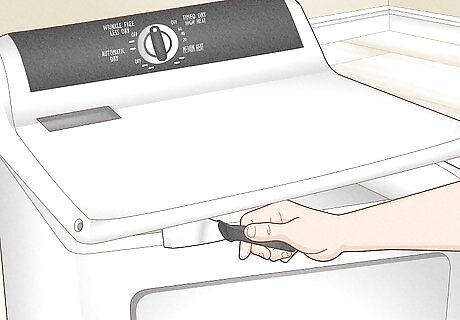
Test the dryer.
Once the panels are secure, reconnect everything and test your work. Slide the dryer back closer to the duct, outlet, and gas line. Reconnect the duct, tighten the gas line using a wrench or channel locks, and plug the dryer back in. Run a cycle with an empty drum for a few seconds to confirm that the drum is spinning and enjoy your fixed dryer! If you’re replacing the belt because it was making noise, that noise should disappear if you’ve fixed it. If the drum doesn’t spin with a new belt, your motor is probably shot. Unless your dryer is brand new and it’s still under warranty, you’re going to need to buy a new dryer.


Comments
0 comment