
Cutting Your Felt Pieces
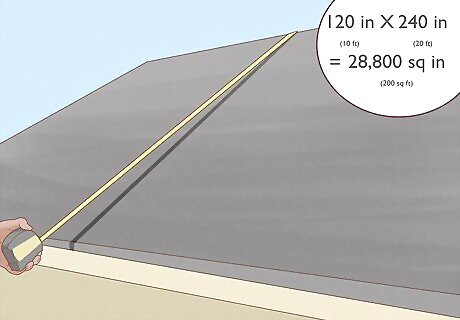
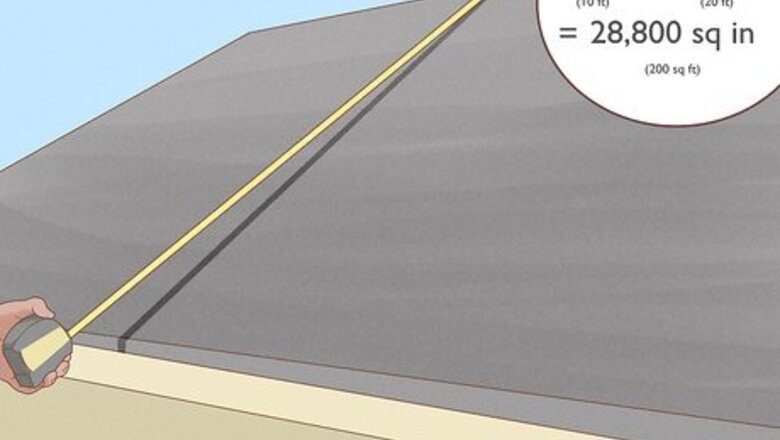
Calculate the area of your roof by combining the area of each surface. Start by measuring the length and width of one side of the roof in inches. Afterward, multiply them to calculate the area. For example, if its length is 120 inches (10 ft) and its width is 240 inches (20 ft), the area is 28,800 square inches (200 sq ft). Continue this for each surface of your roof. Afterward, add each surface area together for the total area of your roof to be covered in felt. Add about 2 inches (5 cm) to each of your measurements before calculating the area. This will give you extra felt to hang over the eaves of your roof.
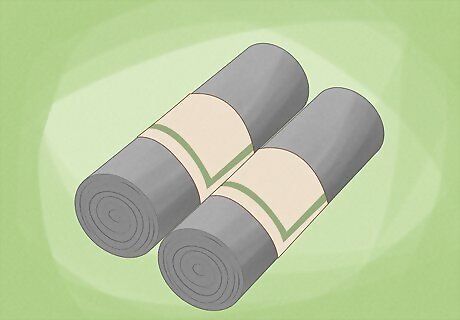
Purchase enough felt to cover your roof's area. Convert the area from inches to feet prior to purchasing your felt. One roll of conventional #15 felt covers 432 square feet (40.1 m). However, you must allow for overlaps on joints. In most cases this will leave 400 square feet (37 m) of net coverage per 1 roll. Purchase an extra pack of felt in case you need more or end up damaging your first roll. Divide your area in square inches by 144 to get the area in square feet.
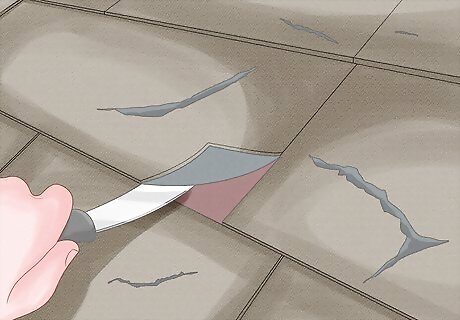
Cut the felt to size using a hooked blade knife. Unroll your felt onto a flat surface. Lightly scratch a vertical line on the surface with the rear of the blade to mark the length of your shed plus the front and rear overlaps. Mark the same at the other end of the roll. Scratch a line between the two marks to create a vertical guide for your cut. Cut through the felt vertically, taking care to keep the path of your knife blade clear of any trailing limbs. For example, if the width of your shed is 240 inches (610 cm) plus 4 inches (10 cm) of overlap, mark a line 244 inches (620 cm) from the left width of your felt piece. Purchase a hooked blade—which has a small hook extending from a standard blade—from a home hardware store. You can also use a standard straight blade if you don't have a hooked blade. However, this will make cutting more difficult. Be sure the flat surface doesn’t have anything sharp on it.
Cleaning and Preparing Your Roof
Remove old felt from the roof with your hands and a putty knife. Grab loose pieces of felt and pull them off the roof with your hands. For pieces that aren’t coming loose, press a putty knife underneath it. Apply pressure and chisel away at it until it comes loose. Pull out nails that are holding felt to the roof using the sharp end of a claw hammer.
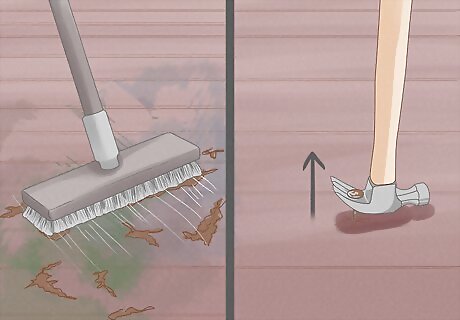
Clean the roof decking of any debris, protruding nails, or other objects. Gently scrub the roof using a bristle brush, taking care not to damage it. Creating dents will make it harder for your roof felt to adhere to the roof. Use the sharp end of a claw hammer to gently pull out any crooked or protruding nails. Replace any removed nails with new ones. Use coarse sandpaper (40- to 60-grit) to remove tough dirt.
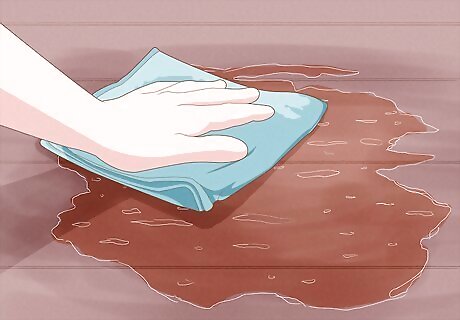
Dry the roof surface using a towel after you're finished cleaning. Scrub the wet spots with a small towel in clockwise motions. Never apply roof felt over wet or damp decking, as this condition will cause the decking to warp or buckle, and possibly rot.
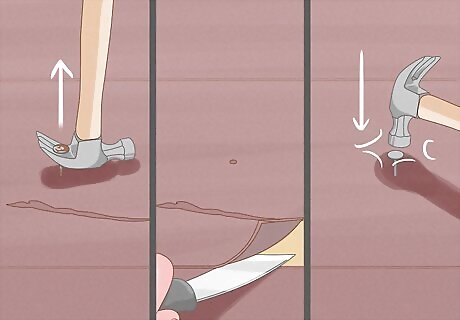
Replace any damaged or rotten material on the roof decking. Remove any nails from the damaging decking using the sharp end of a claw hammer. Insert a square nose spade, shovel, or special scraper under the panel and lever the decking upward. Continue loosening it until it comes off or it's loose enough to pull off with your hands. Install another base sheet of the same material. Be sure to use the same nails to fix it to the wooden beams underneath.

Apply waterproof paint or primer to promote felt attachment. Use a 4 inch (10 cm) paintbrush or a roller to apply the paint or primer. Drag it gently from one end of the roof to the other (east to west or west to east). Begin at the bottom, working in horizontal lines and gradually moving upward. If you use paint, be sure to choose high-quality water-based enamel acrylic brands with rust-inhibiting properties. Select general purpose felt primer with low viscosity.
Attaching Your Roof Felt
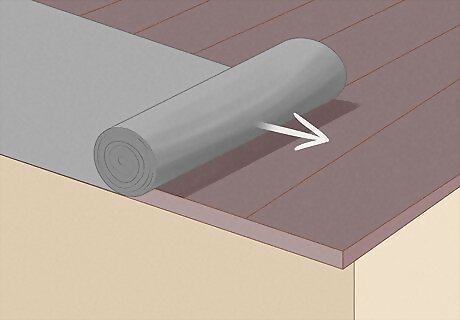
Start rolling the first layer of felt out from the bottom of one side of the roof. Begin at the bottom-right or bottom-left of the roof. Afterward, roll the felt away from you lengthwise along the lower edge about 10 feet (120 in). As you roll it out, make sure that it remains flat. For hip-type shed roofs—which include slopes on all 4 sides—begin at the square hip at the top of the roof. Allow about 1 foot (0.30 m) of the felt to hang over the hip. Adjust the felt as you roll it, making sure that it's straight with no bubbling. Never install the felt vertically across your roof. Hang the lower edge of the felt over the eave—the part of the roof that meets or overhangs the shed's walls—by about 0.5 to 0.75 inches (1.3 to 1.9 cm).
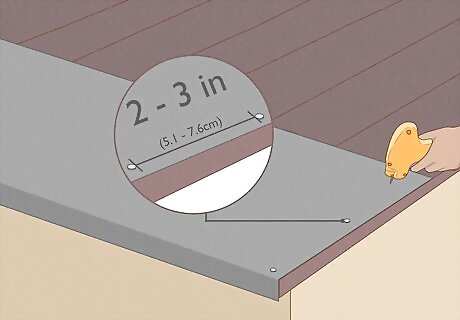
Tack the felt onto the initial rolling spot using a tack gun. Return to the side that you began rolling from and apply 3 tacks vertically using a tacking gun. To load the gun, turn the front dial 180 degrees and insert a needle by lining up the long groove of the needle with the groove on the tack gun. Press the needle into place and then turn the lever back around. Keep each tack about 2 to 3 inches (5.1 to 7.6 cm) from the edge of the roof.
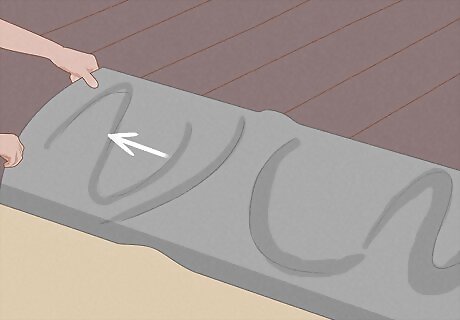
Continue pulling the felt tight from the untacked end. With one side tacked to the roof, pull the opposite end tightly and hold it to the ground, making sure it lies flat on the roof surface. Take care not to rip the felt as you pull it.

Roll a new row of felt into the opposite direction as the first. If you rolled the first row from west to east, the new row should be east to west. Allow about 4 inches (10 cm) of overlap between the bottom of the second row and the top of the first layer. Apply each row in a perfectly parallel manner. Most roof felt pieces have guidelines stenciled into them to ensure you apply them in straight, parallel lines.
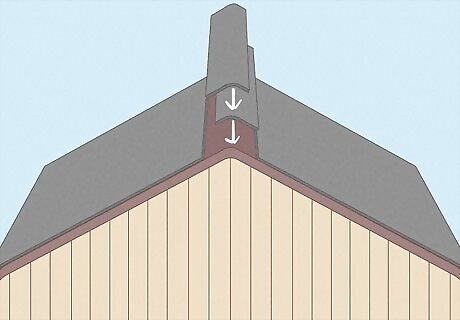
Continue rolling new felt rows until you are close to the roof's peak. Once you get close to the top, add another layer of felt so that you overlap the ridge of your roof by about 1 foot (0.30 m). Afterward, apply the felt in the same manner on the opposite side.
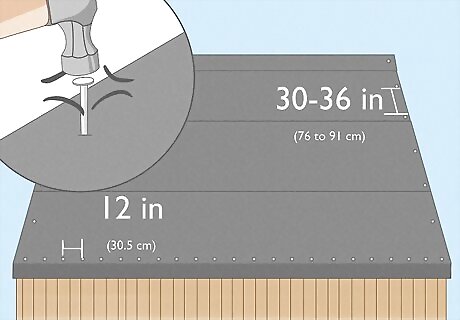
Nail the felt in using 0.59 inch (15 mm) galvanized clout nails. Grip the hammer tightly by the end of the handle and hold your thumb at the top of the shaft. Start at one of the upper corners of the felt and continue along the perimeter. Space each nail apart by about 30 to 36 inches (76 to 91 cm) along the side of the felt closest to the roof's peak and 12 inch (30.5 cm) along the side closest to the ground. Small sheds usually require about 100 to 150 clout nails. Be careful to drive nails flush. If the circular nail heads penetrate the felt they can cause leakage. Remember that each nail must be long enough to pierce 2 layers of felt during across regions that overlap. Simplex or plastic cap felting nails are also sufficient.
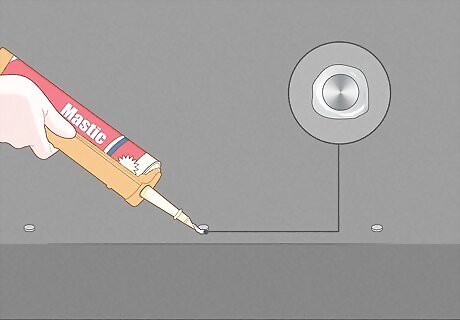
Cover all nail heads with roofing mastic for long-term roofing. If this felt is more than a temporary waterproofing measure, apply roofing mastic using a caulking gun. Hold the gun at a 45-degree angle with the nozzle pointed downwards. Pull the trigger of the gun and move the nozzle around the circumference of each nail. Move at a steady, consistent pace to ensure even application.


Comments
0 comment