
X
Research source
At-home anodizing can be useful for projects like protecting metallic family heirlooms and old jewelry. It can also be a great at-home experiment to try with older kids. Just remember to take extra precautions with caustic substances, like lye and sulfuric acid, when you anodize aluminum at home, as these products may cause chemical burns if handled incorrectly.
- Wash, degrease, and soak your aluminum in a lye solution to thoroughly clean it and remove any existing anodizing on the surface.
- In a well-ventilated area, connect your aluminum to a power source and place it in a tub of a 1:1 mixture of distilled water and battery acid.
- Run the power to your aluminum for 45 minutes, then remove it from the tub. Place the anodized metal in a hot dye bath for 15 minutes afterward to dye.
Collecting Supplies
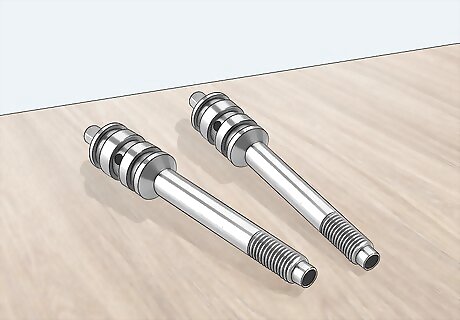
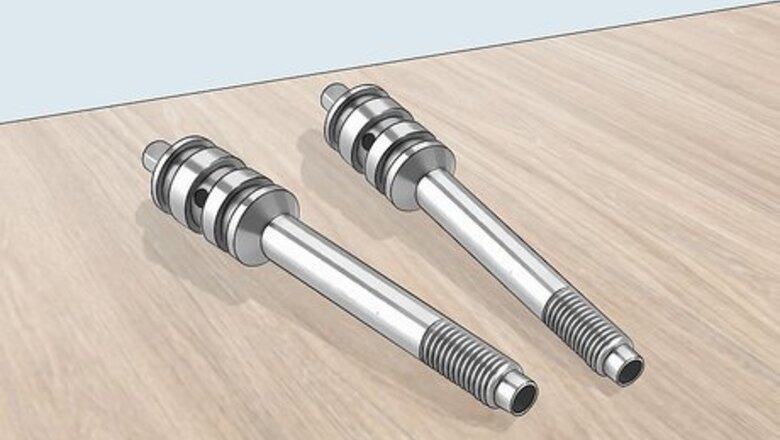
Buy some standard aluminum alloy metal parts. Anodizing works particularly well with aluminum, so, if careful, you can do it at home. Use small aluminum pieces to begin with so that you can submerge it in small quantities of acid. You can find small aluminum parts for this purpose relatively affordably from most home improvement stores, as well as online. During this process, the part that you are anodizing will function as your anode.
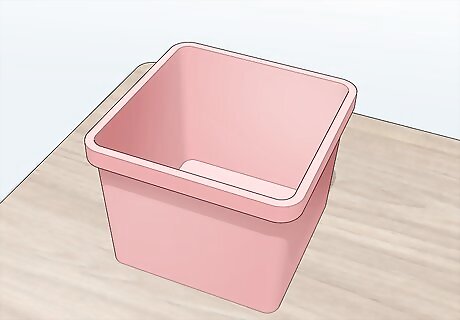
Buy a thick plastic tub to submerge your metal. Choose a type of plastic that is extremely hard and durable. The exact size of the tub you will need depends on what you're working with, but it should be large enough to hold your metal piece and the aluminum and still have some extra room for the liquids.
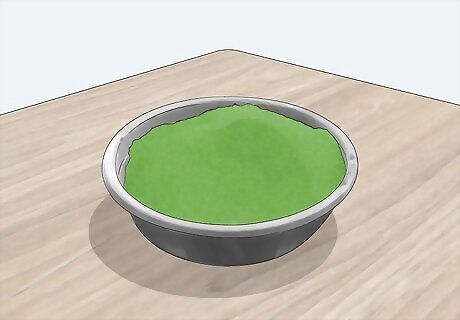
Find some clothing dye at a local craft store. During the anodizing process, you can dye the metal almost any color using a standard fabric dye. This is the process Apple uses to color iPods. You can also buy special dye for anodizing that may produce better results.
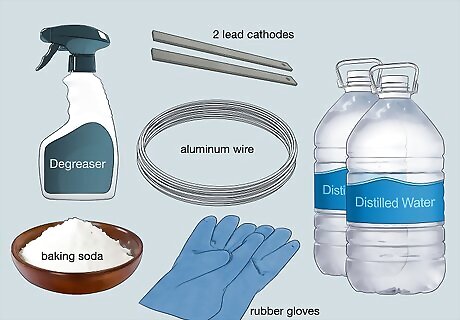
Purchase the items you need for anodizing. You will need several particular pieces of equipment to anodize at home. Most of these items can be found at your local hardware or home improvement store. These include: A degreaser product 2 lead cathodes long enough to overhang your plastic bin A roll of aluminum wire Enough distilled water to fill your plastic tub Baking soda Rubber gloves
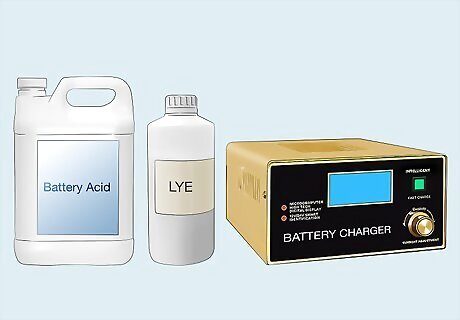
Find places to purchase the hard-to-source supplies. For anodizing, you will need several gallons of sulfuric acid (battery acid), lye, and a constant power supply of at least 20 volts. The battery acid may be hard to find; however, it is usually available at auto parts stores. A large battery charger should work as a constant power supply.
Cleaning the Aluminum
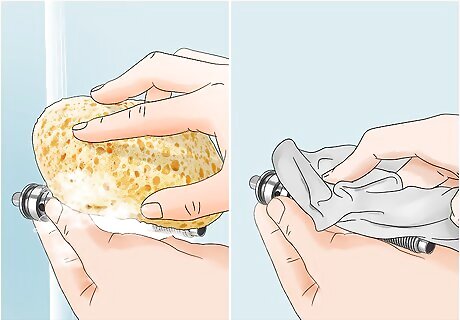
Wash your metal with soap and water. Cleaning off dirt and debris helps keep the anodizing process running smoothly, and reduces the chances of imperfections as you work. Wash the object you want to anodize using a gentle detergent and warm water. Then, dry it completely with a clean rag or paper towel.

Apply a degreaser with a cloth. Following the instructions on the product packaging, use your degreaser to remove any additional oil from the product. Wipe it away as necessary, making sure that no product remains on your metal before you move to the next step.
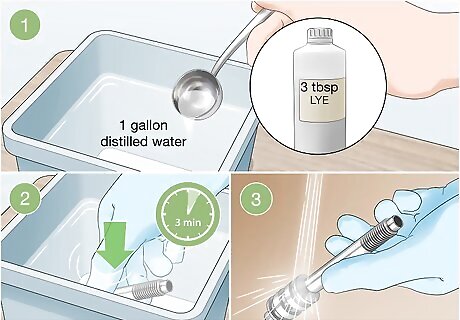
Dilute lye in water to create a scouring solution. In a small plastic tub, mix 3 tbsp. (44 ml) of lye in 1 gallon (3.8 l) of distilled water. Wearing a pair of rubber gloves, place the object you want to anodize into the lye solution. Allow it to sit for 3 minutes, then remove it and rinse it thoroughly with warm water. The lye will remove any existing anodizing on the surface of the metal. Once it is removed, water should pour off the surface easily, instead of beading. Wear rubber gloves whenever working with lye. Do not use measuring spoons or cups that are used for food products. The materials used in this process are toxic.
Setting Up An Anodizing Bath

Place your plastic tub in a well-ventilated area. The tub should also be placed away from things that could be harmed during this process. Set it on a piece of plywood and/or a thick drop cloth in case of spills. A garage with an open door or a shed with all doors and windows open is usually a good location. For best results, do this when the indoor temperature is between 70 and 72 degrees Fahrenheit (21 to 22 degrees Celsius).
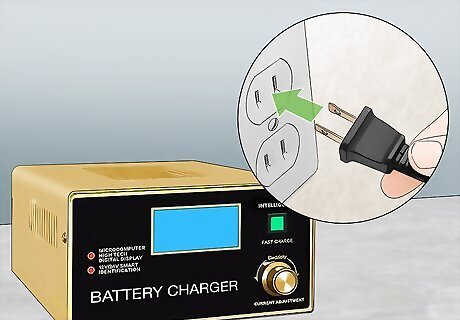
Set up your power supply. Set it on a non-flammable material, like concrete. Use a multimeter, available from most auto supplies stores, to make sure your battery is working consistently. You will need to connect the positive wire from your battery charger or rectifier to a wire that will be strung to your aluminum. You will need to connect your negative wire from your battery charger to an aluminum wire connected to 2 lead cathodes.
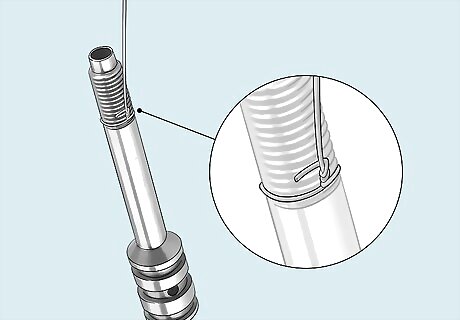
Tie one end of the long aluminum wire to your anode. 12-gauge aluminum wire works well for this use. Wrap it or connect it to the part in an inconspicuous area. If your anodizing a key, for example, you may wrap the wire around the join between the blade and the bow. The area of the part that connects to the wire will not anodize. Make sure it is very tightly wrapped for a more consistent charge.
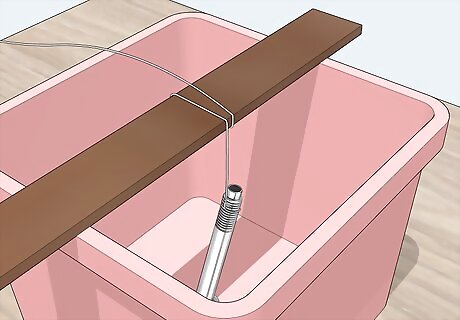
Wrap the middle of the wire around a thin piece of wood. The wood should be longer than your plastic tub. This will give you leverage to lift it out when you are done. Make sure you have extra wire extending toward your power supply after you wrap it. Test the wooden handle to make sure your aluminum part will be fully submerged in the acid mix, but not touching the base of your plastic tub.
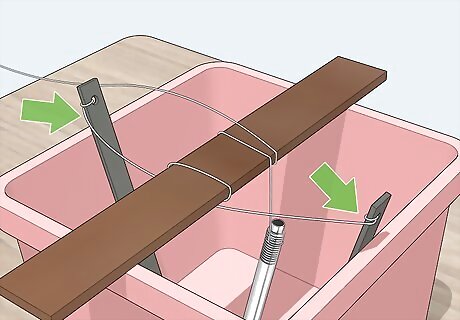
Set a lead cathode on each side of your tank. String aluminum wire between the cathodes and connect them together on your small wood plank. You will attach the negatively charged power supply to this wire. Make sure the wire connecting the anode does not touch the lead cathodes.
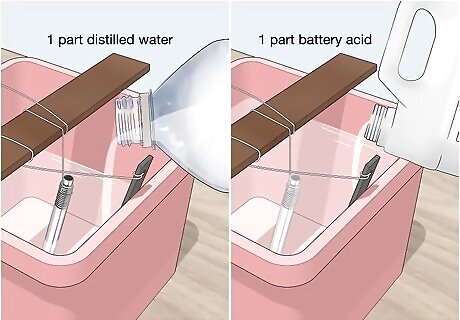
Make a 1:1 mixture of distilled water and battery acid in your plastic tub. The amount you use will depend upon the size of the metal part you want to anodize. You should have enough to completely submerge your anode. Be very careful not to spill as you mix. Put on a mask or respirator before you start working with acid. Turn on a fan to ventilate the area. Always pour the water in before the acid. If you spill any acid, cover it quickly with baking soda.
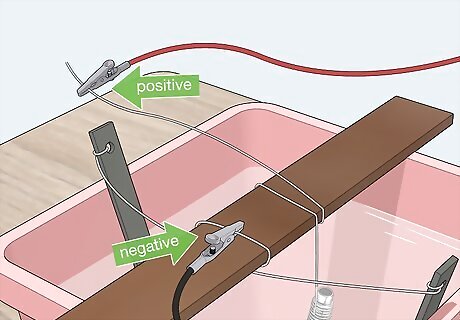
Connect your aluminum wires to your power supply. The wire that leads from your anode should connect to the positive terminal on your power supply. The wire that leads from the lead cathodes should connect to the negative terminal of your power supply. Before you turn on your power supply, check the area around your plastic tub to make sure there aren’t any spills. You should also double-check to ensure the power is safely connected and your skin is completely covered.
Anodizing and Dying Metal
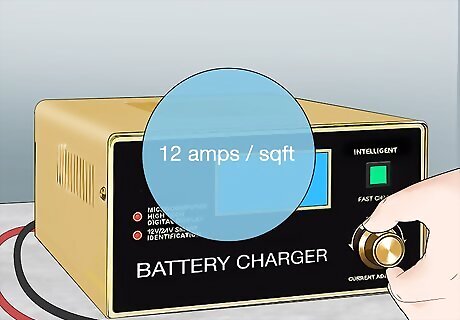
Turn on your power source. Once your power source is on, slowly turn it up to reach your ideal amperage. A good rule of thumb is to use 12 amps per square foot of material. (12 amps per every 0.09 square meters of material). Increasing the power too fast or using too much can burn your aluminum wires.

Keep the power supply constant for 45 minutes. You will see little oxidation bubbles start to form on the surface of the anode. The anode will also start to change color, turning brown, then yellow. If you don’t see bubbles forming within about 30 seconds of starting your power supply, turn your power supply off and check your connections. This is usually an indicator that your power supply wasn’t properly connected.
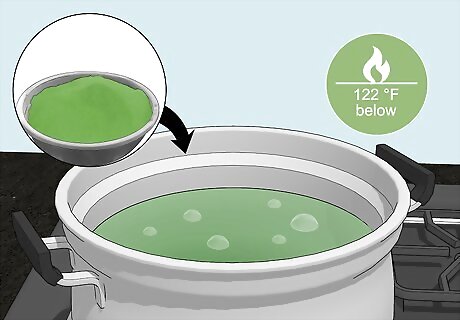
Mix your dye during the anodizing process. If you plan on dying your part, prepare the dye so that it is hot and ready when your anode comes out of the bath. Different dyes will have different requirements, so prepare your dye as directed on the product packaging. Heating the dye will help increase the amount of pigment your part picks up. However, the dye should not be heated to a temperature over 122 °F (50 °C). Dye can be damaging to pots, so use an old one that you no longer use for food.
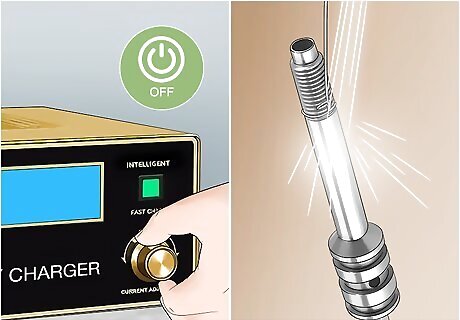
Turn off the power supply after 45 minutes. Once your anode is done in the bath, turn off your power supply before attempting to retrieve it. Remove your aluminum carefully and rinse it with distilled water. Work quickly if you plan on dying your part. Be sure to wear protective gloves when retrieving and rinsing your part.
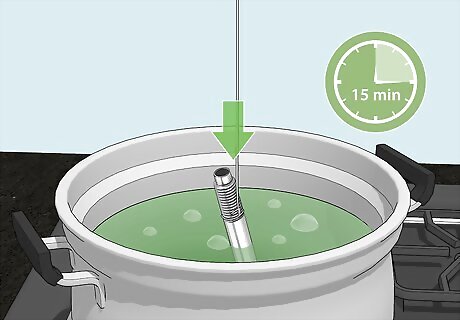
Place the aluminum part in the warm dye bath. Let the part sit in the dye for 15 minutes. If you are only dying part of your anode (such as the bow of a key), wrap your aluminum wire around the part you don’t want to dye. Use this as a handle to dip your anode into the dye. If you do not plan on dying your aluminum part, skip straight to boiling the part in distilled water for 30 minutes.
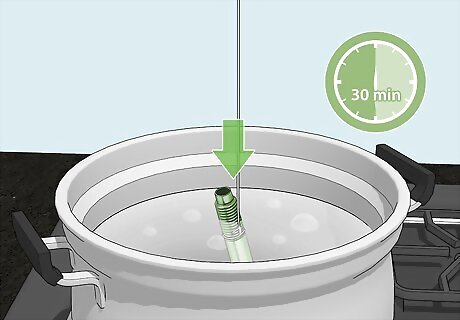
Boil distilled water on a hot plate. You should have enough water to fully submerge your anode. Once your anode is done in the dye bath, remove it and place it in the boiling water for 30 minutes.
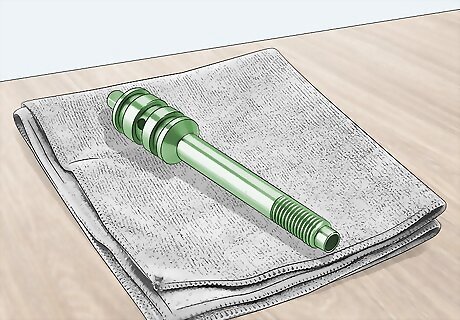
Remove the hot metal carefully and allow it to dry. Set your newly dyed aluminum on a clean towel or rag and allow it to cool completely before handling. Once cooled, the surface should be sealed.


Comments
0 comment