
- The easiest way to add captions to a Twitch stream is to use OBS and the Closed Captioning via Google Speech Recognition plugin.
- Once you install the plugin and configure settings, you can use the captions for every stream easily.
- Alternatively, install a Twitch extension to add closed captioning to your streams.
Using OBS
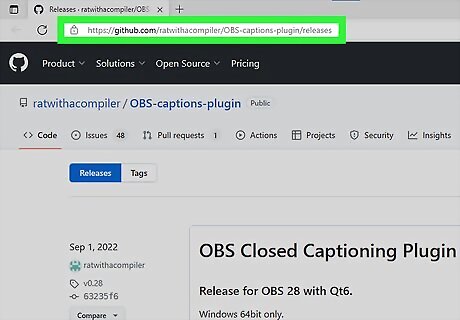
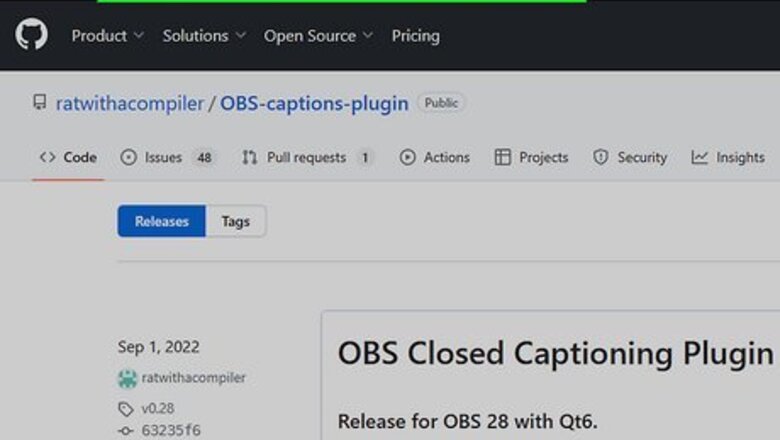
Go to the closed captioning plugin page. If you stream to Twitch using OBS, you can use this method to easily and automatically show closed captions every time you stream. If you don't use OBS, skip to enable the Twitch extension every time that you stream. Make sure OBS is closed when you install this plugin. If it's open, you'll get an error window that prompts you to close the program.
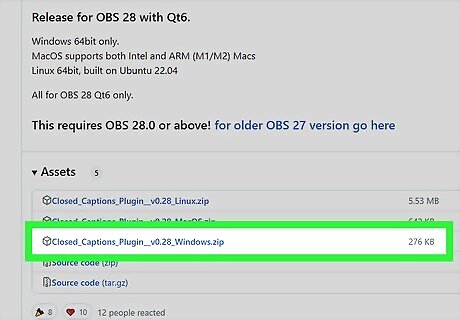
Click the download link with your operating system. Under the "OBS Closed Captioning Plugin" header are Windows, Mac, and Linux links, so click the right one. The latest stable version of the plugin is usually listed first, and that's what you want to download. Install the plugin once it's downloaded. Drag the installed file to your OBS Studio folder and open OBS to install the plugin.
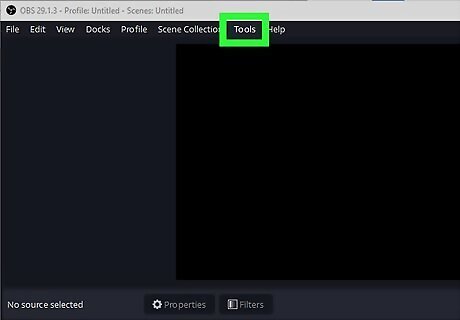
Click Tools. You'll see this at the top of the OBS window.

Click Cloud Closed Captions. It's at the bottom of the menu.

Check the box next to "Capturing Enabled" to turn the feature on Windows Checked. You won't see any captions immediately until you change some settings.
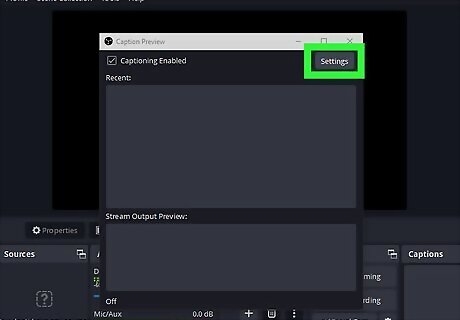
Click Settings. This button is to the right of the check box.

Select your microphone next to the "Caption Source" prompt. Use the drop-down menu to make your selection.
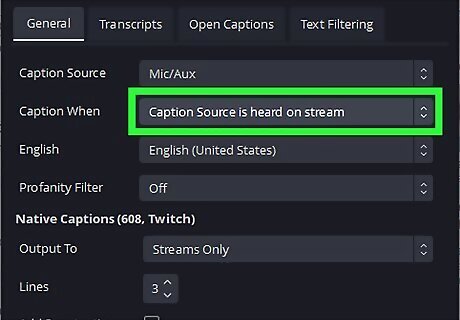
Select "Caption Source is heard on stream" next to the "when" prompt. This means that OBS will create captions for your stream as long as your mic picks up noise. If, however, you mute your microphone, like if you're answering a phone call, OBS will not produce closed captions.
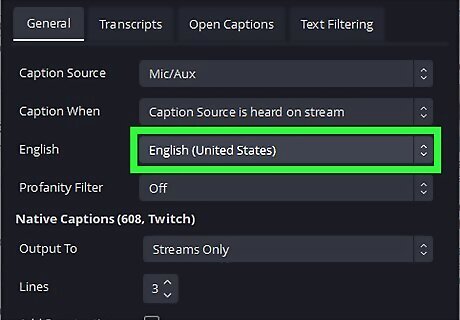
Pick the language that you're speaking. There are even dialect options, so you can pick between "English (United States)" and "English (United Kingdom)."
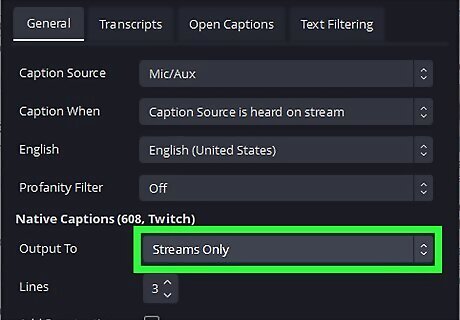
Choose what to caption. Next to "Output To" you can choose if you want your captions to appear on your streams only, local recordings only, streams and recordings, or neither.
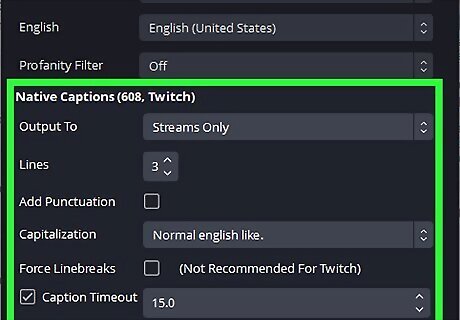
Select the rest of your options. You can usually leave the rest of the settings at their defaults. You can change the number of lines that take up your screen (the default is 3), but Twitch doesn't support a large amount of text. If you want to save your past closed captions, go to the Transcripts tab and check the box next to "Save Transcripts." You can also go to the Text Filtering tab to add text changes if there's a word you're saying that is repeatedly wrong in closed captions. Technical terms of a game you're playing would fall into this category!
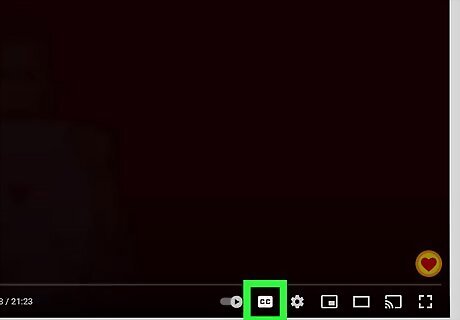
Enable closed captions as a viewer. Finally, if you're watching a stream where closed captioning is offered, you'll see a little "cc" icon in the bottom right corner of your screen that will display "Captions (c)" when you mouse over it. Click the "cc" icon to show the captions on the stream. Click the gear icon ("Settings") to change how the captions appear, like the text color, font, text size, alignment, etc. If you're using an Android, iPhone, or iPad, you'll see the same icons when you tap the screen.
Using a Twitch Extension
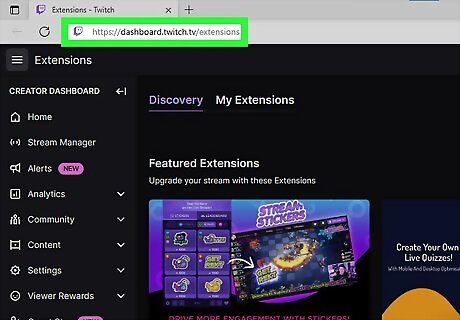
Go to https://dashboard.twitch.tv/extensions and log in. If you're not logged in, you will be prompted to sign in to continue. Use this method if you don't stream with OBS. However, the dashboard will always need to be open in order for this to work.

Search for closed captions. The search bar is on the right side of your browser page.

Click Install next to the "Stream Closed Captioner" extension. It's the search result with the purple icon that says "Stream" above "cc". Once you click Install, you'll see a pop-up with instructions on setting it up.
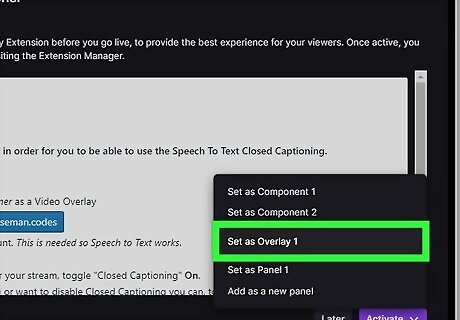
Click the Activate drop-down and select Set as Overlay 1. Click Done when a window pops up to close it and continue. If you have another extension as "Overlay 1," this extension will override that one since you can have only 1 overlay at a time.
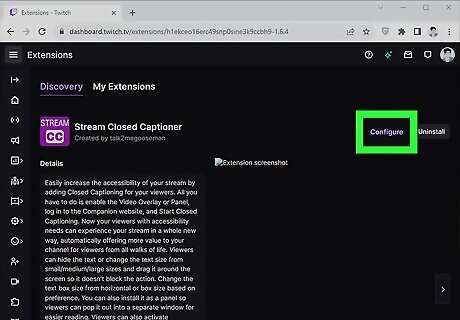
Click Configure. You'll see this on the right side of your browser and it'll open the first window again.
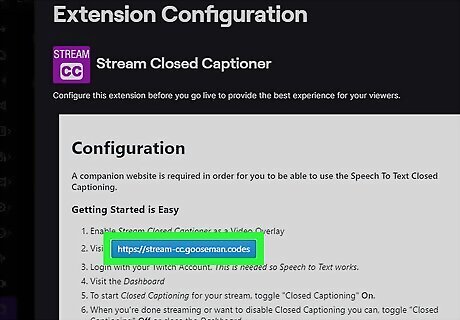
Click the link. You're redirected to another site where you need to sign in with your Twitch account to continue.

Click Get Started. It's a purple button in the top center of your browser page.
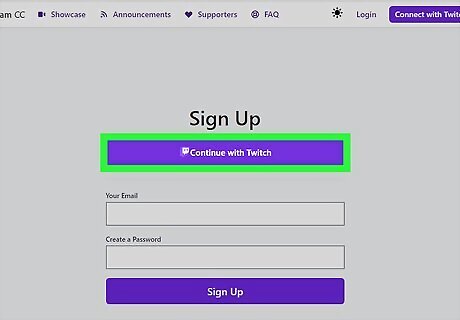
Click Continue with Twitch. You'll see this immediately below the "Sign Up" header. Click Authorize to let the extension work properly.

Click Caption Settings. It's next to a gear icon near the bottom of the page on the right side.

Change your settings. Make sure the language selected is the language you're speaking, or have the bot remind you to turn on CC if you are streaming and have it off. Click Save when you're done.

Return to your dashboard and click Click to Start Captions. Your browser might prompt you for microphone permissions, so it can caption as you're speaking. Once you've done that and gone live, your viewers will see closed captions! After your live stream, go back to your dashboard (which always has to be open for this to work!) and turn off CC. You'll need to re-enable this every time you're streaming.
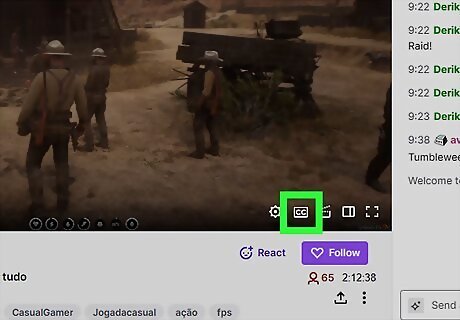
Enable closed captions as a viewer. Mouse over the Twitch screen to see the "CC" and gear icon. Click either of those to toggle CC and change how it looks.


Comments
0 comment