

Plastic Bottle Toy Car
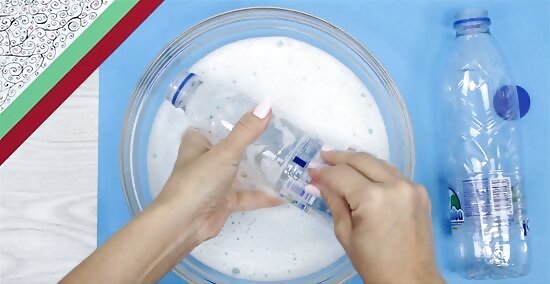
Clean an empty plastic water bottle and remove the label. Soak the bottle in warm water and dish soap for 10 minutes to loosen the label. Pull off the label with your fingers and give the bottle a good scrub to remove any glue residue. You can use any plastic bottle you have on hand. A water or soda bottle works great, but you could also use an empty hand sanitizer bottle, or whatever you have within easy reach.
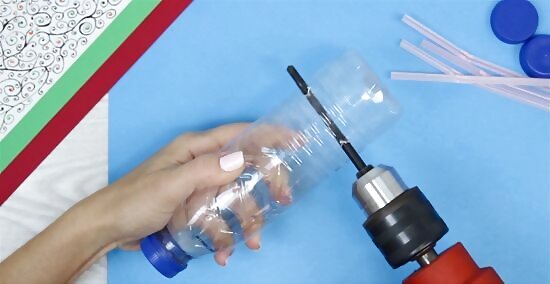
Puncture 2 sets of holes into each side of the bottle. Use a power drill to make 1 pair of holes that are 2–3 in (5.1–7.6 cm) down from the neck on each side of the bottle. Drill the other pair of holes 2–3 in (5.1–7.6 cm) up from the bottom of the bottle. Make sure each set of holes is parallel to each other. If you're a kid, let an adult handle the drill so you don't hurt yourself. If you don't have a drill, use scissors or an ice pick.
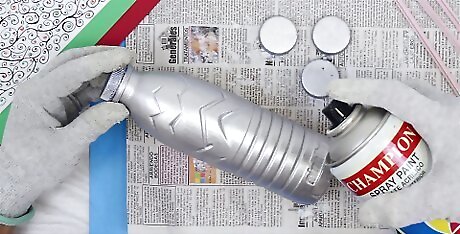
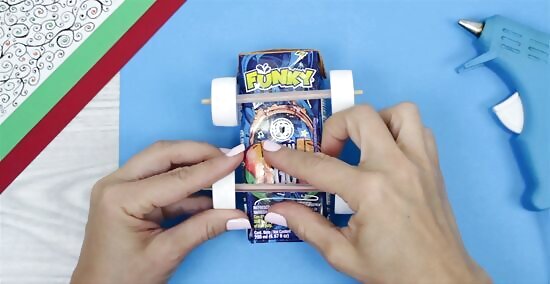
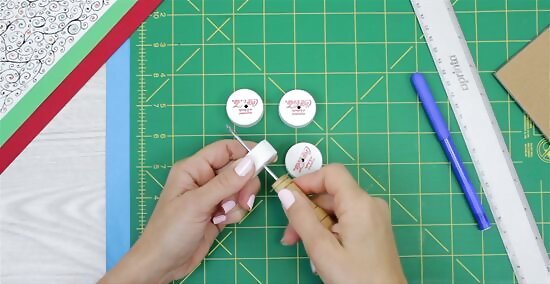
Spray paint the plastic bottle and 4 plastic bottle caps (if you want to). The plastic bottle will be the outside of the car (be sure to keep the original bottle cap on the bottle because you'll be using that soon). Then, grab an extra 4 bottle caps to make the wheels. Go with any paint color you'd like! A silver car with silver wheels would look cool. It’s easier to paint the bottle and bottle caps before assembling the car.
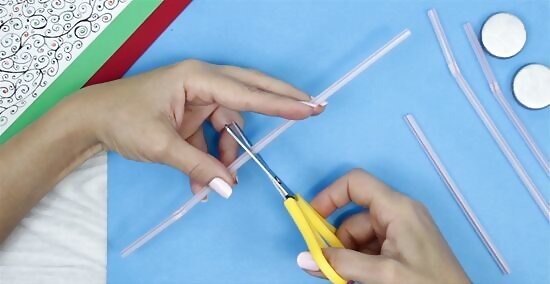
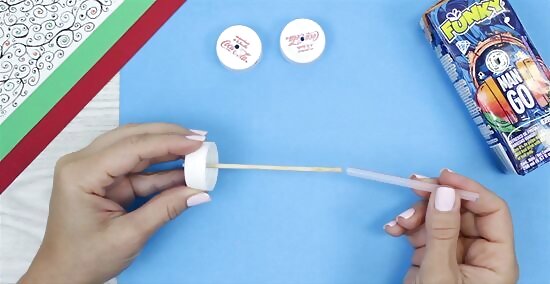
Trim 2 plastic straws to be about 5 in (13 cm) long. Both straws need to be slightly longer than the width of your plastic bottle, so adjust the length accordingly to match whatever plastic bottle you're using. If you don't have plastic straws, you can improvise with sticks, pencils, or thick wire from a wire hanger.
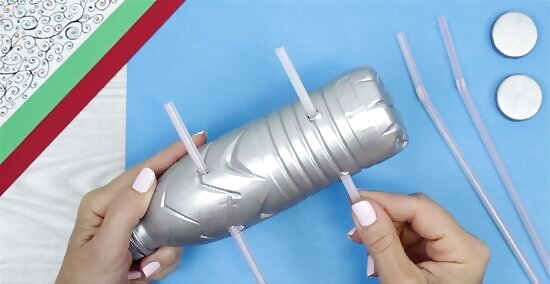
Stick the plastic straws through the holes in the plastic bottle. The axles hold the front and rear wheels, so run 1 straw through the top set of holes (for the front wheels) and the other straw through the bottom holes (for the rear wheels). Center the straws so that an equal amount of length sticks out of both sides of the bottle.
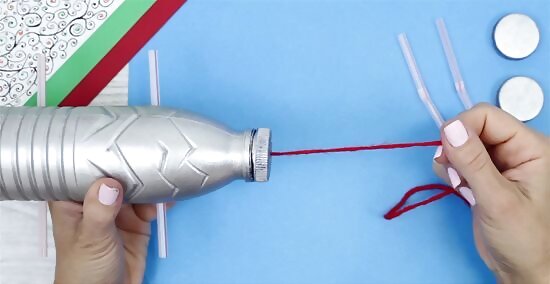
Drill a hole into the center of the original bottle cap. Unscrew the original bottle cap and make the hole. Then, knot a piece of string or yarn and thread it through the hole in the lid, making sure the knot is on the inside of the lid. Screw the lid back on the plastic bottle. The string is optional, but it you want to use it, cut the piece to be 12–24 in (30–61 cm) long (you'll use the string to pull the car). Put the lid back on the bottle so the length of string hangs outside the lid in front of the car.
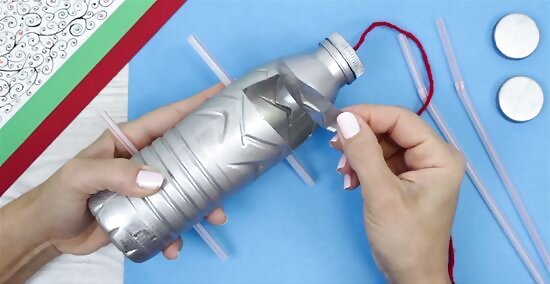
Cut the top of the bottle to make a windshield (if you'd like). If you want to make a windshield, get an adult to cut a rectangle or square into the front top of the bottle with scissors or a box cutter. Only cut 3 sides of the shape and then flip it up so the windshield faces the lid of the bottle.

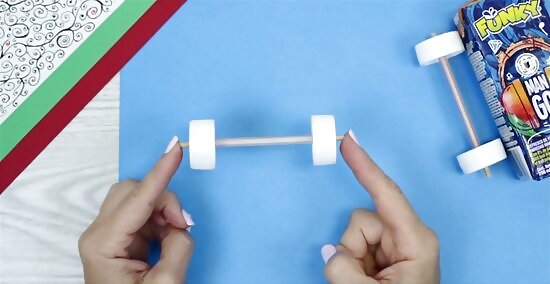
Puncture a hole through each of the 4 plastic bottle caps. Let an adult use a drill or another sharp object (like an ice pick) to create a hole in the center of each bottle cap. Each hole needs to be big enough to slide a plastic straw through it.
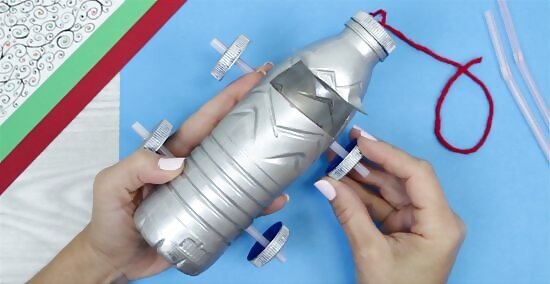
Thread the bottle caps onto the plastic straw axles. Run the axles through the holes you drilled in the bottle caps. Position the open side of each bottle cap to face the car so that it has more stability.
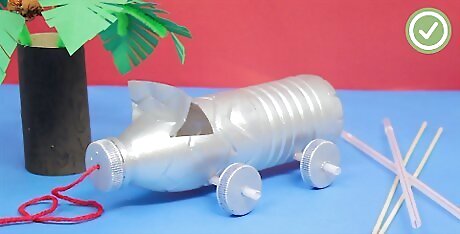
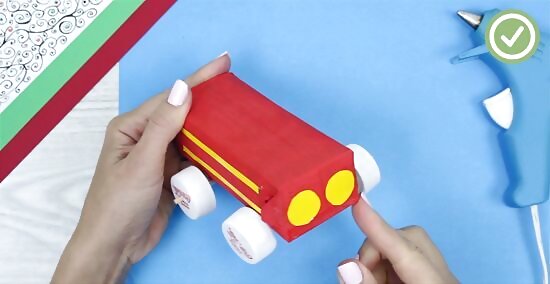
Push the car on a flat surface or use the piece of string to pull it. The axles should turn just like a real car, so your toy will move forward on its wheels! If you don’t want to use the string, just push the car to make it move.
Milk Carton Toy Car
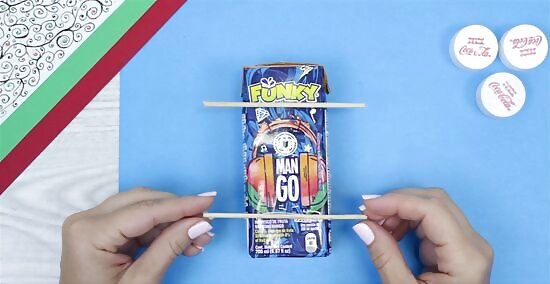
Place 2 wooden skewers across a milk carton. Use a single-serving milk carton for your car. Position the empty milk carton on a flat surface with the long side down. Cut the skewers to be slightly longer than the width of the milk carton. The skewers will be the axles for the car. If you don't have a single-serving milk carton, cut out a 4 in × 6 in (10 cm × 15 cm) piece of cardboard.
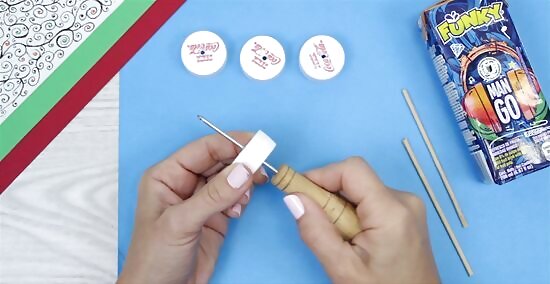
Get 4 plastic bottle caps and drill holes through the centers. If you don't have a power drill, let an adult bore holes with a box cutter, scissors, or knife. The plastic bottle caps will be your car's wheels.
Thread a bottle cap on one end of each skewer. Make sure the top of each bottle cap is facing towards the milk carton as this provides better stability. You can use hot glue where the skewer and cap meet to make it sturdier (just be sure to let the glue dry before proceeding).
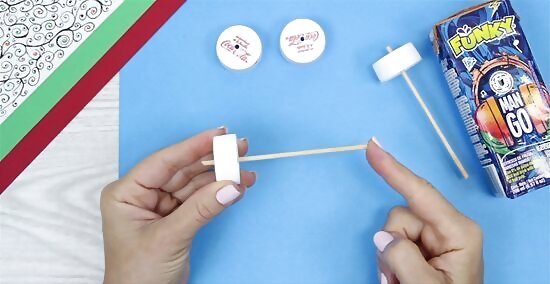
Cut a plastic straw shorter than the skewer and stick the skewer through it. Cut the straws down until they are slightly shorter than the skewer. Slide the free end of each skewer through a straw. Threading the skewers inside of the straws will make the wheels spin.
Push the skewers through the remaining 2 bottle caps. Orient the bottle caps so their tops face the milk carton. If you want to make the wheels sturdier, apply hot glue where the skewer and cap meet. Then, let the glue dry for a few minutes.
Tape the axles horizontally across the milk carton. Position 1 axle a few inches down from the top of the carton, and the other axle a few inches up from the bottom of the carton.
Customize the car (if you'd like) and give it a roll. You can use construction paper, paint, or markers to decorate the milk carton any way you'd like (or not). You can also cut shapes into the milk carton to give it character.
Balloon-Powered Cardboard Car
Cut a rectangle of cardboard to measure 4 in × 6 in (10 cm × 15 cm). Use a ruler or measuring tape to trace the lines on the cardboard with a pencil. Then, use a box cutter or strong scissors to cut along the traced lines. Instead of cardboard, you can use old sturdy paper boxes. Alternatively, glue together several layers of recycled toilet paper or shipping paper to make them as thick as cardboard.
Drill holes through the centers of 4 plastic bottle caps. Let an adult use a power drill or sharp object to make a hole in the center of each bottle cap. These bottle caps will create the wheels for your toy car.
Cut a plastic straw in half and tape the pieces horizontally across the cardboard. Orient the cardboard so the long ends are on the top and bottom and the short ends are on the left and right. Take each straw half and tape it horizontally across the surface of the cardboard, one straw on each end (the straw pieces should be parallel with the short ends of the cardboard). Position the first straw about 2 in (5.1 cm) from the top of the cardboard and the other straw about 2 in (5.1 cm) from the bottom of the cardboard.
Cut a wooden skewer in half and stick one half through each straw. Trim down the skewers to be slightly longer than the straws and thread them through the center of each straw. The 2 bamboo skewers will act as your car's axles.
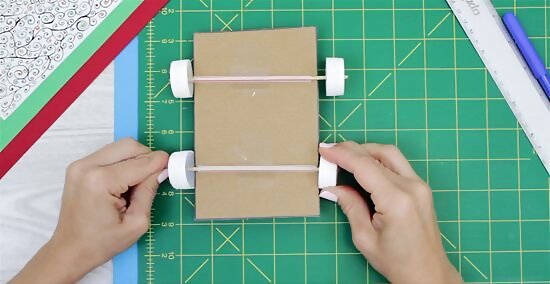
Stick the bottle caps on the ends of the skewers and secure with hot glue. Make sure that the top of each bottle cap is facing towards the cardboard. Push the caps down the skewers until they're resting against the cardboard. Apply hot glue to hold the caps in place.
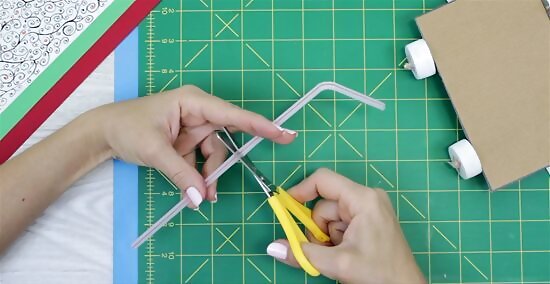
Cut a flexible plastic straw in half. Make sure the pieces are of equal length. Then, discard the part of the straw that doesn’t bend.
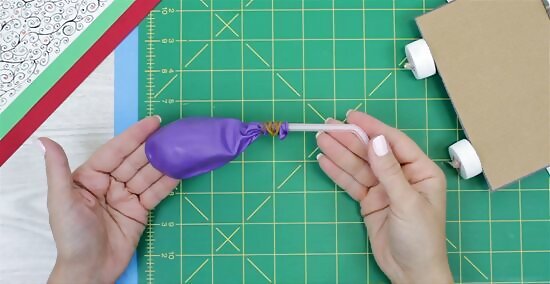
Secure the balloon to the flexible drinking straw with a rubber band. Place the elastic part of the balloon over one side of the straw. Take a rubber band and wrap it over the elastic part of the balloon with the straw inside. It can help to inflate and deflate the balloon a few times to stretch the rubber first. Blow into the straw to test if the rubber band is tight enough. No air should be able to escape the balloon.
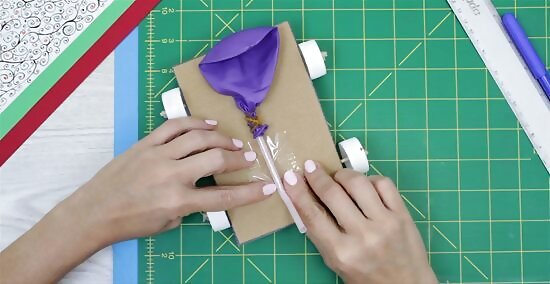
Tape the balloon and straw to the short end of the cardboard piece. Flip the cardboard piece over so the axles are on the bottom side. Tape the end of the straw to the short end of the cardboard. One half of the straw should be hanging over the edge of the cardboard.
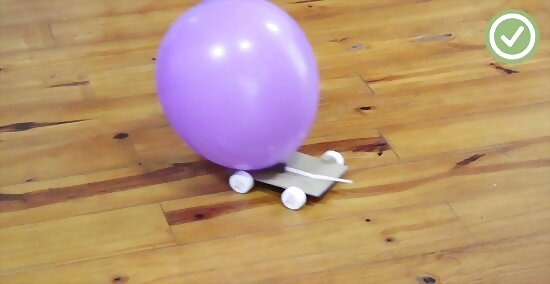
Blow into the straw to make the car roll. Pick the car up and blow into the balloon through the straw. Pinch the straw so that no air escapes it, place the car on a flat surface, and let go of the straw. The air will escape the balloon and push the car forward! You may have to straighten the wheels a few times to get the best movement.
Rubber Band-Powered Car

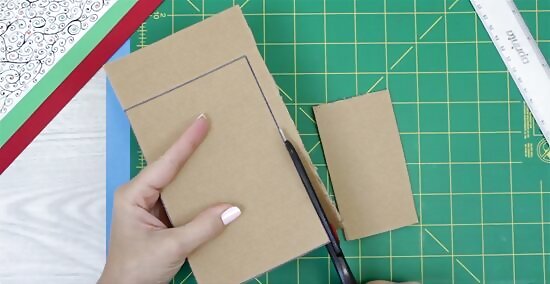
Cut a 5 in × 9 in (13 cm × 23 cm) piece of corrugated cardboard. The cardboard piece needs to be slightly longer than a standard plastic drinking straw (which is 8.5 in (22 cm) long). The width of the cardboard can be about half that (the width measurement doesn't have to be exact.)
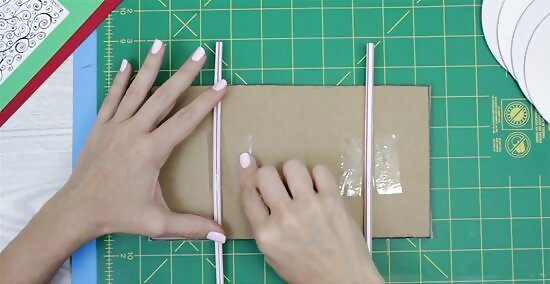
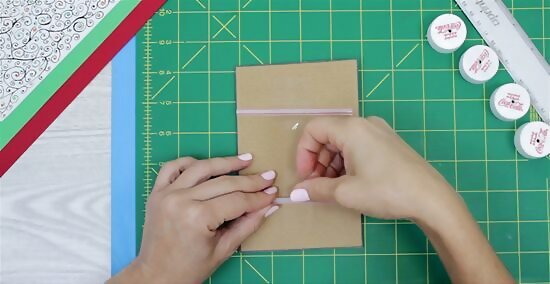
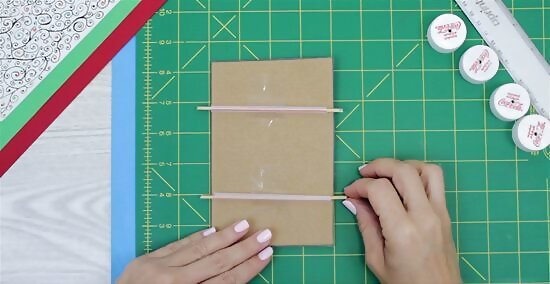
Tape 2 straws to the top of the cardboard (one at each end). Place the straws horizontally across the cardboard and line them up so they're parallel to each other. The straws will hold the axles for your car's wheels.
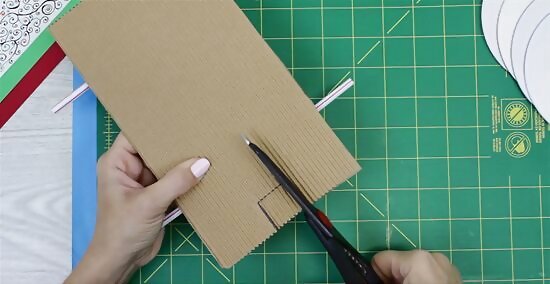
Cut a 1 in × 1 in (2.5 cm × 2.5 cm) notch out of the front of the cardboard. Cut the piece from the center of one of the short ends of the cardboard. When you make the cuts, you'll also remove a segment out of the middle of the front straw.

Insert a wooden skewer through each straw. Center each skewer so an equal amount sticks out from each side of the straw. The wooden skewers will be your car’s axles, which will hold the wheels of your car.
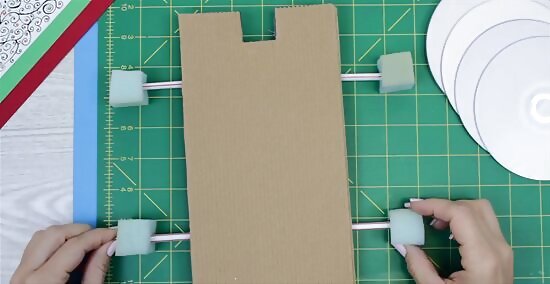
Cut out four 1 in × 1 in (2.5 cm × 2.5 cm) pieces of sponge. Press 1 piece of sponge to each end of both wooden skewers. When you apply a little pressure, the skewer will puncture the sponge and it'll stay in place.
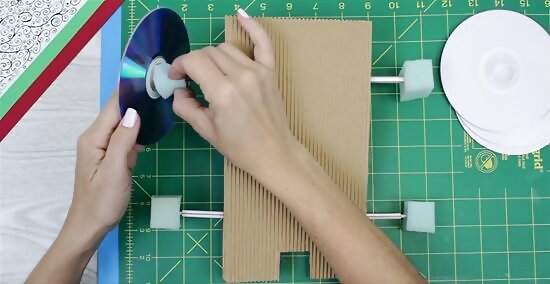
Insert an old CD onto the ends of the wooden skewers. The CDs are your wheels! Press the sponge pieces through the center holes of each CD so the sponge holds the CD in place. Secure the CD with tape so it won't wobble.
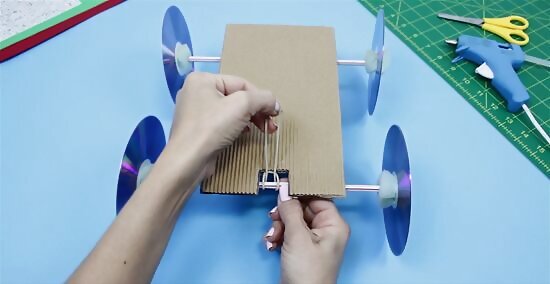
Attach a rubber band to the exposed part of the front wooden skewer. The middle of the skewer will be visible because you cut that notch out the cardboard/straw earlier. Loop the rubber band around itself a few times, leaving about ⁄2 in (1.3 cm) of the end loose, and tape it to the skewer to secure it. Try rotating the front skewer—as the skewer rotates, the rubber band should rotate with it.

Slice a ⁄2 in (1.3 cm) slot in the middle of the cardboard. Use scissors, a power drill, or box cutter to make a horizontal cut in the center of the car. The cut should be parallel with the short ends of the cardboard rectangle.
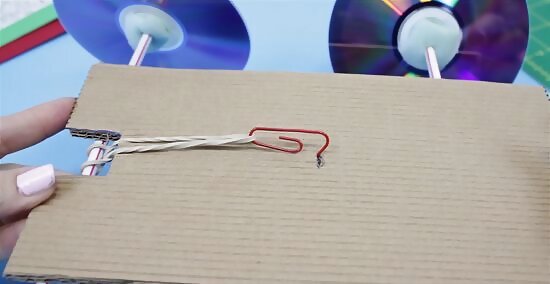
Stick a paper clip through the center slot and attach the rubber band it. Unbend the paperclip but leave one of the ends hooked. Stick the straightened end through to slot and hook the free end of the rubber band onto the paper clip's hook.
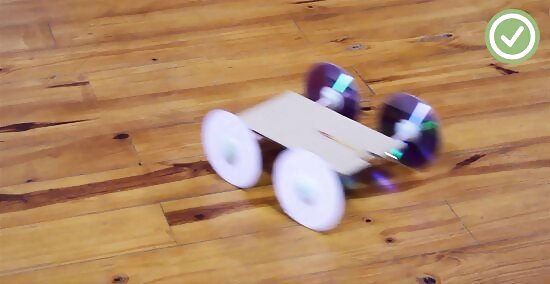
Wind up the axle that’s connected to the rubber band and let go. After you wind up the axle, put the car down on a flat surface and release the axle to make your car roll forward! If the rubber band didn't unwind after you let go, wind it more tightly and give it another try. If the rubber band unwound but the axle didn't spin, secure the rubber band to the skewer with more top or hot glue.


Comments
0 comment