views
- You can use the Edison plugin to reduce noise in samples, and Fruity Limiter to reduce noise while recording.
- In Edison, load a sample, highlight the noise you want to reduce, and click the noise reduction tool.
- To reduce noise while recording, apply Fruity Limiter to a track, adjust the Threshold to set the volume to block, and adjust the Gain to select how much it blocks.
Using Edison
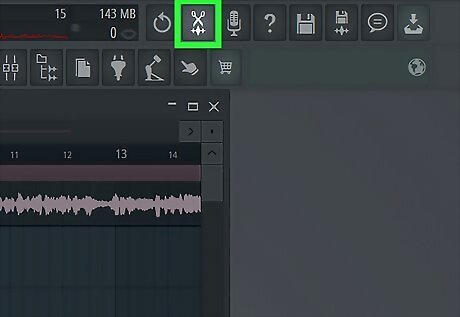
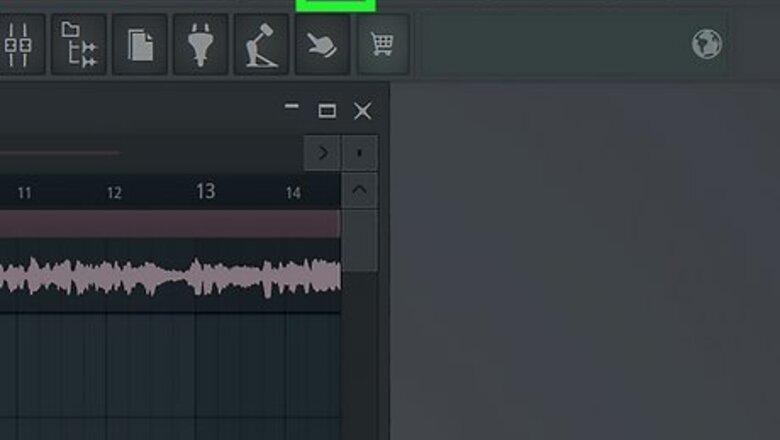
Open Edison in FL Studio. You can use the Edison plug-in, which comes with FL Studio Producer Edition, to denoise pre-recorded audio samples. To open Edison, click the Edit icon that looks like a pair of scissors at the top-right corner. Alternatively, you can press Ctrl + E (PC) or Command + E (Mac).
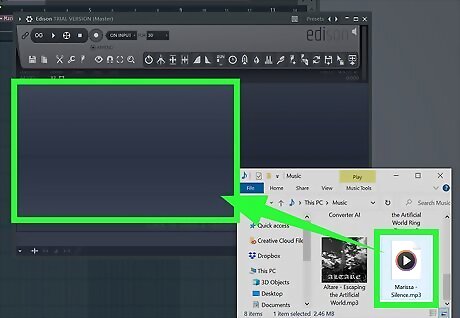
Load an audio sample. You can do so by dragging and dropping an audio sample into Edison from your computer's file browser, or from the Browser window in FL Studio. Alternatively, you can click the floppy disk icon to open a file browser and select the audio sample.
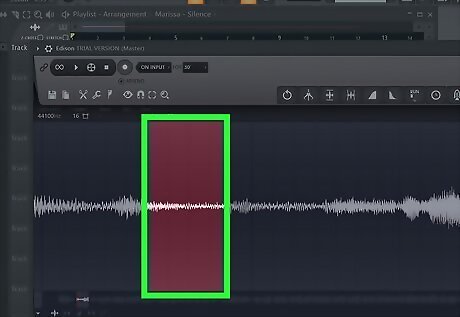
Select a sample of the noise. Click and drag to highlight a sample of the noise you want to remove. Highlight a section that just has noise and nothing else you want to keep (instruments, vocals, speech, etc.). Edison works best to remove continuous noise, like a fan or a hiss in the background. You can either select the noise from the wavelength screen or switch to spectral view to see the horizontal lines that usually indicate a continuous noise.
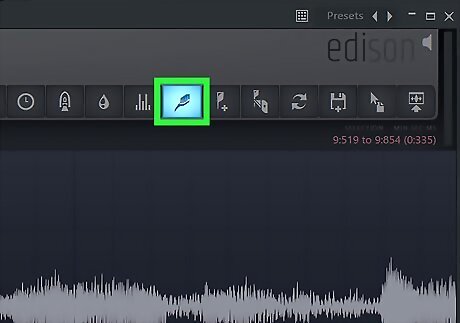
Right-click the noise-reduction tool. This is the brush icon in the menu at the top of the editing space. You should see "Noise profile acquired" scroll up.
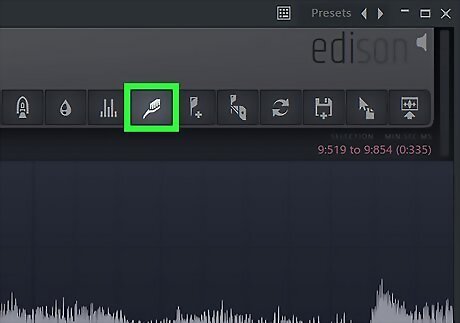
Click the noise-reduction tool. This will open the clean-up (denoise) window.
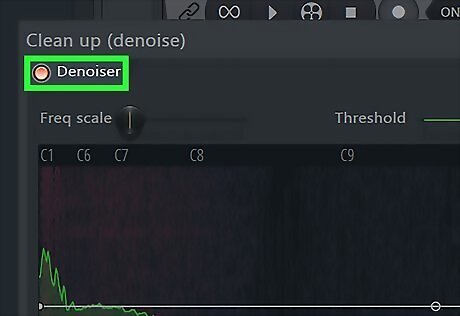
Make sure "De-Noiser" is selected and "De-Clipper" and "De-Clicker" are off. This ensures that all levels of the sound you previously selected will be removed from the audio sample.
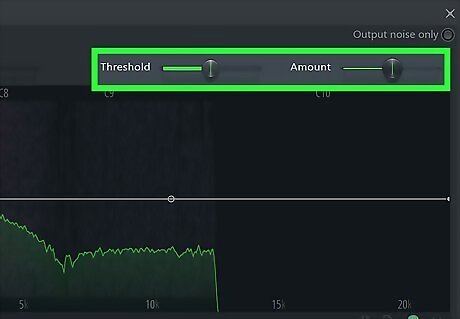
Set "Threshold" to 0db and "Amount" to 22. The "Threshold" and "Amount" knobs are at the top.
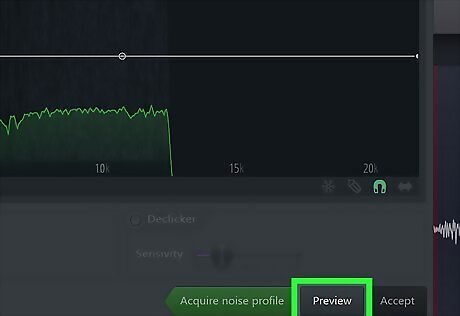
Click Preview at the bottom. If you don't like the sound, go back and change the threshold and amount settings. You can select "Output Noise Only" to hear the noise that will be removed. It should be cutting out the noise you want to remove and not the audio you want to keep. If you hear any voices or instruments in the "Output Noise Only", lower the settings.
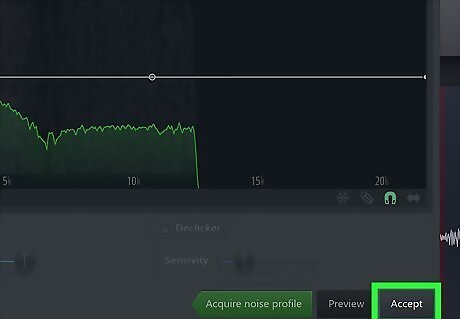
Click Accept. This will redirect you to the spectral view of your sound. Save the file once you are done. To do so, click File followed by Save.
Using Fruity Limiter
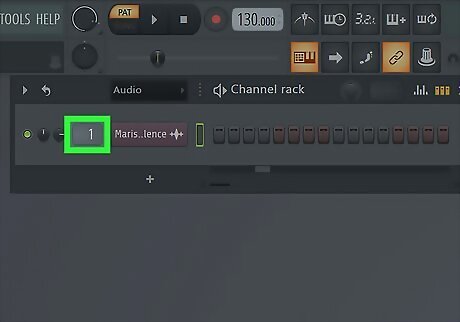
Route a track that has noise you want to reduce to the mixer. The Fruity Limiter plug-in in FL Studio has a noise gate you can use to reduce background noise while mixing, or as you record. To route a track, double-click it, then select which mixer channel you want to route it to using the box in the upper-left corner of the window. You can either drag and drop imported audio samples into a track to mix, or arm a track to record with.
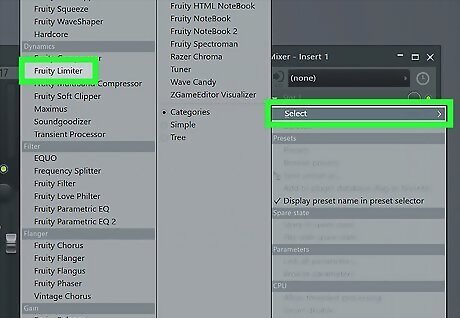
Apply Fruity Limiter to the channel. To do so, select the channel in the mixer at the bottom of the screen. Then click the arrow (⏵) next to an effect slot in the panel to the right of the mixer. Then select the Fruity Mixer plug-in.
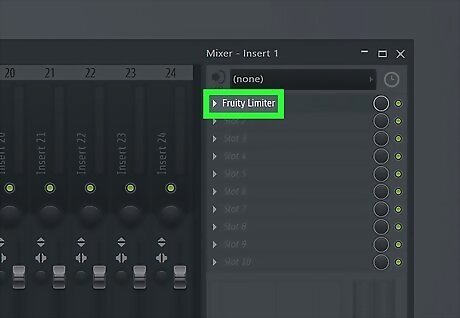
Open the Fruity Limiter plug-in. To do so, double-click the Fruity Limiter plug-in in the effects panel.
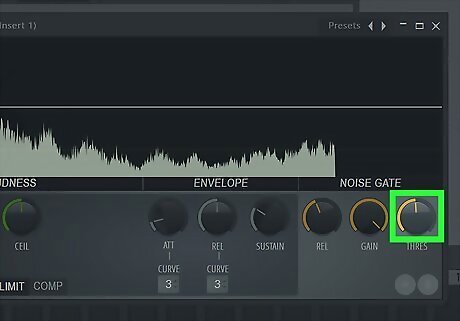
Adjust the threshold (Thresh). The Threshold knob is in the lower-right corner of the Fruity Limiter effect window. The threshold adjusts the volume at which the noise gate opens and allows sound to pass. Sounds below the threshold volume will be blocked by the noise gate. Noise gates are useful for blocking out background noises, such as fan noise, or buzzing from a guitar amp when there is no other sound. As you adjust the threshold, you will see a vertical line in the window that displays the waveform. Play the audio back to view the waveform. This will give you an idea of how loud the background is and where to set the threshold.
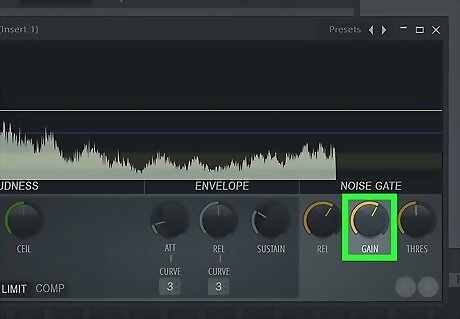
Adjust the gain. The Gain knob is to the left of the threshold knob in the lower-right corner. The gain knob adjusts how much the noise gate blocks sounds 100% gain allows all sound to pass through the noise gate with no gating. No gain blocks all sound passing through the noise gate.
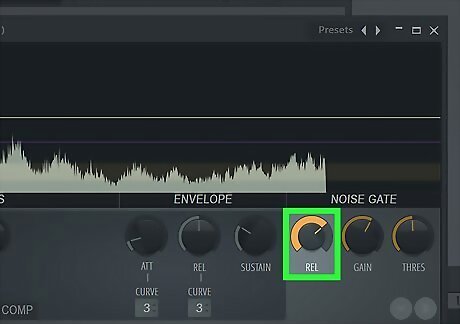
Adjust the Release (Rel). The release knob is the third knob in the lower-right corner. It adjusts the time it takes for the noise gate to close and block sound. Turning the release knob too low may cause abrupt cut-offs in the audio sample or recording. Longer release times allow the sound to ring out more naturally.
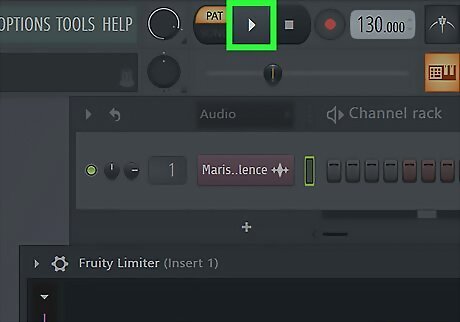
Preview the sound. To preview the sound, simply play back the audio. The noise gate will be applied to the mix in real-time as you mix or record. If there is too much background noise getting through, raise the threshold and lower the gain. If the parts you want to record are cutting off too abruptly, increase the release.




Comments
0 comment